Want to know an amazingly easy to create beautiful watercolor landscape art? These are the tested and approved watercolor techniques to do just that!
Disclaimer: THIS POST MAY CONTAIN AFFILIATE LINKS, MEANING I GET A COMMISSION IF YOU DECIDE TO MAKE A PURCHASE THROUGH MY LINKS, AT NO COST TO YOU. AS AN AMAZON AFFILIATE I EARN FROM QUALIFYING PURCHASES.
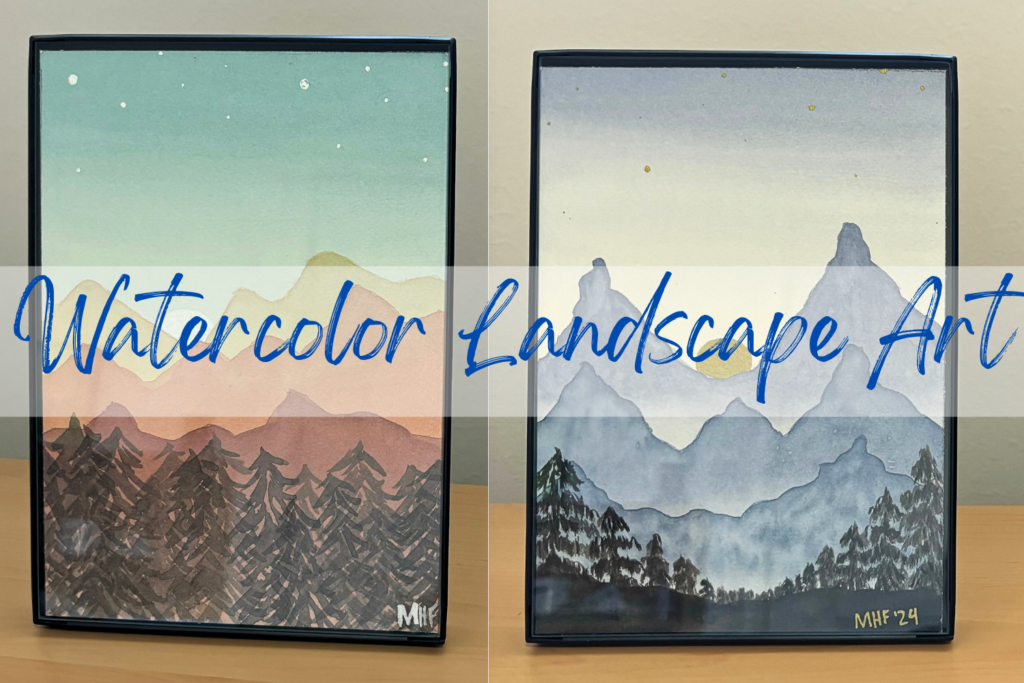
Have you ever wondered how to create the iconic watercolor landscape art that looks so good? There are a lot of different approaches but the one that you will learn about is my favorite technique. Not only is it simple but it creates a beautiful effect with the watercolor paints. I hope that you like this watercolor technique as much as I do.
You are going to learn about how to paint watercolor landscape art, gradient wash watercolor technique, watercolor mountains, watercolor trees, monochromatic landscape watercolor painting, mixing watercolor paints, and more!
After reading this post you will be able to paint a limitless amount of unique watercolor landscape art pieces.
Amazingly Easy Watercolor Landscape Art
Supplies needed:
The supplies above are the ones that I use. You can use different supplies, however, the paint colors that I list when mixing watercolor paint are based on the Pelikan watercolor palette.
Mixing Watercolor Paint
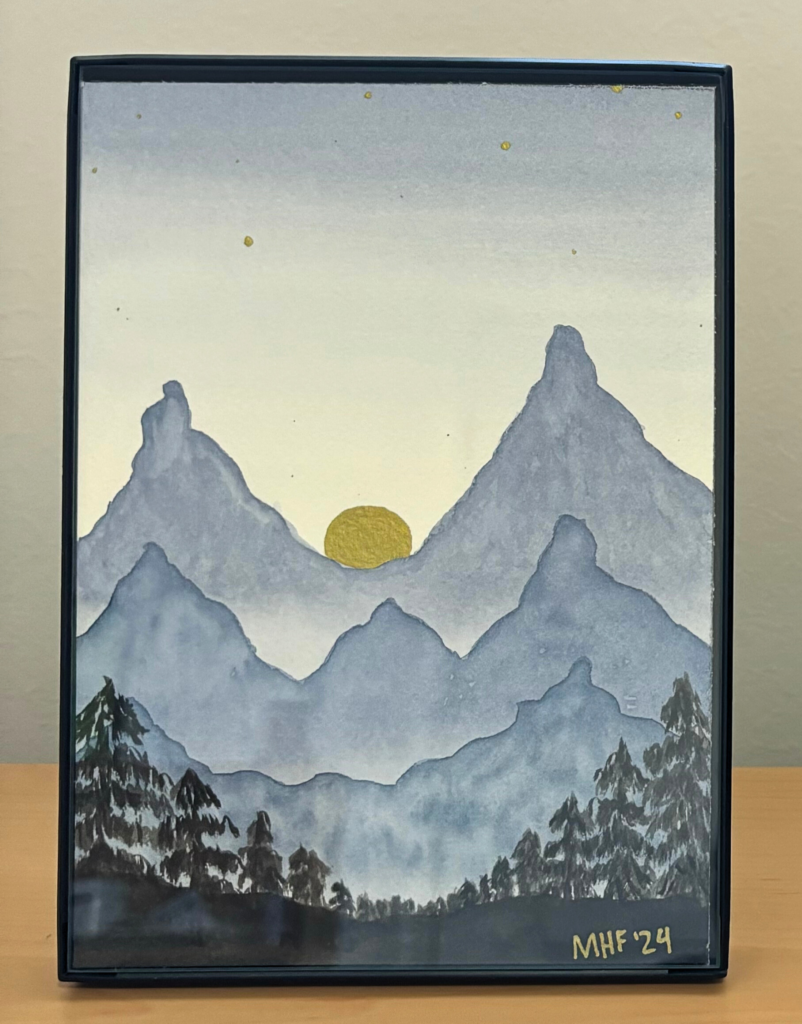
After tracing the size of the frame on the watercolor paper (5×7 inches) you will want to mix up the colors you will be using. I decided to use light turquoise, dark yellow, orange, and red. If you have other colors in mind use those instead.
This is how I got my colors for this watercolor landscape art from the Pelikan watercolor palette:
Sky Blue: Teal + Prussian Blue + Yellow (Blaugrün + Preußishblau + Echtgelb)
Far Mountain Range: Yellow + Vermillion Red (Echtgelb + Zinnoberrot)
Middle Mountain Range: Vermillion Red + Crimson Red (Zinnoberrot + Karminrot)
Near Mountain Range: Crimson Red + Burnt Siena + Violet + Prussian Blue (Karminrot + Gebr. Siena + Violett + Preußishblau)
Trees: pre-mixed red color + black (Lampenschwarz)
Gradient Wash Watercolor
You will use the gradient wash watercolor technique a lot in this painting. It is also called a graduated or graded wash. It is straightforward to do once you get the hang of the drip. Don’t be discouraged if you have to practice a few times before you can do it well. I have noticed that it is trickier for me to do it correctly on a large surface area which is why this painting is smaller.


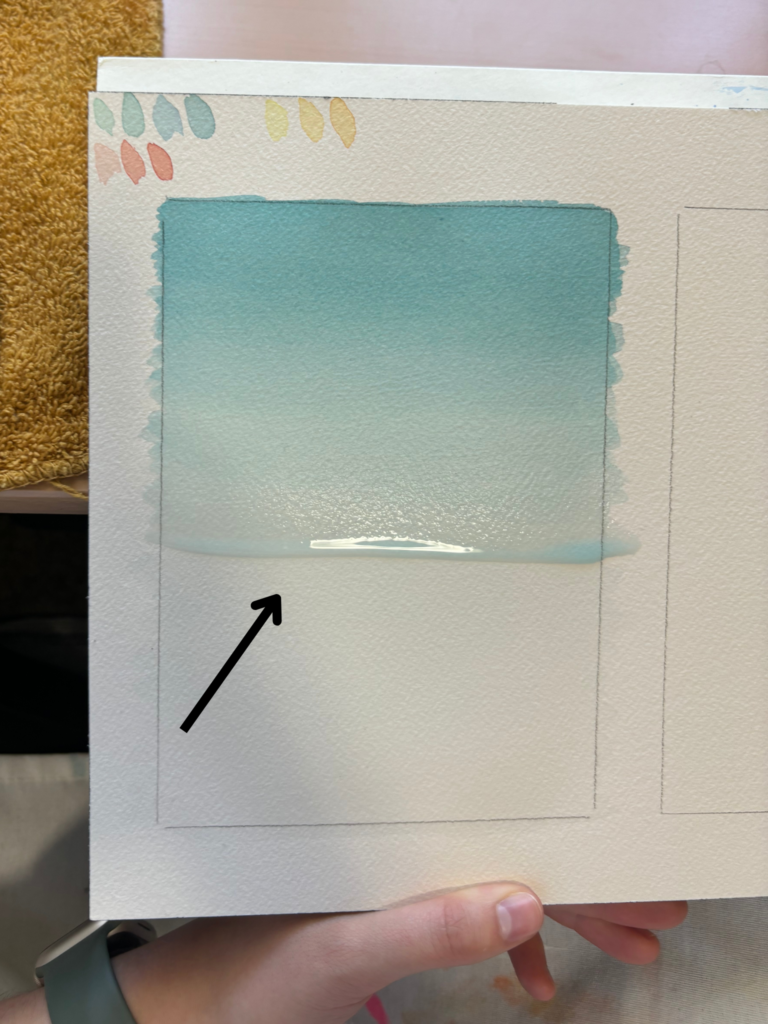
When you have done this technique correctly it will look similar to the picture on the right.
What happened in the far left picture (purple paper) was that I let the drip dry or didn’t have enough water to form the drip so there are places where the paint is more concentrated. In the middle (orange paper) I attempted to make a section darker by going back over it without letting the paper dry completely. That is why there is a watermark on the end.
You will need to learn how to hold your paper. You need it at an angle (30-45 degrees). Because of this, you will need to tape your paper onto a clipboard, or lap desk, or I like to use a quilting ruler. Painting at an angle allows gravity to pool the water creating a drip (excess amount of water). The drip is the most important part of a wash because it keeps the paint smooth. If the drip dries up the color won’t dry smoothly.
You will want to load your brush up with the sky blue you mixed. Load it up so it is about to drip. Then apply the paint in one long vertical line. When you paint the next line have your brush overlap the drip. Repeat this step 2 or 3 times or until the paint is about 1/3 of the way down the page.
If you continue doing this you could create a flat wash, but you want the horizon to be lighter than the top of the sky so you will head onto the next step.
You will introduce clean water to the painting to create a gradient wash watercolor effect. The more water you add the quicker the paint will fade away. You will want to experiment and practice with this technique.
After you are happy where the color is, instead of grabbing more paint water you will do a baby dip (only the tip of the paintbrush) into clean water. Then you will paint the next line across the page. You should still end up with a drip at the bottom of the waterline. Do a total of 2 or 3 baby dips.
Then you will do a medium dip (about half of your paintbrush) for the next 2 or 3 lines. Then a big dip (entire paint paintbrush) until you have covered the entire painting. If you have a lot of water at the bottom, dry your paintbrush off then use the tip to soak up the excess water.
Let that layer completely dry and then repeat until the sky is as dark as you like.
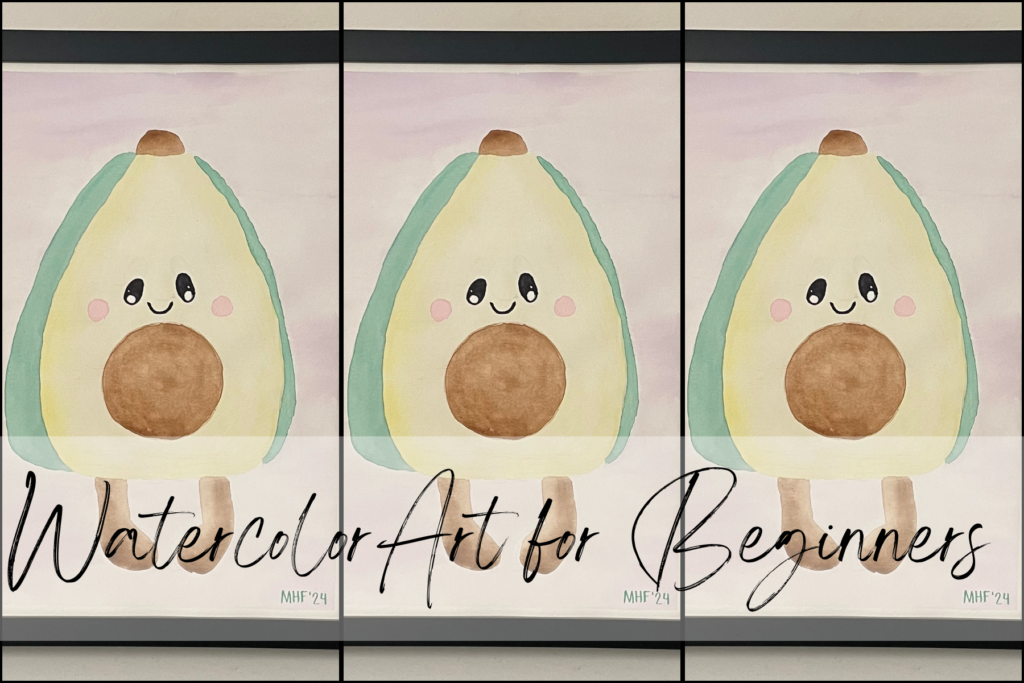
Want to learn about more watercolor techniques? Learn about wet on wet watercolor technique in Watercolor Art for Beginners – Cute and Easy Avocado Painting.
Watercolor Mountains
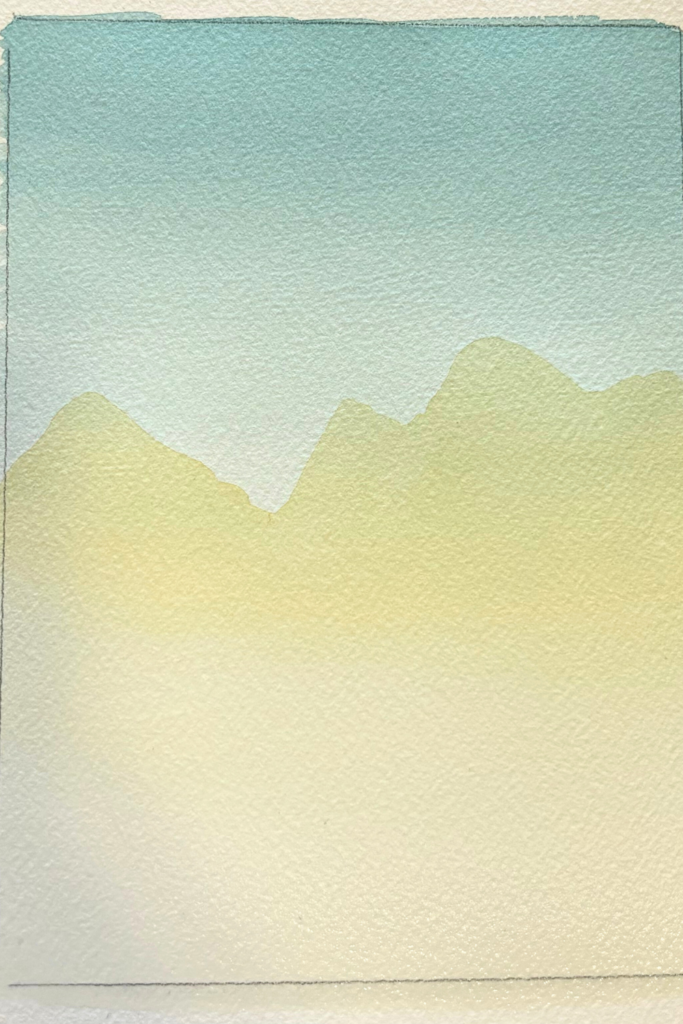
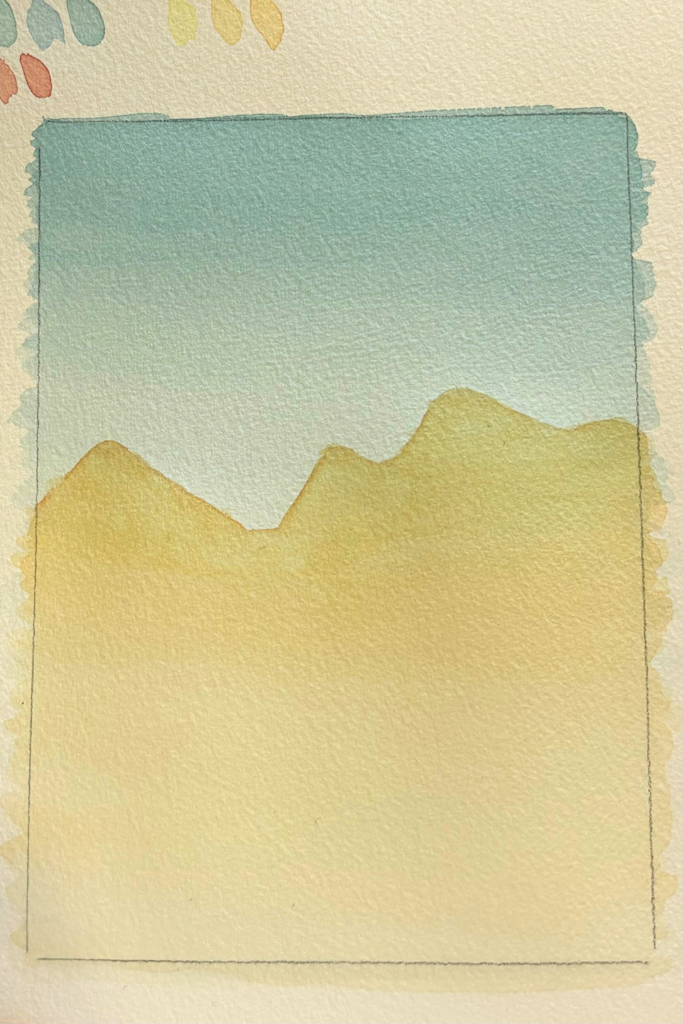
You will use the same gradient wash watercolor technique for all of the mountain ranges.
Start with the lightest color for the furthest mountains, which would be your yellow (if using the same color palette as I did). You want the lightest because the closer to the setting sun the lighter objects will be. Shape the mountains however you would like. The yellow and furthest away mountains should be the largest. As they get closer to the view they should get smaller and darker.
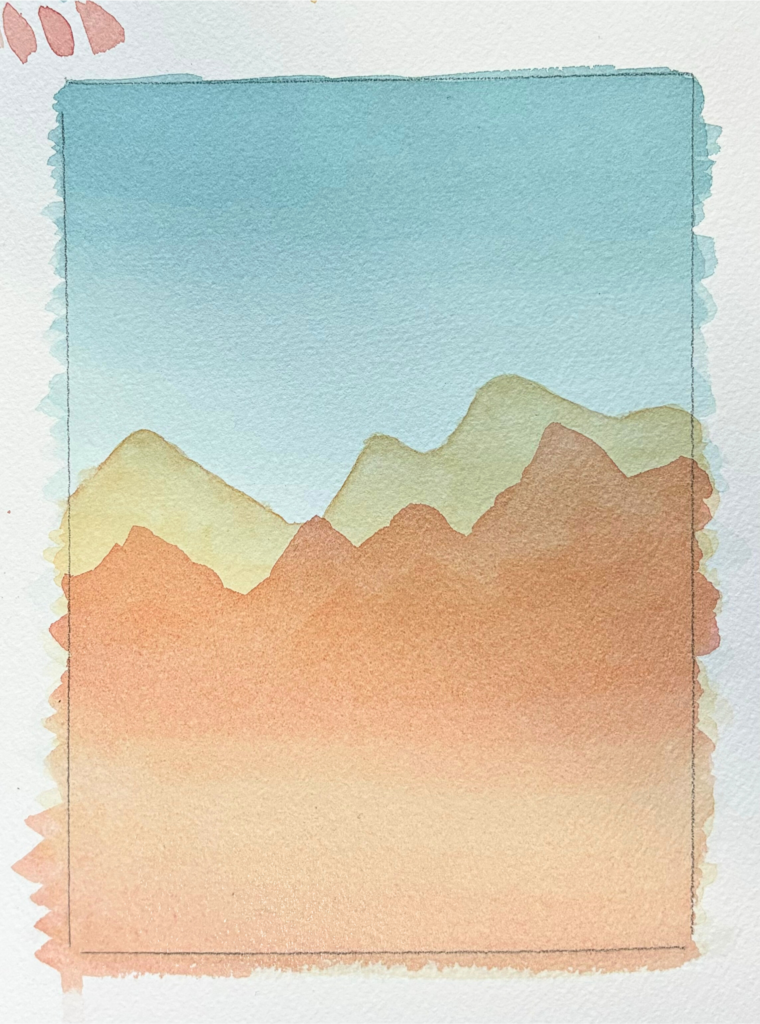
With all of the watercolor mountains, you can add a few layers of color to make it the shade you want. Just ensure that the previous layer is dry before adding another.
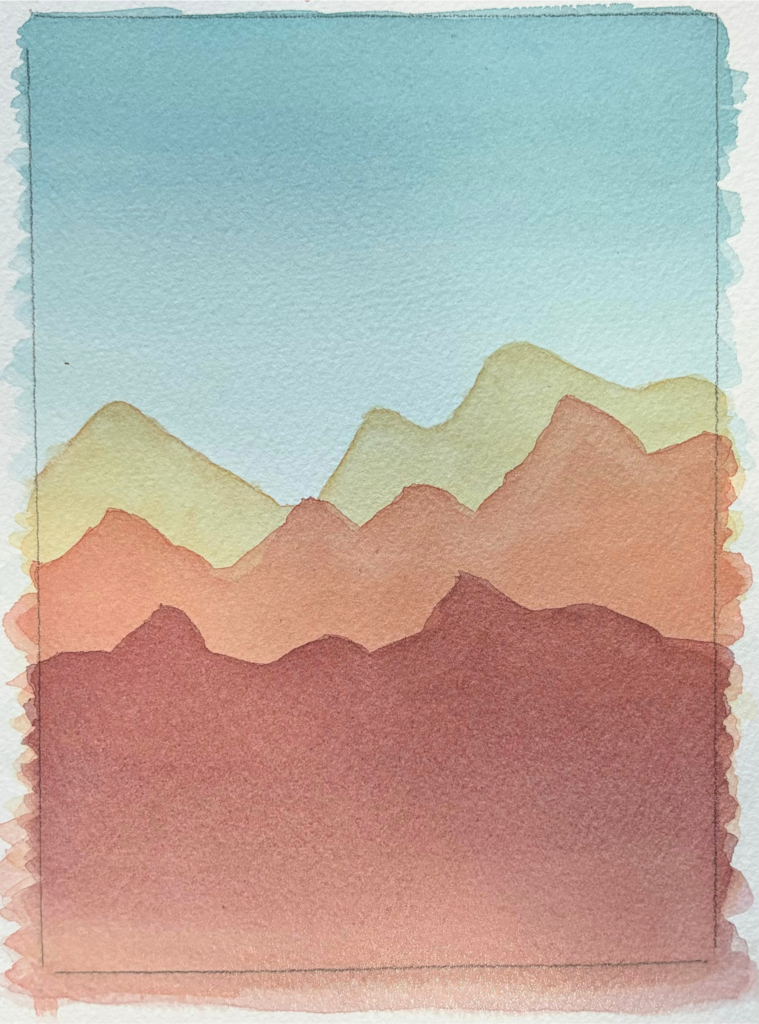
Repeat this step until all of your mountain ranges are painted. I did two layers for each watercolor mountains.
Watercolor Trees
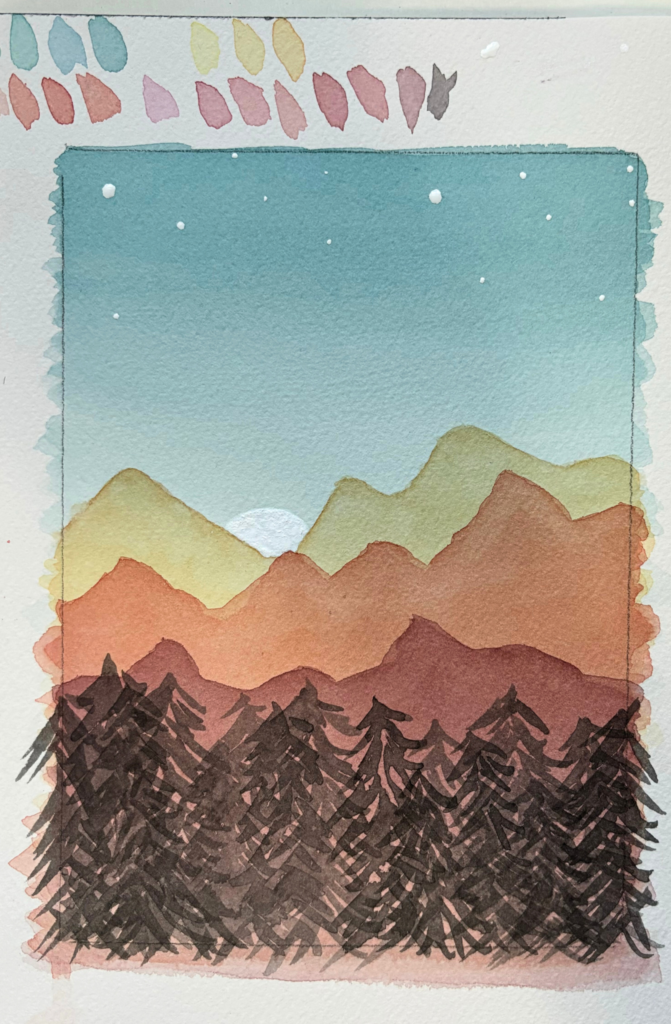
To paint the trees you will want a very dark, black color. I added black to the red color of the third mountain range, but you can also use a new water well to mix your black. Don’t add too much water or you will need to add a lot of black paint.
Now it is time to start painting the pine trees. It is easy to get in the flow of painting every tree the exact same, which is what you don’t want to do. Nature isn’t perfectly uniform so to look natural you won’t want your watercolor landscape art perfectly uniformed either.
I find it is easier for me to paint unique trees if I hold my paintbrush by the end. That way I don’t have as much control. I also must focus on not making uniform brush strokes, which is harder than you would think. It takes practice so be patient with yourself if you also struggle with this.
You can paint as many or as few trees as you like. If you want them darker use a dry on dry technique by drying off your brush and adding black paint from the actual paint (not the pre-mixed black paint) onto your paintbrush to paint the trees.
Sun and Stars
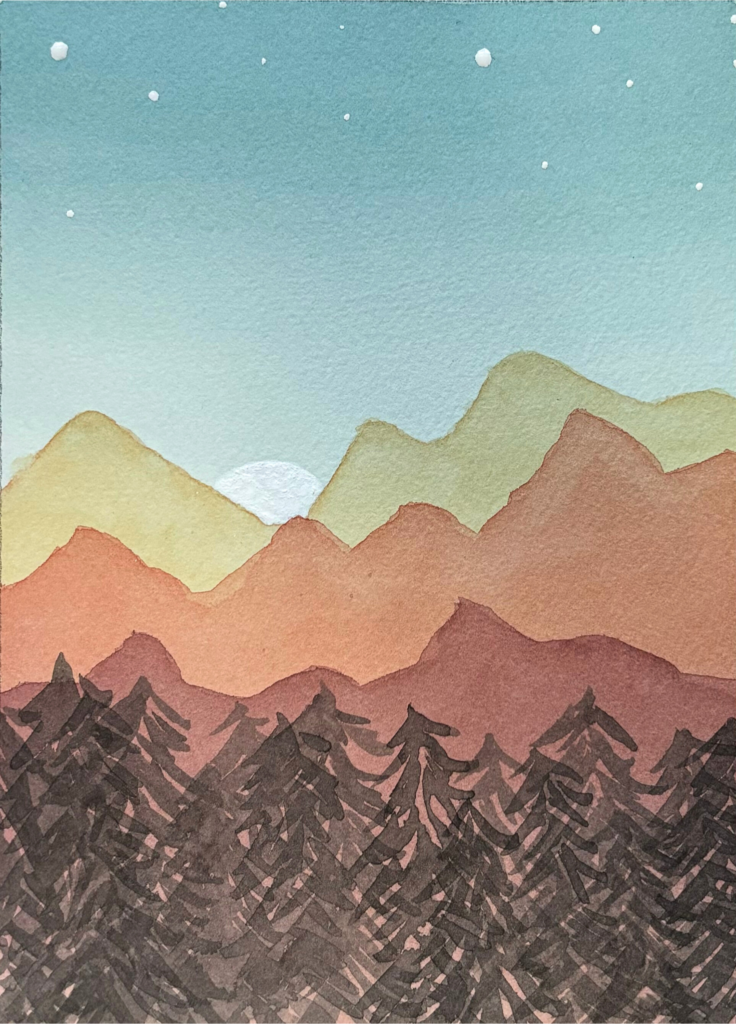
To create a white sun and stars use either a white pen or acrylic paint markers. If you don’t want to add stars you could add silhouettes of birds by painting small ‘V’s with curved tips in black paint using the dry on dry technique.

Now that you have painted a beautiful watercolor landscape art piece sign it and hang it up somewhere nice!
Try out different watercolor landscape art in How to Paint a Watercolor Landscape in 5 Easy Steps.

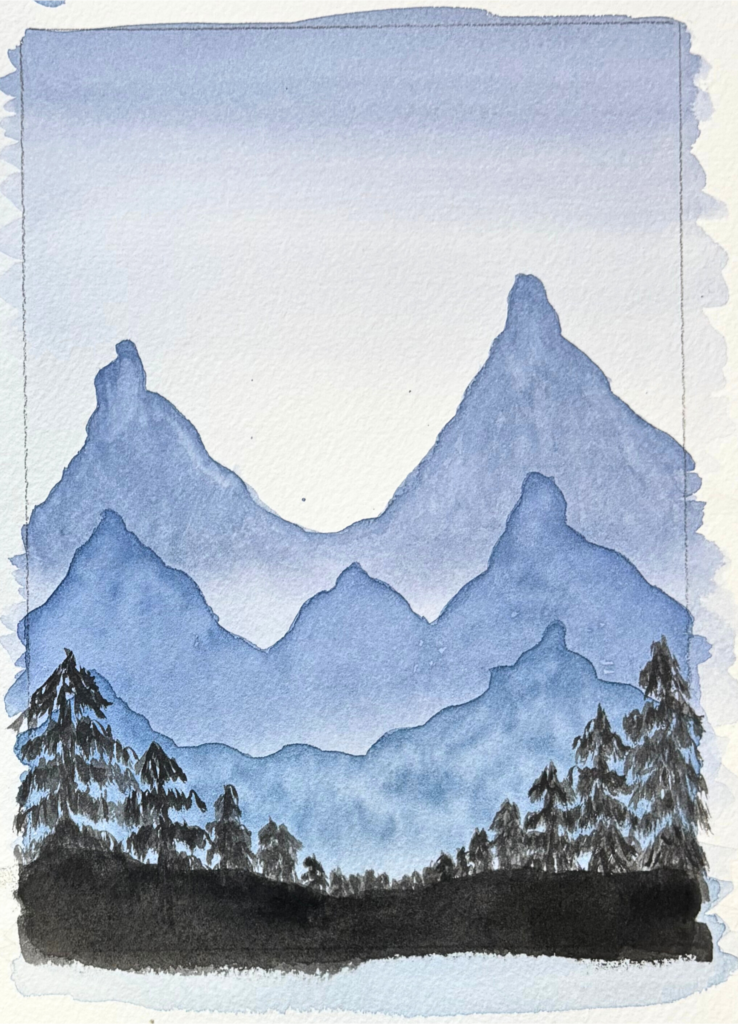
Monochromatic Landscape Watercolor Painting
This monochromatic landscape watercolor painting will use the same watercolor techniques as the watercolor landscape art you learned about above. The only difference is that instead of using different colors you will only use one color.
If you want to do a sunrise landscape painting you could use a yellow, orange, or pink. I wanted to go for a watercolor night sky look so I used a dark blue/purple color.
Mixing Watercolor Paint
Teal + Prussian Blue + Yellow + Violet (Blaugrün + Preußishblau + Echtgelb + Violett)

Step One:
Paint your night sky using the gradient wash watercolor technique.
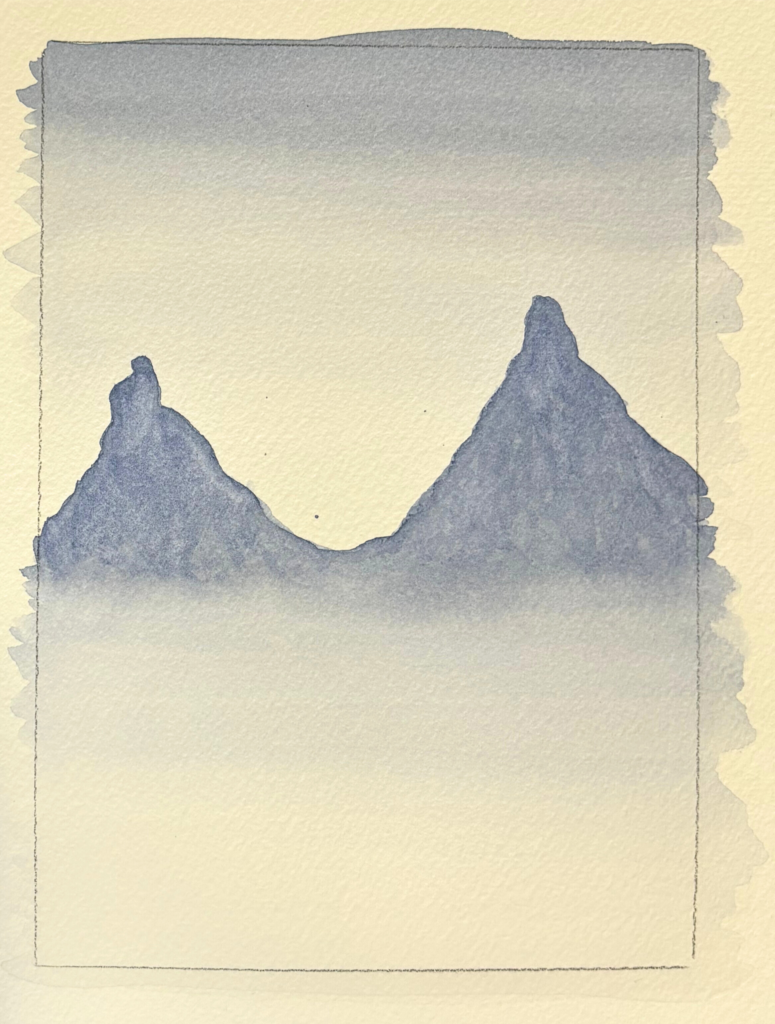
Step Two:
Paint the far mountains using the gradient wash. You can add some texture to them by taking the paintbrush and making squiggly lines when the gradient wash is nearly dry.
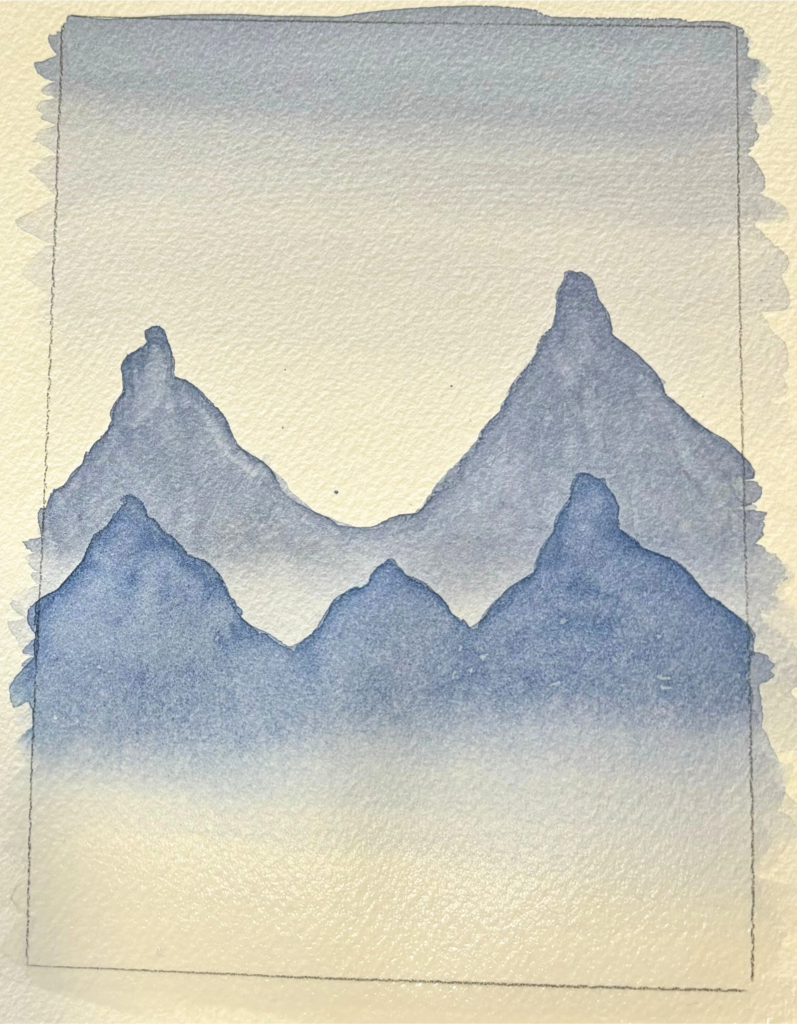
Step Three:
Using the gradient wash watercolor technique paint the middle mountain range. Add texture to these mountains by loading your dry brush up with Presusian Blue (Preußishblau) and tracing the tops on the semi-dry layer. You can move the paint around until you like it.
Step Four:
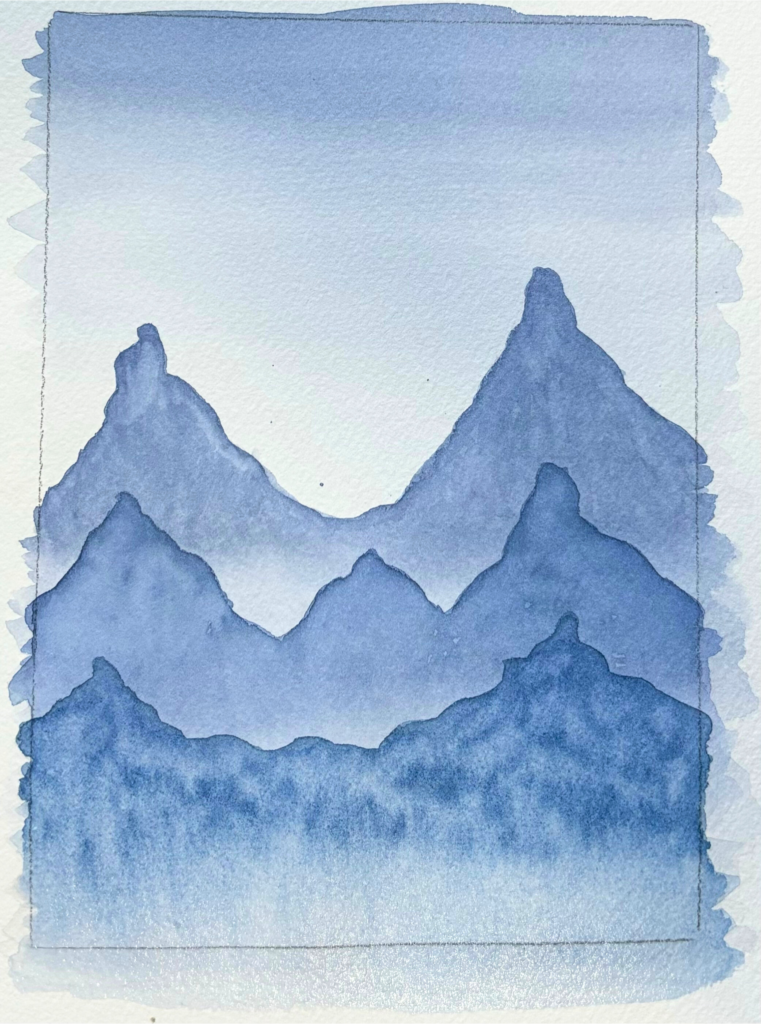
Paint the last set of watercolor mountains using the gradient wash technique. Add texture to these mountains by drying off your brush (don’t add any extra color) and moving the paint around with your damp brush. If you take away too much color you can add more from the pre-mixed color but try not to get your brush too wet.
Step Five:
Paint the trees using black paint and the un-uniformed technique discussed earlier. Add a black hillside and the base if you don’t want as many trees.
To add the sun and stars use acrylic paint markers. Then sign and display it!
Reflection
This bonus step is used to help you actively improve your painting skills by taking the time to reflect on your watercolor landscape art. Use the following questions as a guide:
i. What is your favorite part of this watercolor landscape art painting?
ii. What is your least favorite part?
iii. What will you do differently with your next watercolor landscape art project?
iv. How have you improved since your last piece?
This post is all about watercolor landscape art and how to create them with gradient wash watercolor technique. Thanks for learning with me and be sure to share your creation with MHF Paints!
Other posts you might like:


Leave a Reply