Want to know how to get unstuck from the slump you’ve been in lately? These stained glass art drawing examples will inspire that drive in you once again.
Disclaimer: THIS POST MAY CONTAIN AFFILIATE LINKS, MEANING I GET A COMMISSION IF YOU DECIDE TO MAKE A PURCHASE THROUGH MY LINKS, AT NO COST TO YOU. AS AN AMAZON AFFILIATE I EARN FROM QUALIFYING PURCHASES AT NO EXTRA COST TO YOU.

Every artist has, is, or will eventually get stuck in a slump where they don’t know what to do next. The surefire way to get out of a slump is to be inspired by something new that I haven’t tried before, that is how I discovered stained glass art drawing. If you don’t know what that is read on because it is fun to do!
You will learn about stained glass art drawing, stained glass art for beginners, stained glass paintings, stained glass art design, how to make stained glass art, and more!
After reading this post you will be inspired to create a stained glass art drawing for yourself!
3+ Examples of Stained Glass Art Drawing that Will Inspire You
Supplies needed:
- Procreate app and an iPad
Tips for Stained Glass Art Design
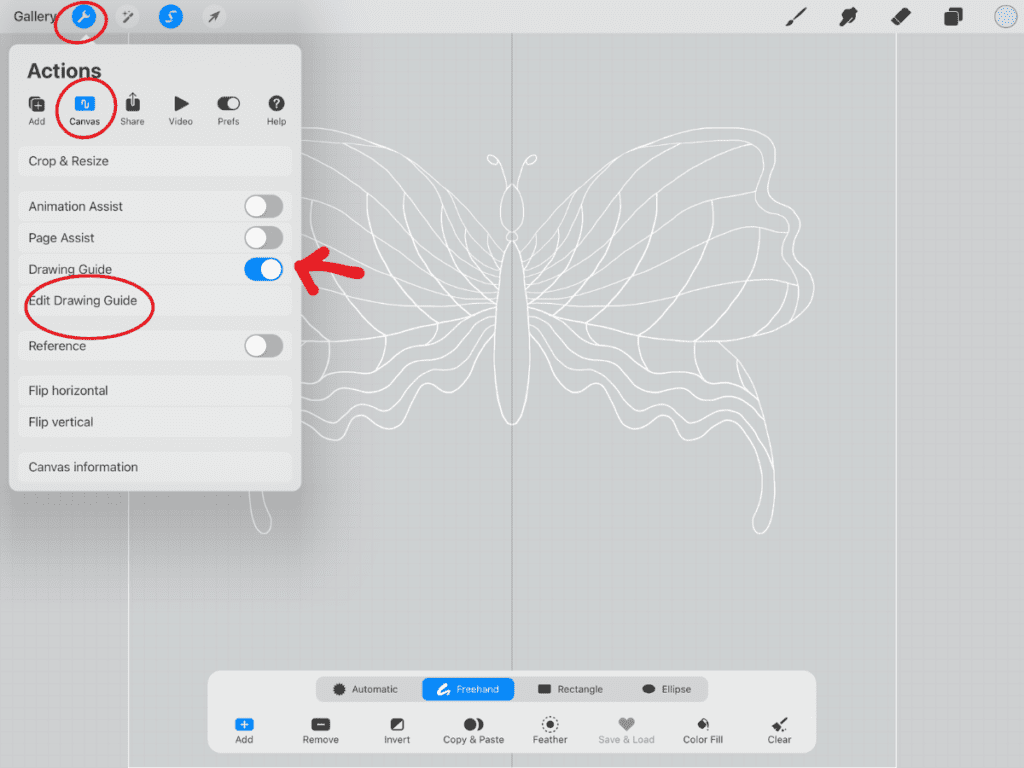
If you want to create a symmetrical design -butterfly or background or geometric shape- the ‘Edit Drawing Guide’ will be your best friend. By turning this action on whatever you draw on one side will be drawn on the other side exactly the same.
- Click on the Wrench in the upper left corner
- Choose ‘Canvas’
- Put the ‘Drawing Guide’ on
- Click ‘Edit Drawing Guide’
- Click ‘Symmetry’
- Click on ‘Options’
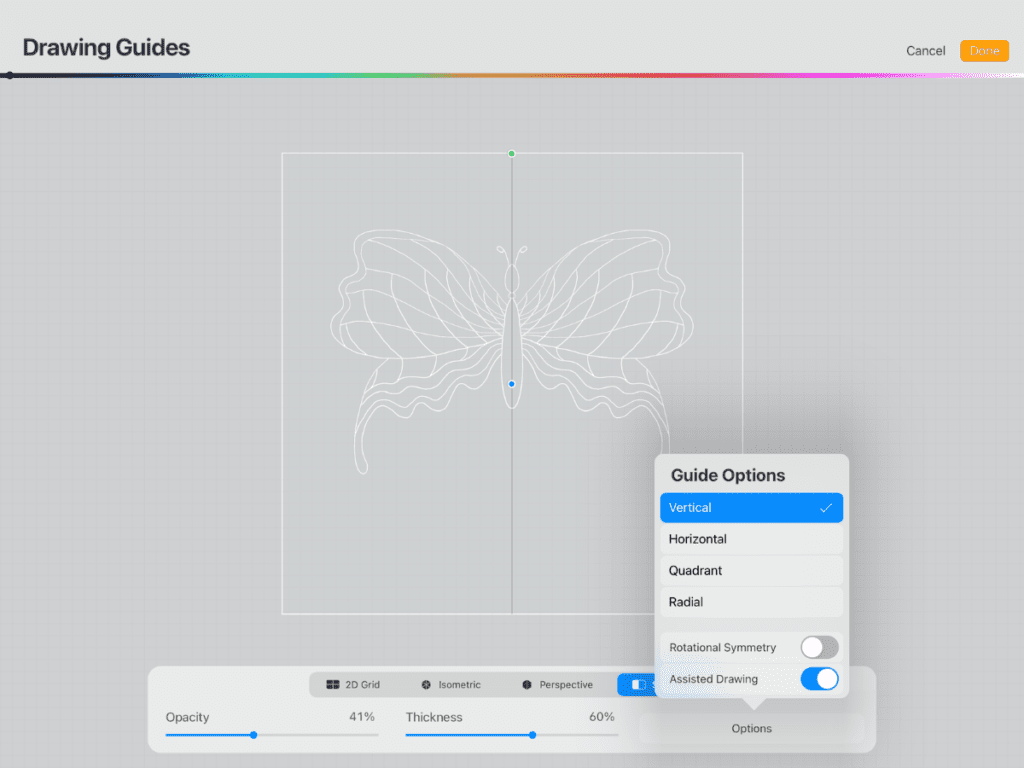
- There will be four guide options to choose from. The ‘Vertical’ option will reflect what you draw on the right side to the left. The ‘Horizontal’ option reflects what is drawn from the top to the bottom. The ‘Quadrant’ option splits the screen into fourths and whatever you draw in one box is drawn in all other boxes. The ‘Radial’ option will flip what you draw. So if you drew the head of the butterfly in the upper right the left side would be in the lower left corner.
Learn how to use the ‘Color Drop’ feature to make it easier to fill in your stained glass paintings with colors check out How to Make Endless Desert Wall Art with 1 Design.
How to Make Stained Glass Art
To create the stained glass look in Procreate is really simple.
- Click on the Wand
- Choose ‘Noise’
- Adjust the three options (Scale, Octaves, Turbulence) and choose the type of movement (Clouds, Billows, Ridges) you want
- Move your finger across the screen to increase/decrease the percentage of noise in your painting
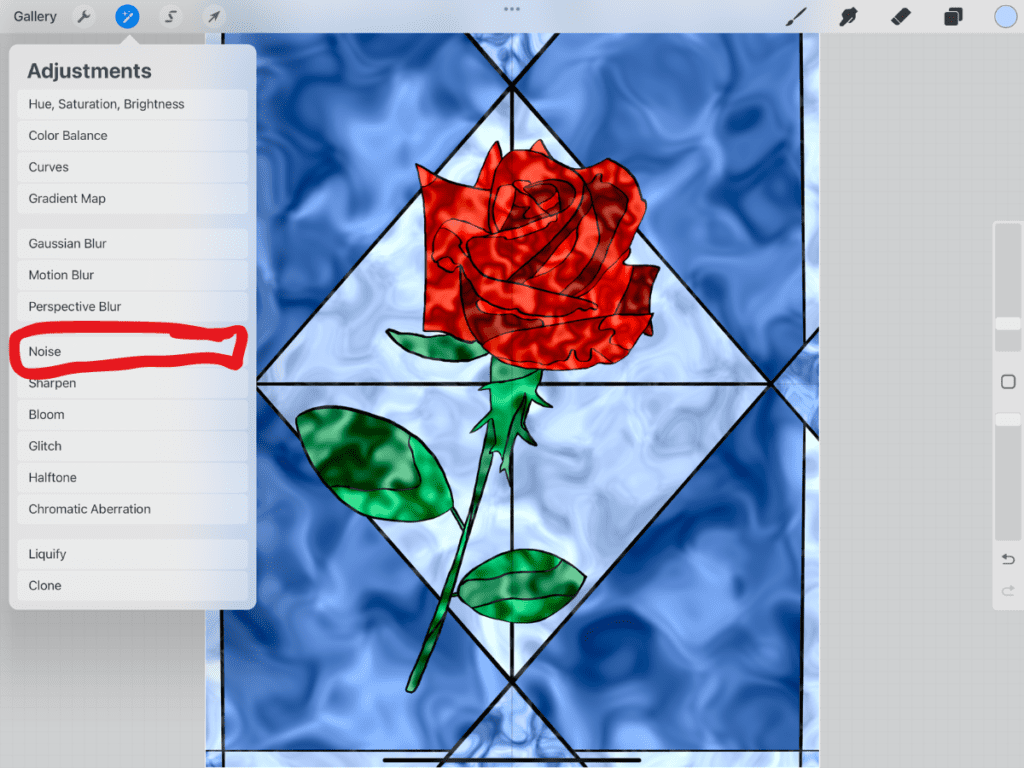
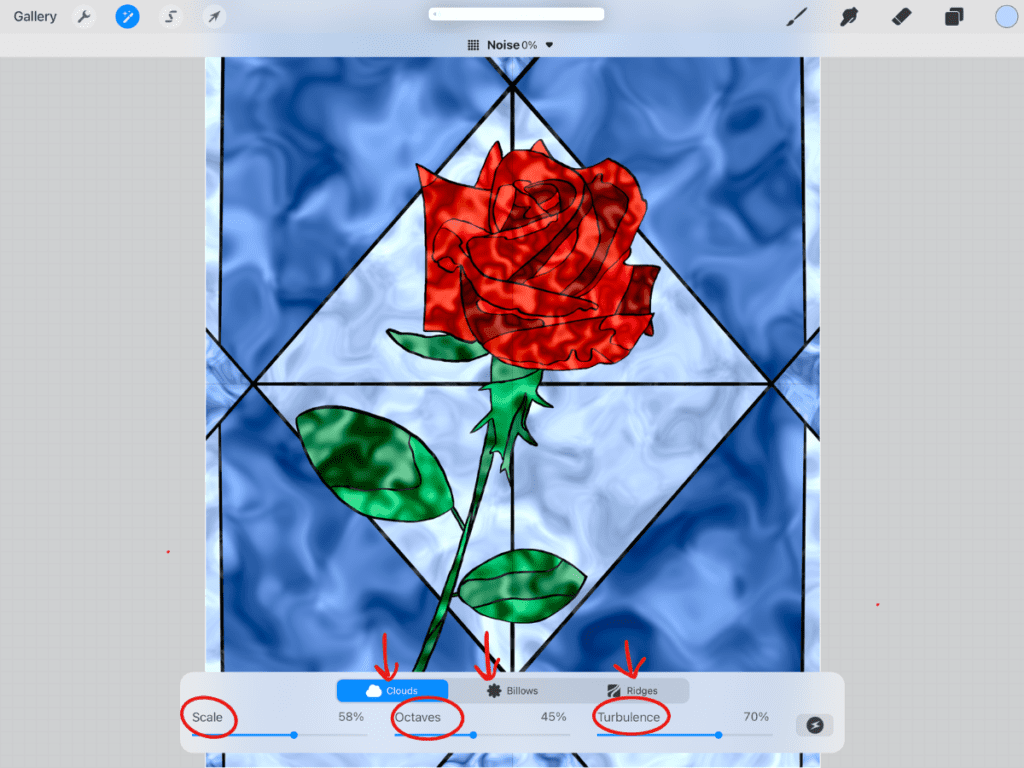
By adjusting the noise you will create the stained glass effect on your painting.
You will want to play around with all of the options.
- Noise Percentage
- Type of Ridges: Clouds, Billows, Ridges
- Scale Percentage
- Octaves
- Turbulence
You will get the best results of an authentic-looking stained glass art drawing if you create each section in a different layer so you can adjust the 5 options for each layer.
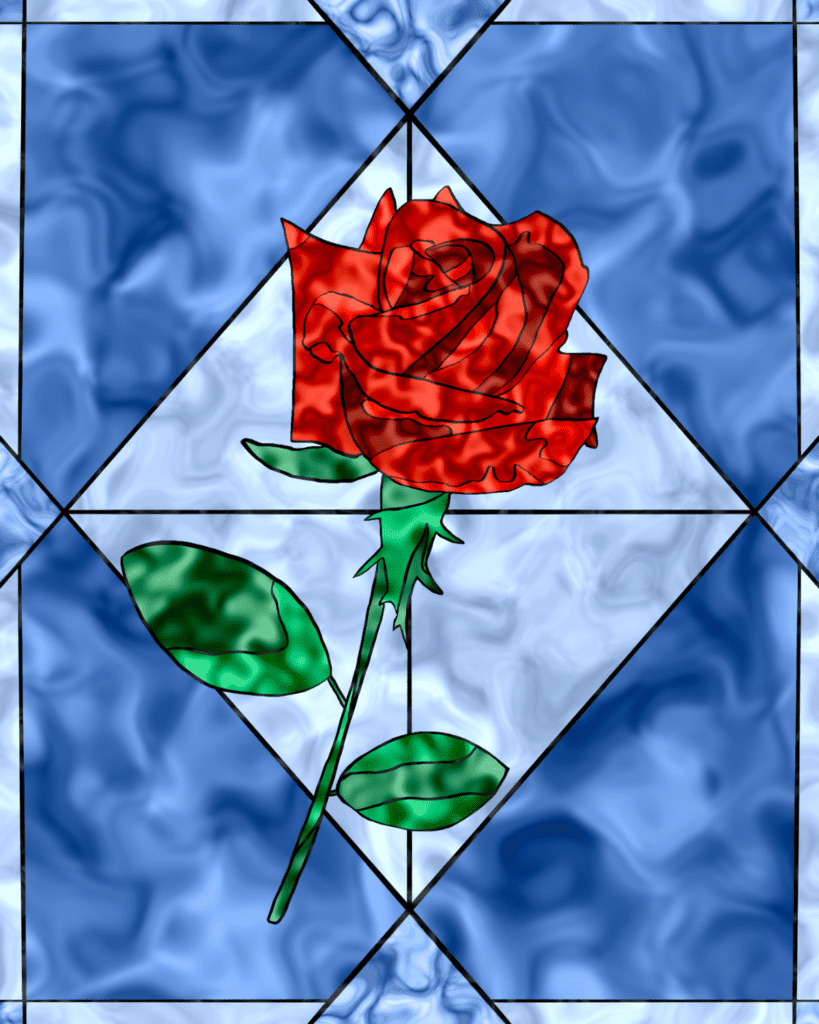
Butterfly Stained Glass Art Designs
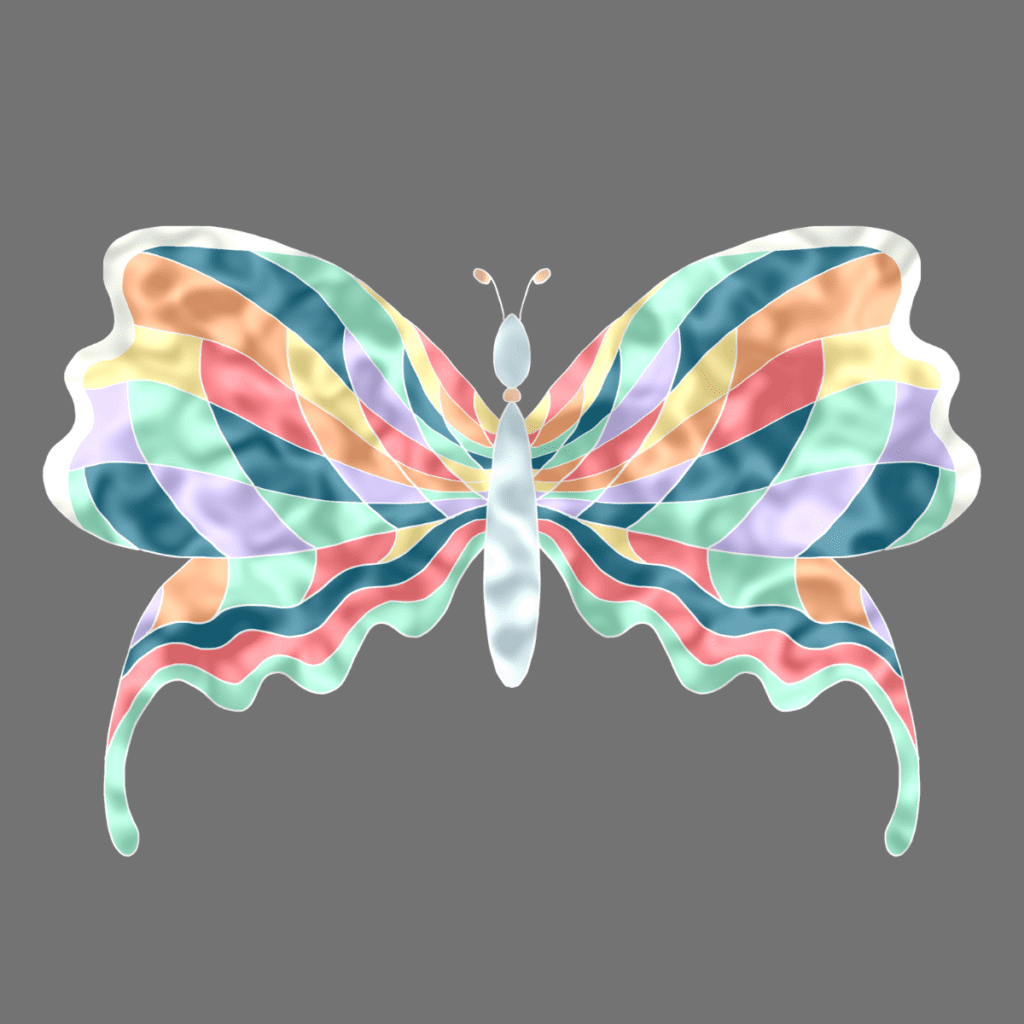
This butterfly was placed on a gray background so you could see the colors better. Within Procreate it has no background color to make it into a sticker.
Along with the stained glass effects that were talked about above, the ‘Bloom’ feature was used to create the glow.
Instructions for Bloom:
- Special Effects Wand
- Bloom
- Adjust percentages to the desired effect
You do need white or a very light color for this to work.
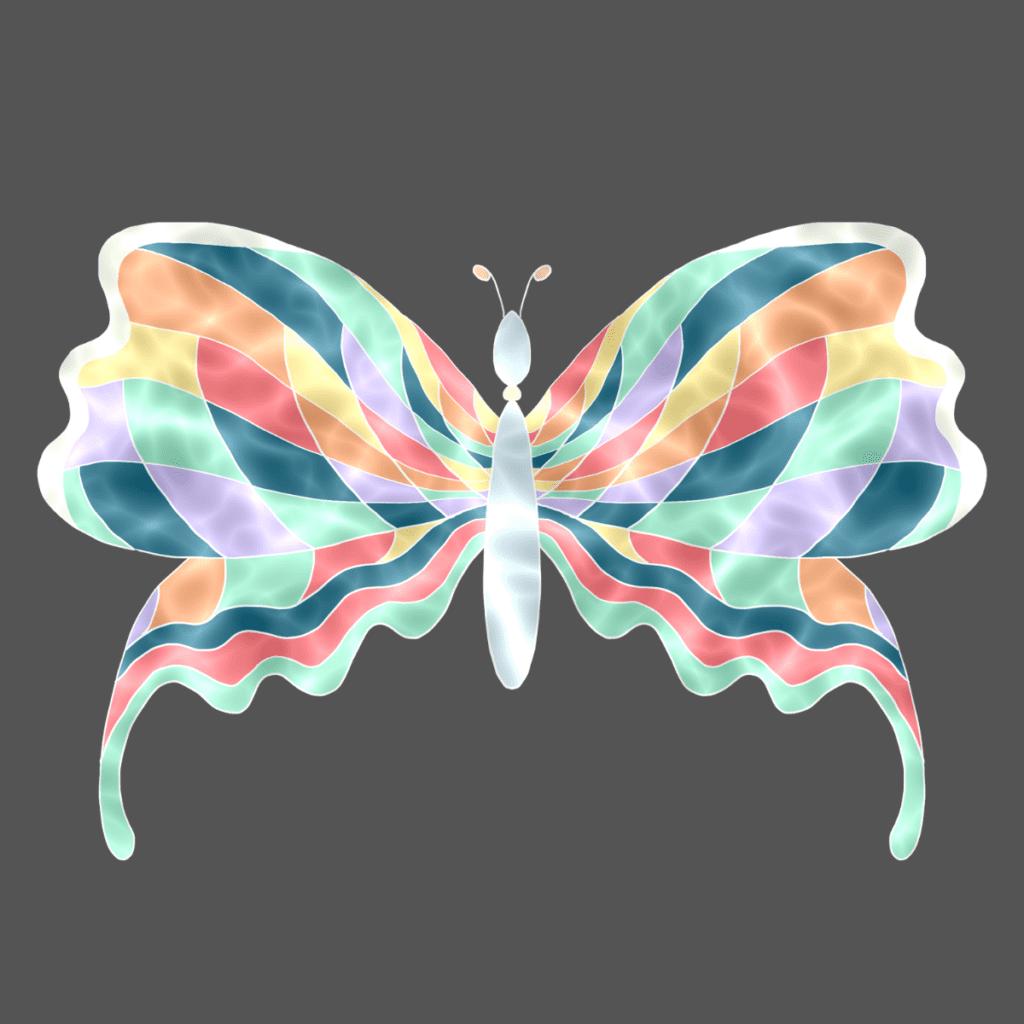
To create this stained glass art for beginners the Scale percentage is low with the Noise percentage high. It almost creates a glitter effect.
If you look closely you can see a colorful shadow of the butterfly. This was created with the Chromatic Aberration Displacement feature.
Instructions for Chromatic Aberration: Displace:
- Duplicate the layer you want to displace
- Special Effects Wand
- Chromatic Aberration
- Displace
- Change the percentages to what you like
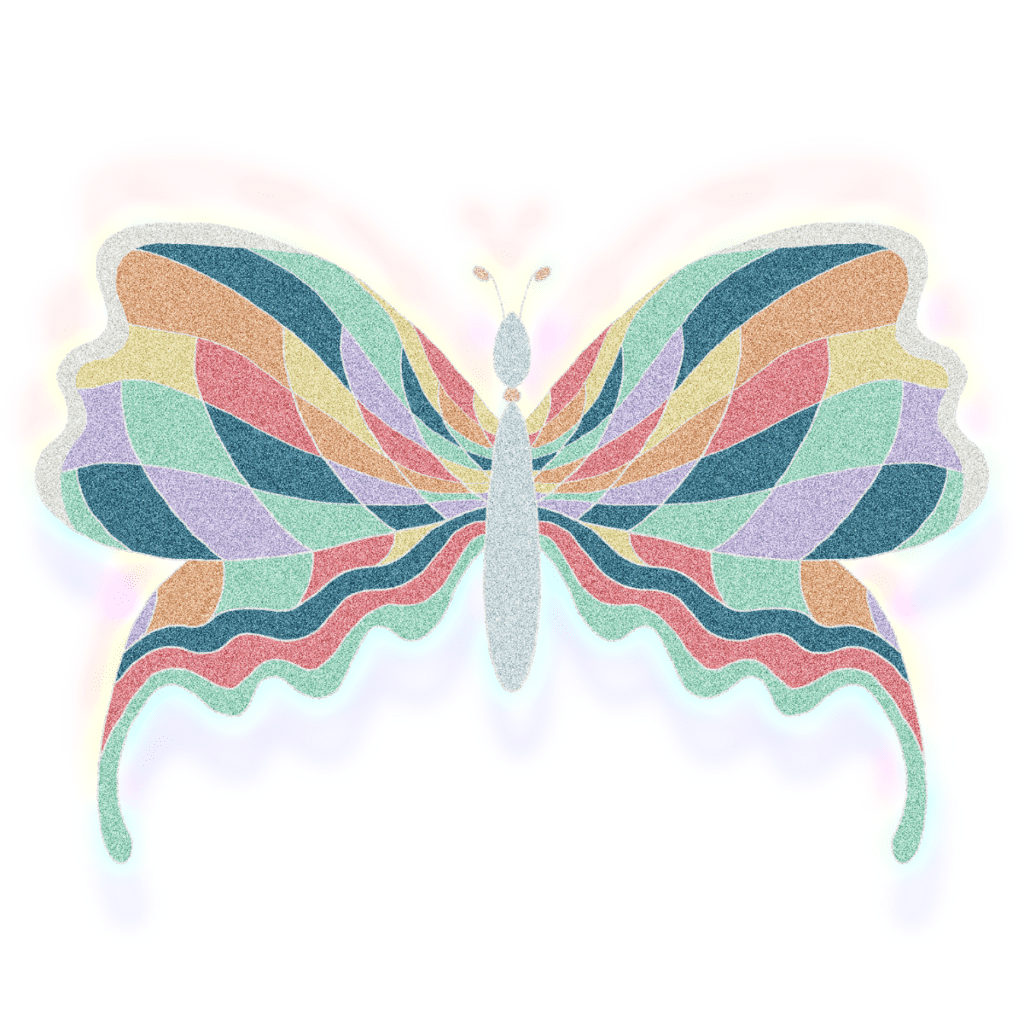
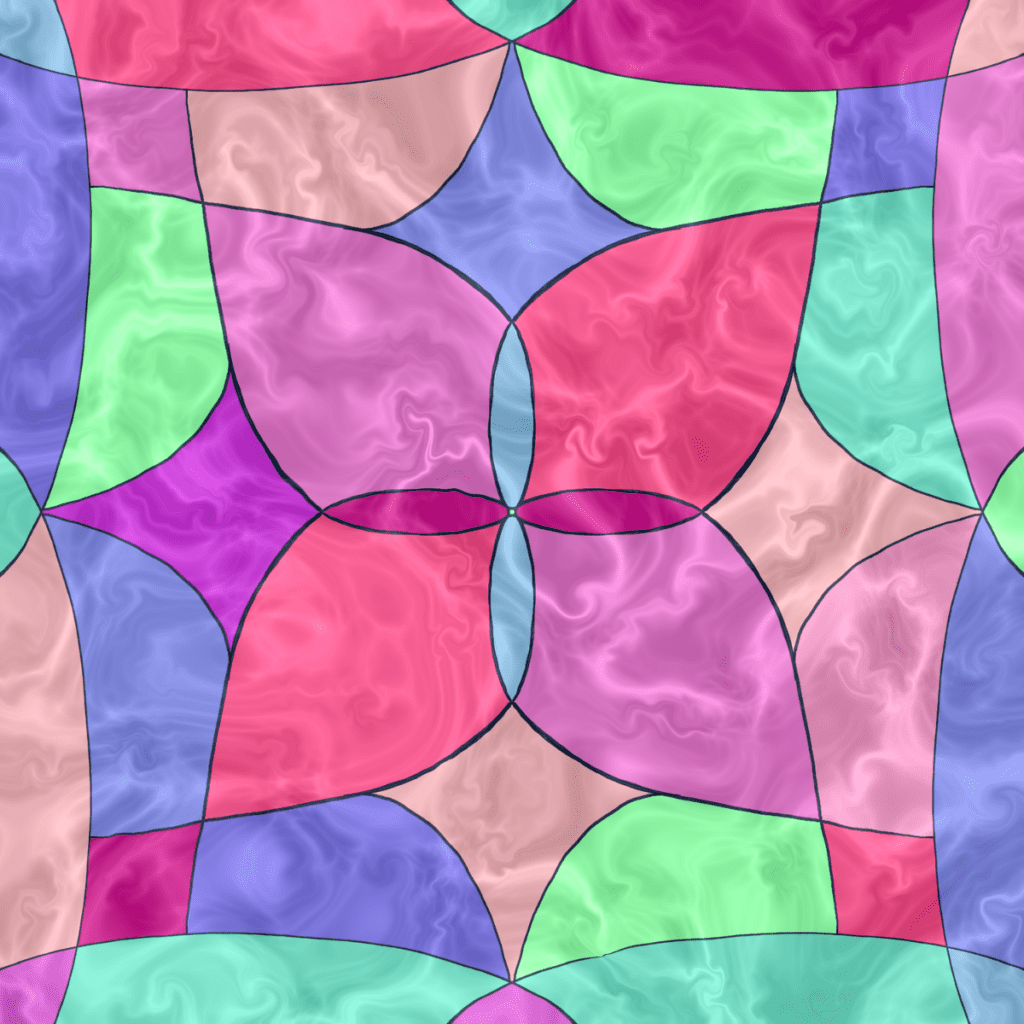
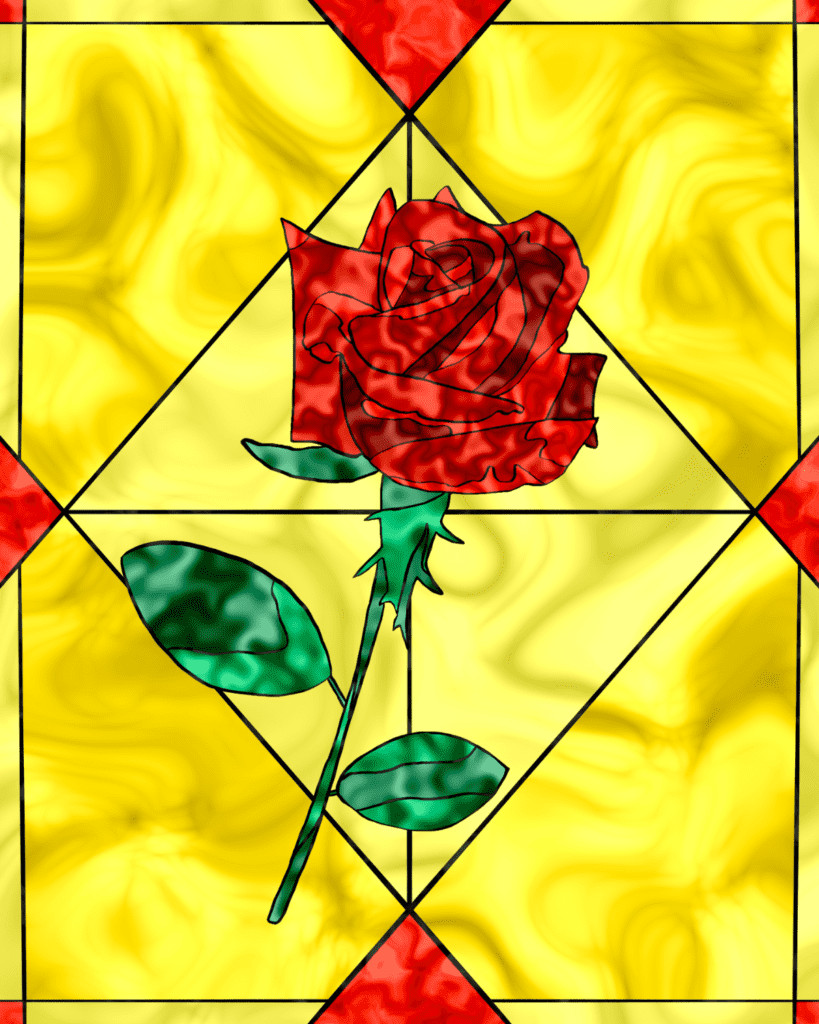
How to Make Stained Glass Art
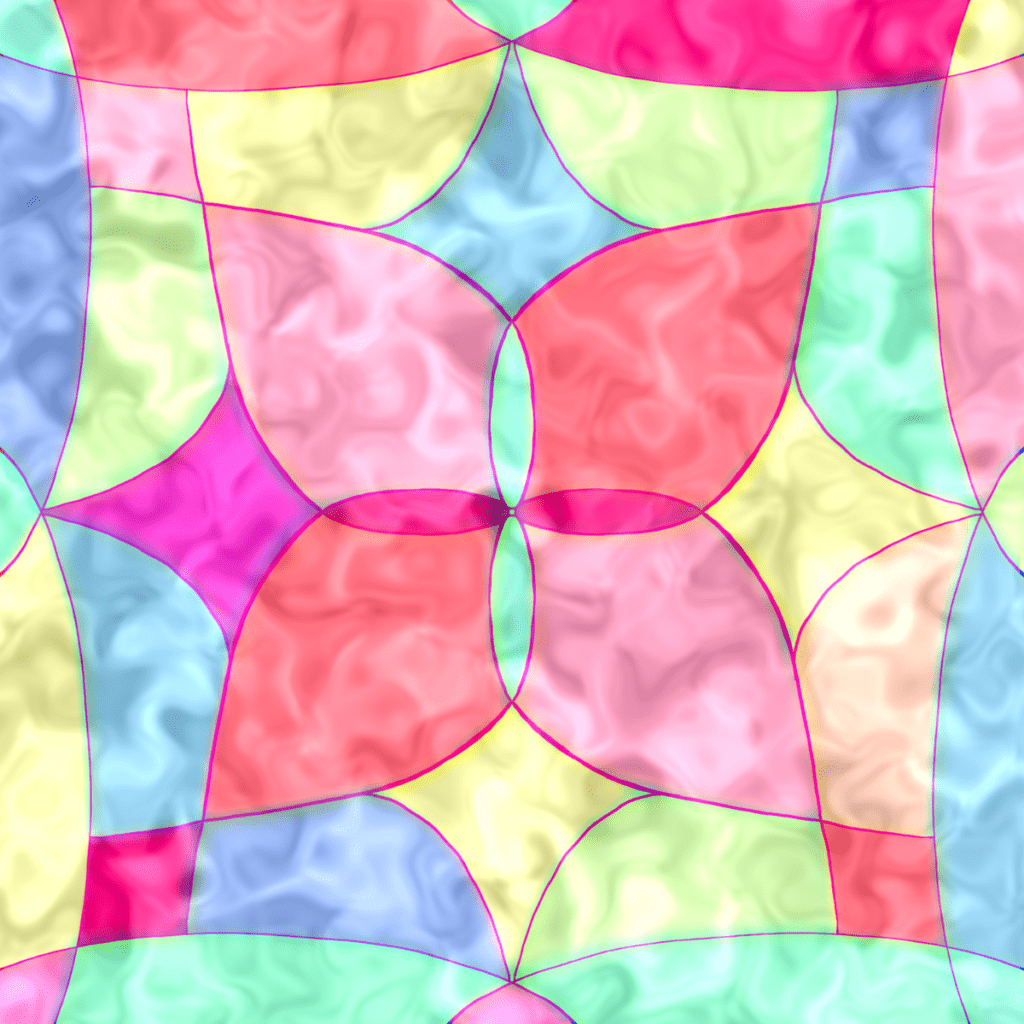
This design is good for playing with the differences in the Noise settings.
If you want to customize your stained glass even more you can use the ‘Liquify’ feature to change the swirls further.
Instructions for Liquify:
- Special Effects Wand
- Liquify
- Choose which type of liquifying option you want
- Adjust the percentages
- Touch an area on the artwork to change it
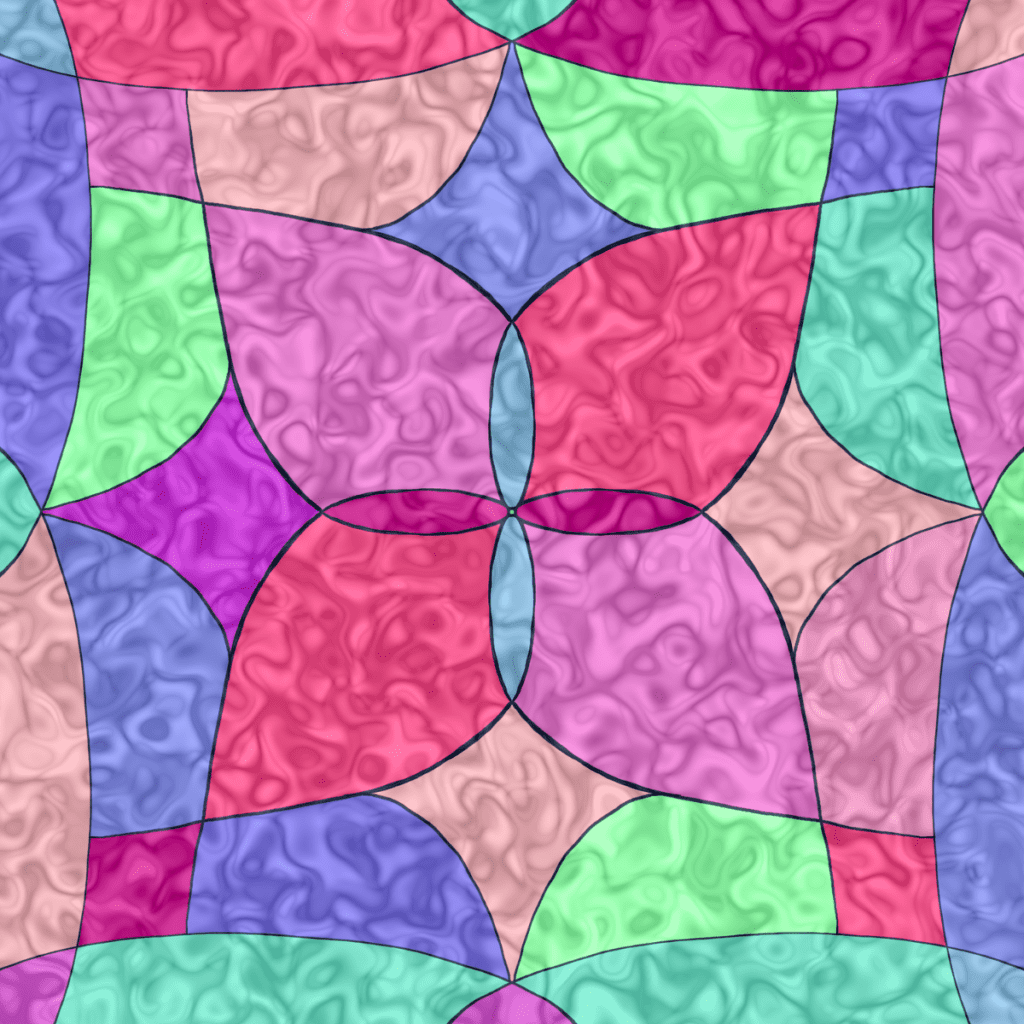
This piece used the ‘Noise’ feature on all colors because they were not in different layers. It still looks cool, but if you want every color to have a unique pattern, make sure you create separate layers.
Stained Glass Paintings
Use everything that you have learned in this post to create a unique stained glass painting! If you are not confident in your drawing abilities or want to trace the featured object you can always upload the picture and trace it in a separate layer.
Find colors that complement each other so that the object pops.
Have fun with it! Duplicate the layers that have the designs so you can make multiple artworks with the same design.
Don’t know how to do this? No worries learn how to in How to Make Endless Desert Wall Art with 1 Design.
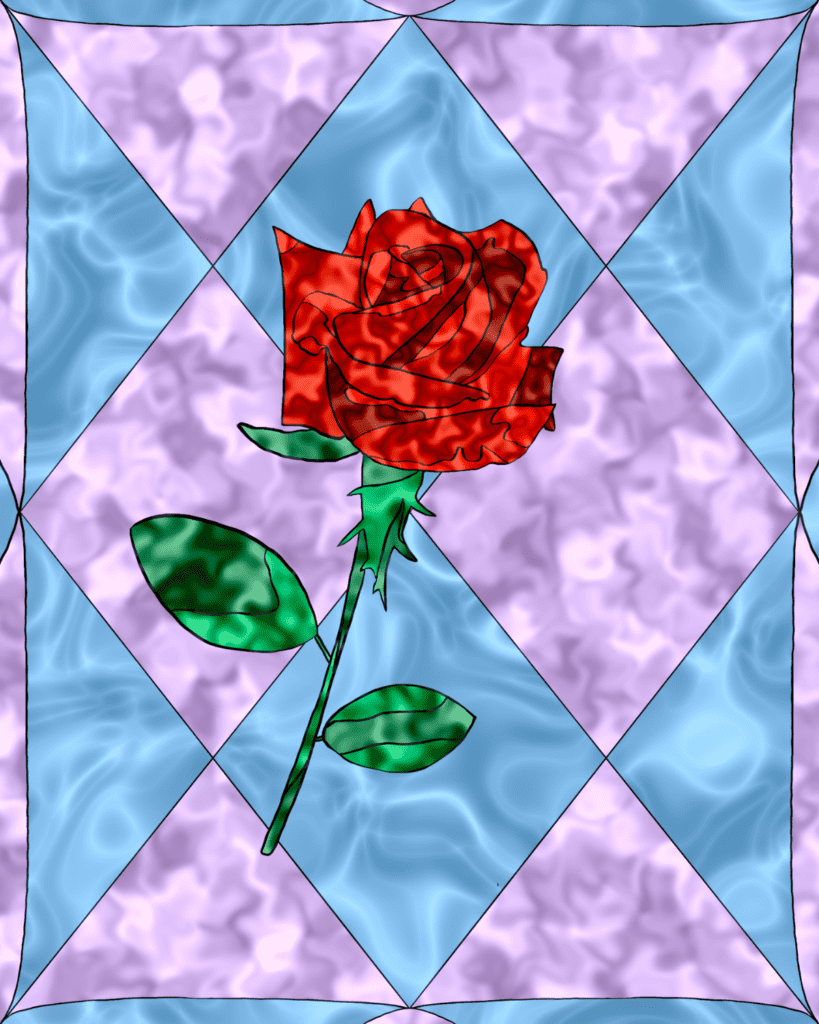
Stained Glass Art Drawing
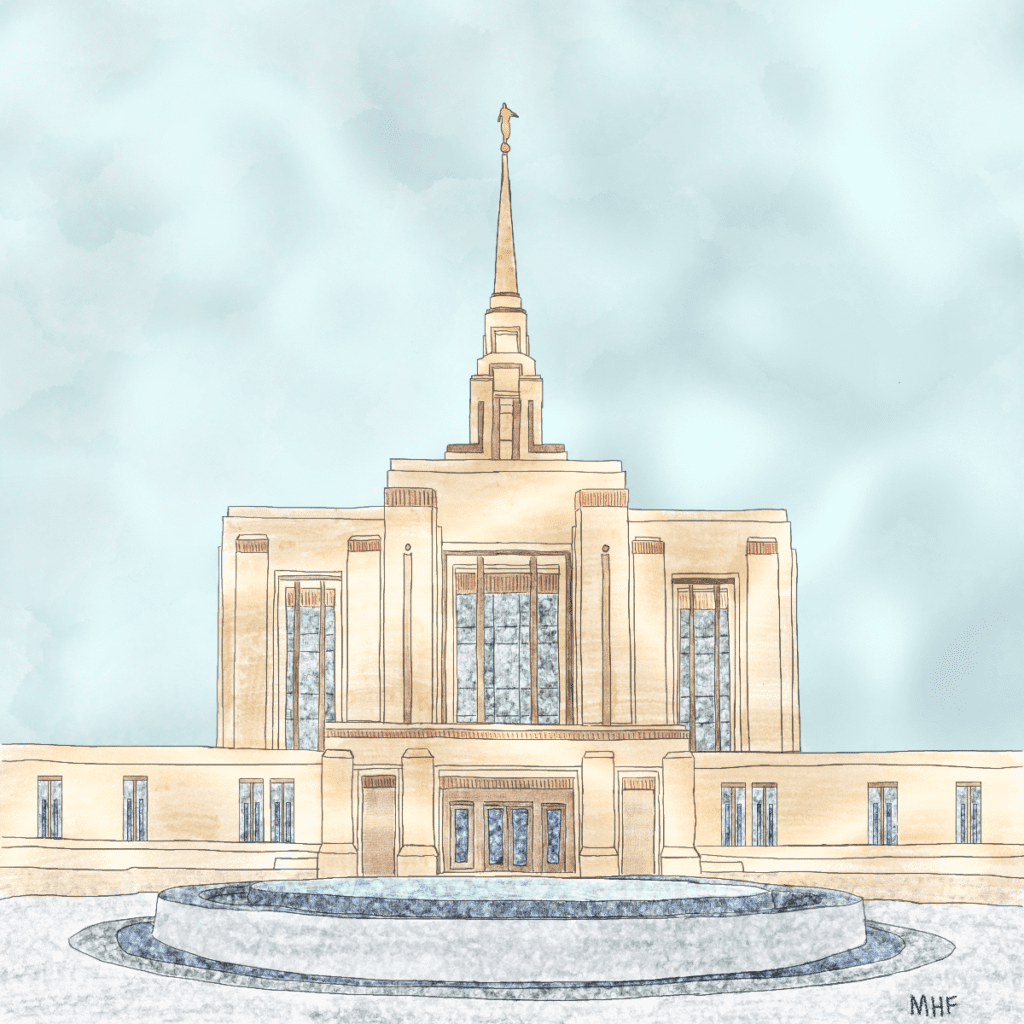
Take a completed piece of art that you have done and create it into a stained glass painting. This is one that I did a few months ago, but I love how the windows look like stained glass now. I will definitely be using this technique in future drawings.
This post is all about stained glass art drawing.
Continue learning new techniques for your artwork with these related posts:


Leave a Reply