Are you a fan of coloring books for adults but wish you could create something more unique? Well, this digital river painting is like a coloring book, but it’s a whole new level of awesome!
Disclaimer: THIS POST MAY CONTAIN AFFILIATE LINKS, MEANING I GET A COMMISSION IF YOU DECIDE TO MAKE A PURCHASE THROUGH MY LINKS, AT NO COST TO YOU. AS AN AMAZON AFFILIATE I EARN FROM QUALIFYING PURCHASES AT NO EXTRA COST TO YOU.
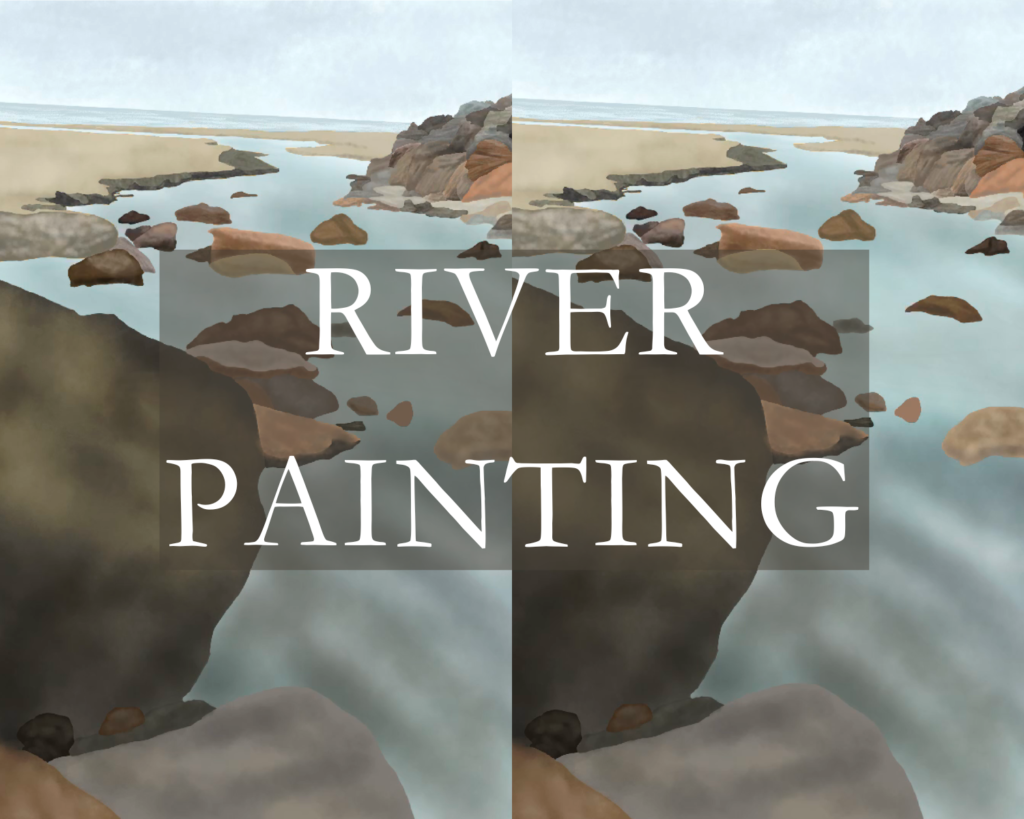
I enjoy good coloring books for adults, but after a while I find myself wishing I could do pictures of my own choosing. Learn how to do just this in this river painting tutorial.
In this post, you will learn all about turning a river painting into coloring books for adults, minimalist painting ideas, river scenes, Procreate tutorials, and more!
After going through the river painting Procreate tutorial you will be able to make any of your favorite pictures into coloring books for adults.
How to do a River Painting with Procreate that Feels Like Doing Coloring Books for Adults
Supplies needed:
Procreate App

Procreate has a few different apps to choose from depending on what Apple device you are using. I will be using the “Procreate: Complete Art Studio” app for this tutorial.
iPad Pro
There are a slew of iPads that are compatible with Procreate. (Check out the list here). I love my iPad Pro 12.9-inch for the big screen. However, whatever iPad you use it will work for this tutorial.
Apple Pencil

The Procreate website recommends using the Apple pencil with its app. I think you can use other stylus devices, but I am not sure how well they work.
Reference Photo of a River

For this digital painting, I will be using a photo of river scenes I took while on vacation in Oregon. If you have another photo you want to use you can use that one. If you want a copy of this photo please reach out to me via email at mhfpaint@gmail.com.
Procreate Tutorial
Before you start doing anything there are a few basic Procreate functions you will need to know how to use.
1. How to upload photos
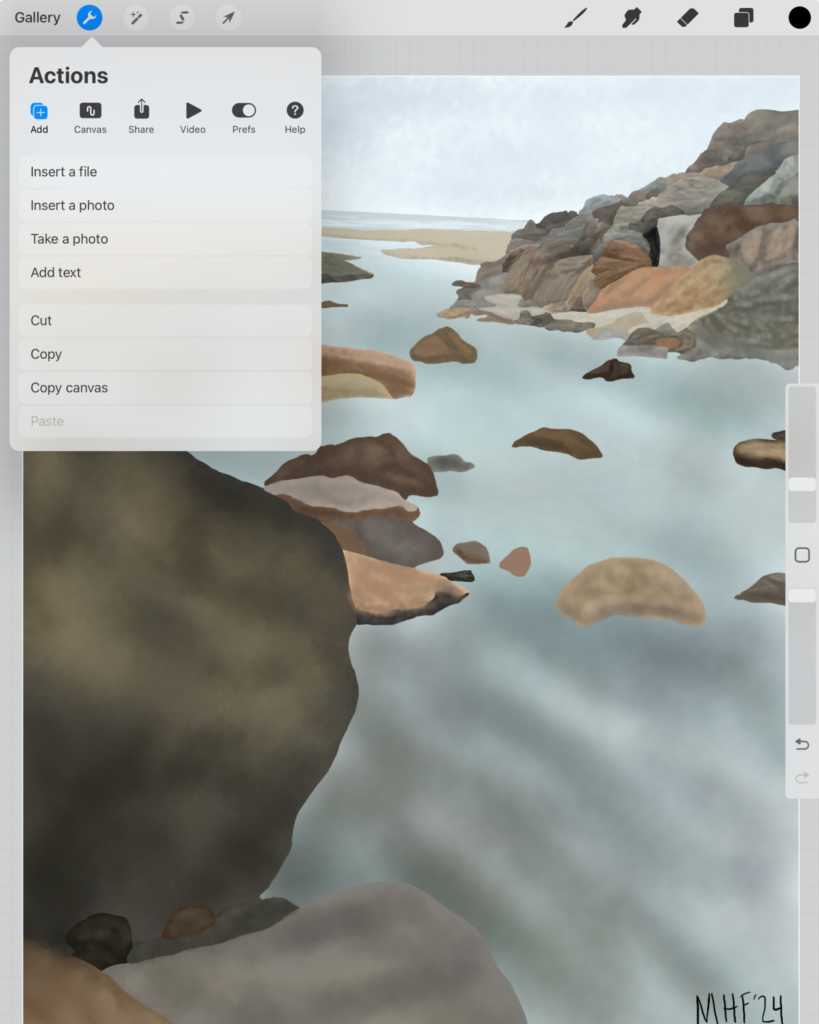
Once you have received the reference from me or chose one of your own you will need to have it available on your iPad.
Click the wrench tool.
Then insert a photo.
This will create a new layer where the reference photo is on.
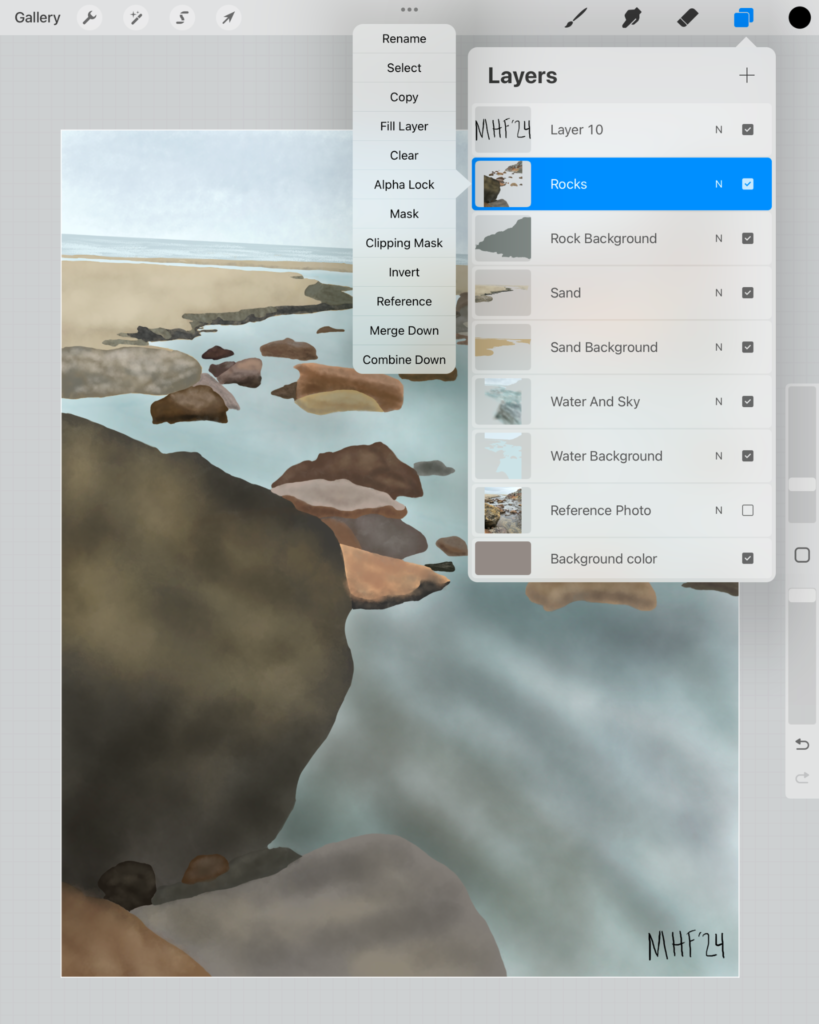
2. How to create and use layers
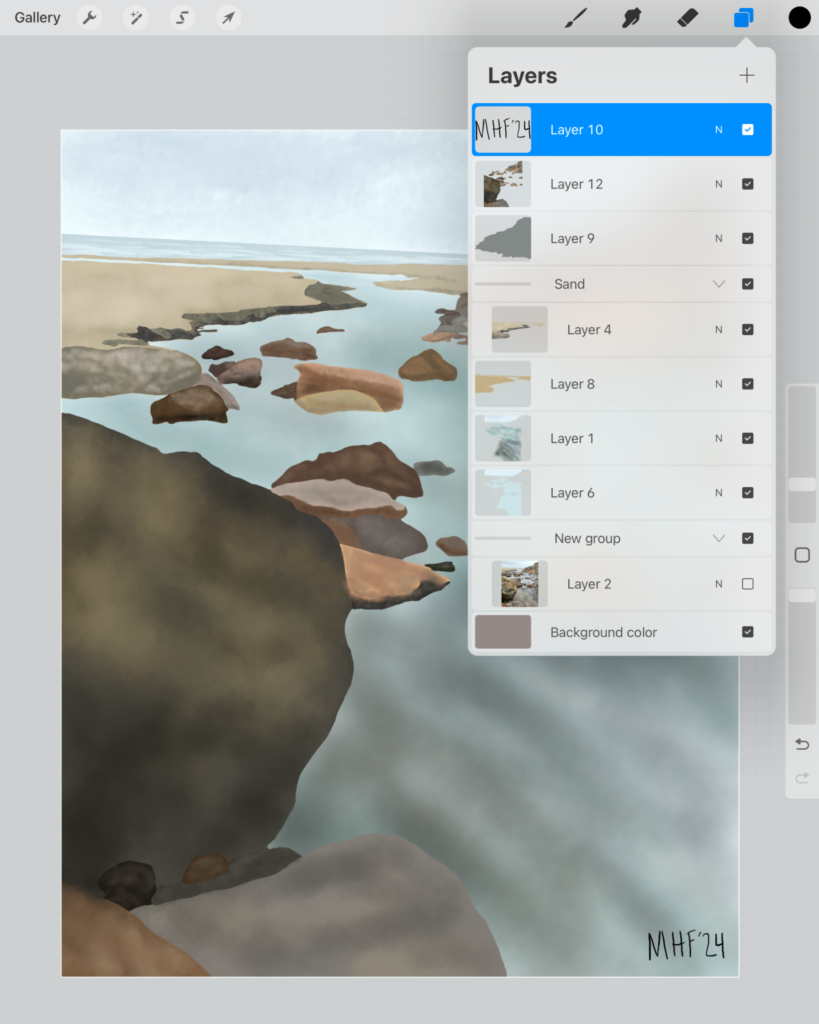
To manipulate the layers you will use the double page icon in the right hand corner.
To add a layer simply press the plus sign.
To turn a layer on or off (making them visible on the page or not) check the box of that layer. In the example I have all of the layers on except the last one which is the reference photo.
To change the order of a layer touch and drag it to whatever order you want. The layer at the top will be the layer at the front of the painting.
To combine layers ensure that the layers are next to each other and one of them is highlighted. Then pinch the two layers together.
7 Best Digital Art Ideas for Beginners
3. How to use clipping mask
The clipping mask tools is one of my favorite features. This allows you to essentially color outside of the lines and then immediately fit it to the layer underneath.
To do this you have an area/object drawn on Layer 1. Then in Layer 2, you apply more color on top of the area/object. You don’t need to worry about erasing lines if they go “outside the lines”. Instead, make sure that Layer 2 is directly on top of Layer 1 then tap Layer 2. This will cause a sidebar to show up. Select Clipping Mask and it will get rid of any markings outside of the object of Layer 1.
4. How to create groups
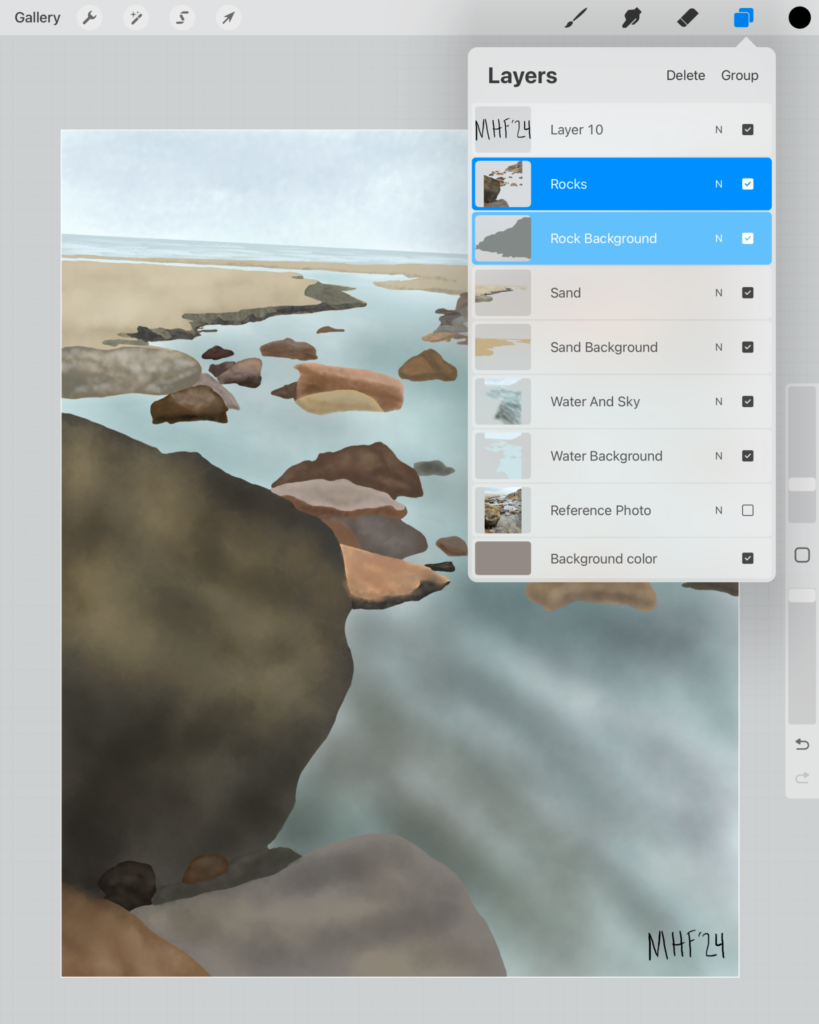
Grouping layers together can help you get organized while working in Procreate. It’s also a convenient way to move multiple layers at once into a different position within the painting.
To create a group highlight a layer you wish to group together then on any layer you want in that group swipe right on the layer. This will cause the additional layers to be highlighted in a pale blue color. Once you have chosen all of the layers you want grouped click Group in the upper right corner.
You can rename groups and layers by tapping on the words and typing in whatever you want to call that layer/group.
6. How to color find

Color finding is super easy with Procreate.
Simply touch and hold whatever color you want. A ring will pop up with the new color on the top half and the color you were already using on the bottom half of the ring. When you release your finger the top color will be chosen and ready to use.
7. How to color drop

To color drop you first need an enclosed outline. Then you touch and drag the selected color (in the upper right corner) inside of the outline. Once the color drop takes it will make the entire enclosed area the color of the selected color and you can remove your finger from the screen.
If you have any areas in the outline that aren’t touch then the color will escape outline and color your entire screen. You can play with the percentage of the color drop by sliding your finger across the screen. Watch the blue bar at the top when you do this.
Most inking brushes work well for color dropping because you don’t get gaps in the line when drawn.
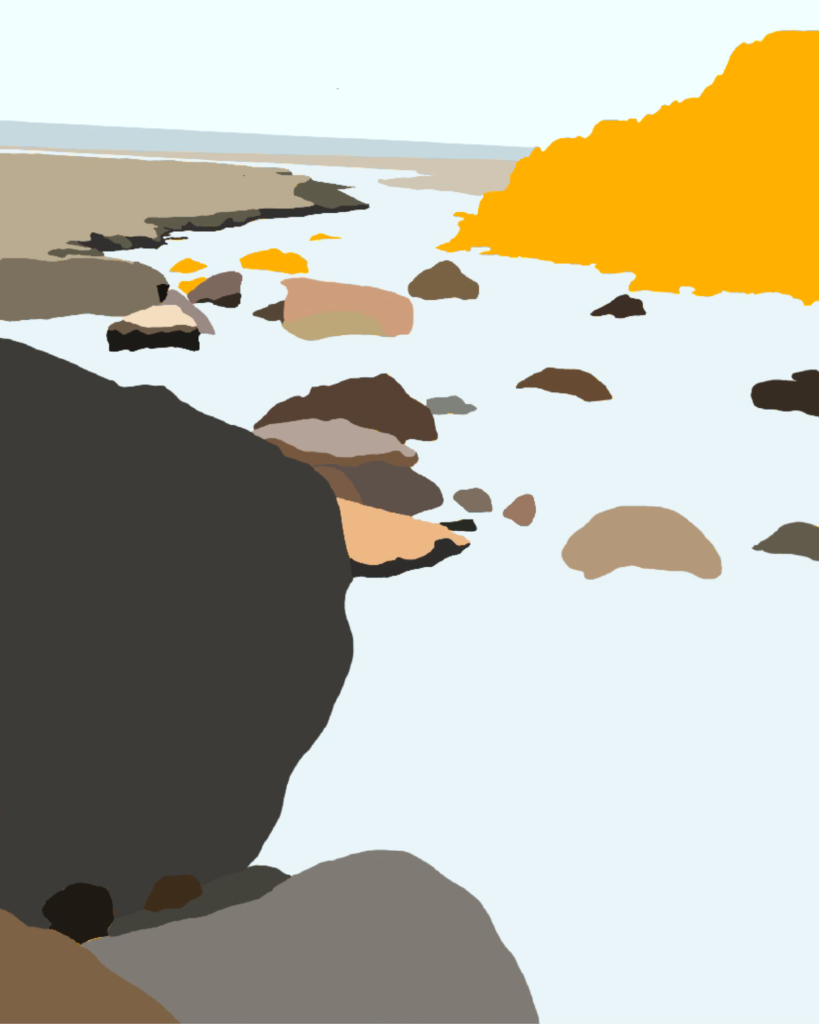
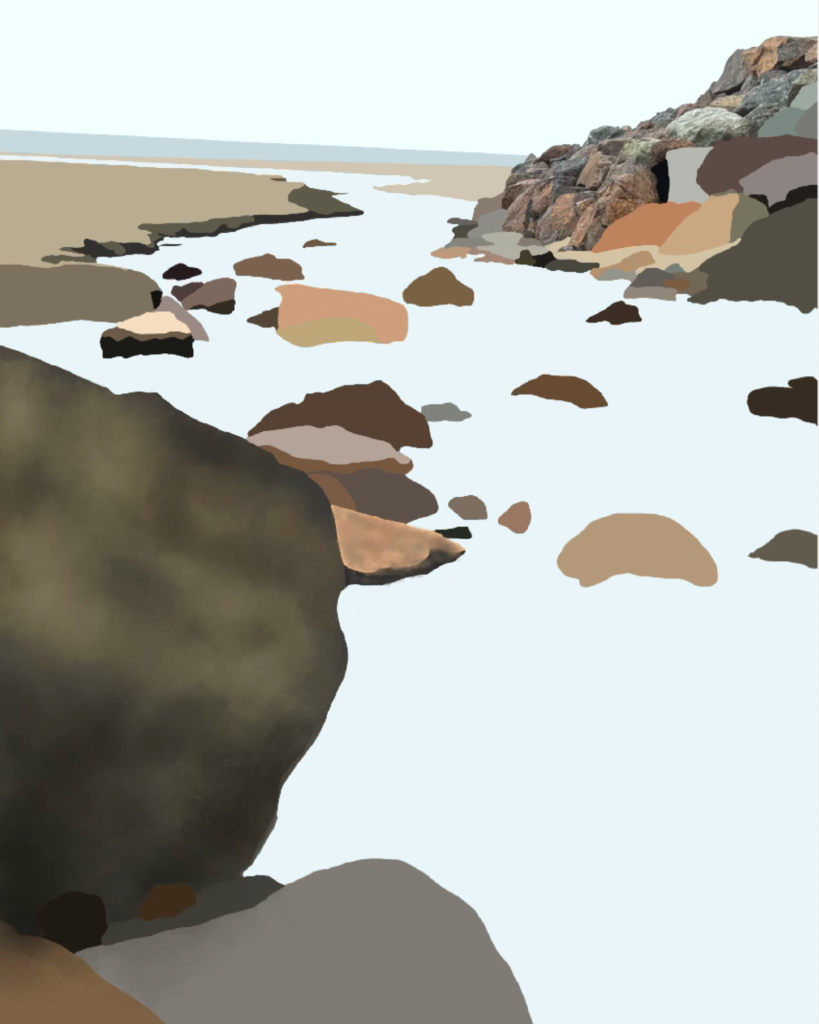
Step 1: Minimalist Painting Ideas
Using the Technical Pen start with the sky. Color find the color from the reference photo and outline where the sky is.
Uncheck the reference photo layer and color drop into the outlined sky.
In a new layer repeat the steps for each section of the river painting.
I turned the background a dark blue so that I could see if there were any spaces between sky/ocean/sand/rocks/water.

In the distance, you can see that there are areas between the river and sand banks that aren’t colored. When this happens to you, make sure you are on the correct layer before filling in the gaps.

If you want a minimalist painting continue these steps with the rocks.
Step 2: Rock Details
Since the rocks are a darker color, change the background to a light color to see any gaps.
My original plan was to make every rock an individual layer. But then I learned that there are a limit of layers that you can have on Procreate. (It depends on the size of the canvas and the device type. If you are curious this website can calculate it for you). So I had to change tactics. I will tell you the way I ended up doing it, and would have done it from the start had I known about the layer limit.
Using the same process in Step 1, outline and color drop the rock. In a new layer (that is on top of the rock layer) switch to a watercolor brush.
I have downloaded a set of watercolor brushes from Brushes for Procreate. They are free to download. I use brush 9 from option 2. Watercolour Brush Set. If you don’t want to download this set look through the pre-set options that come with Procreate. The Textured and Materials categories have some cool options that would work.
With the brush that you choose color-find a color on the specific rock, and add that color to the rock. You will want some darker colors and lighter colors. On average, I used about 3 different colors for every rock.
Once you are happy with the texture of the rock use the clipping mask feature to fit the textured layer to the rock base.
Repeat the same steps for another rock. Then combine those two layers. Repeat this for every rock so you will end up with only one rock layer.
I did get a bit bored of doing so many rocks, so I’d jump to step 3 and paint some of the landscape. Then, I’d come back to more rocks to switch things up. This won’t affect your river painting, just make sure you know which layer you’re painting on.
5 Types of Digital Art – An Awesome Beginner’s Guide

Step 3: Landscape Details
Follow the same process with the river, sand, ocean, and sky.
For the sky, there is a Clouds brush in Elements that you can use.
To get the breaking waves in the ocean use the Procreate Pencil in Sketching to add some white lines. The lines should be closer together at the sand and get more spaced out going towards the horizon.
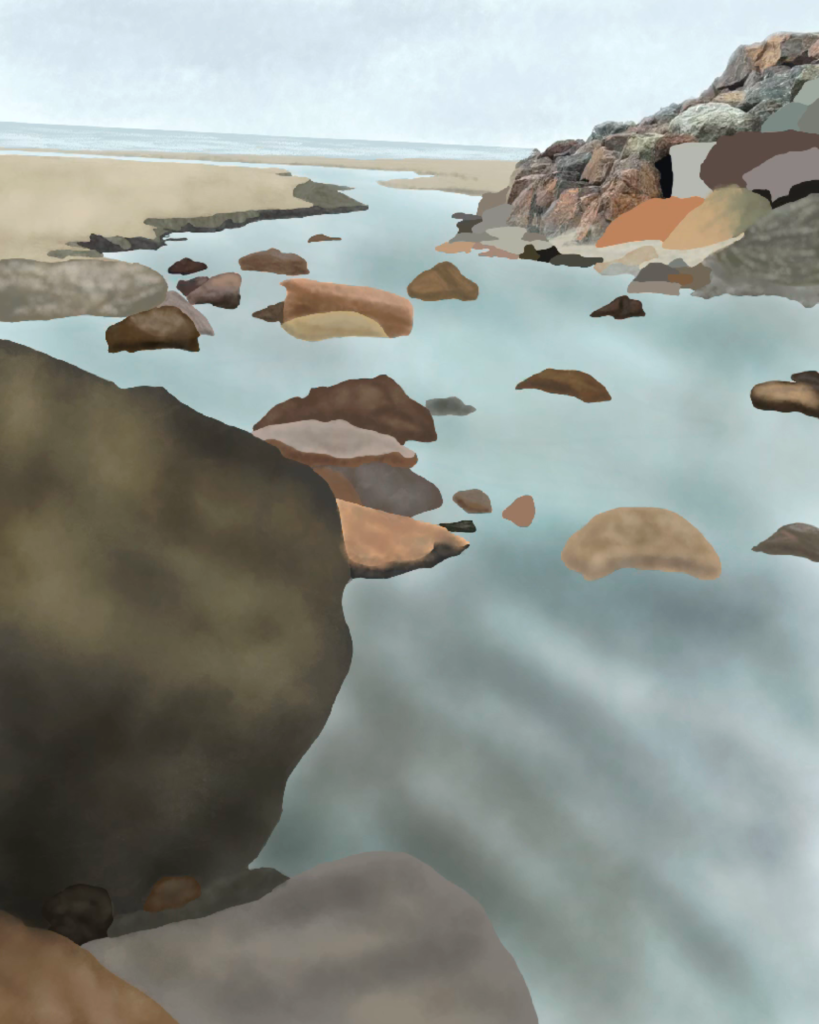
Step 4: Add Your Signature
I always like to do my signature on a separate layer. This way you don’t need to worry about erasing any of your artwork accidentally.

Timelapse of River Painting
This post is all about how to create a river painting using Procreate.
More posts you will be interested in:
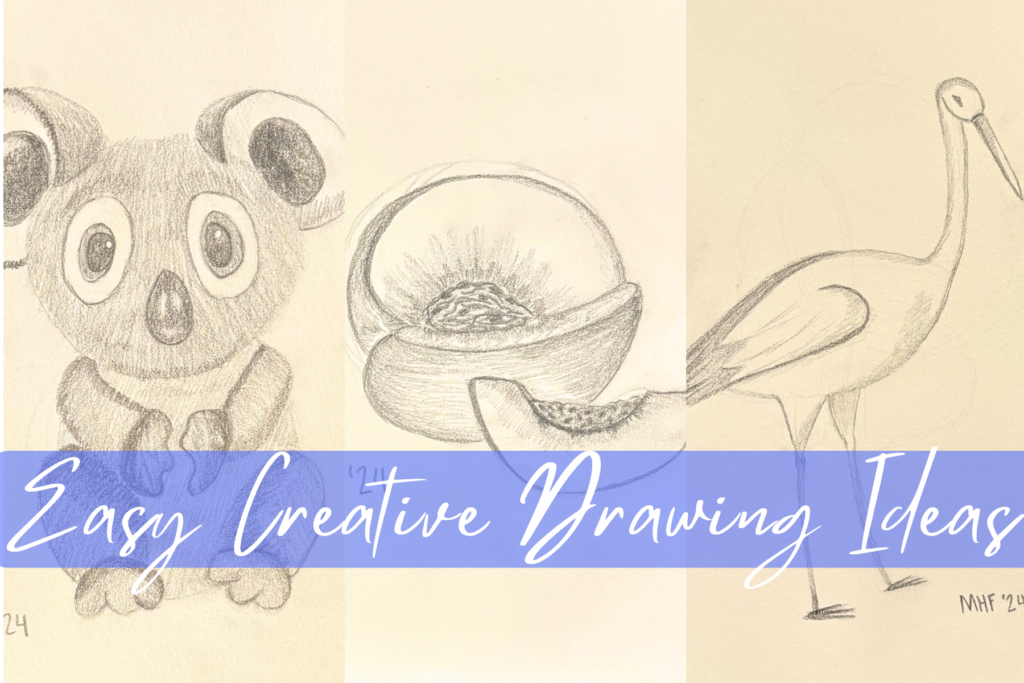
13+ Creative Drawing Ideas Easy
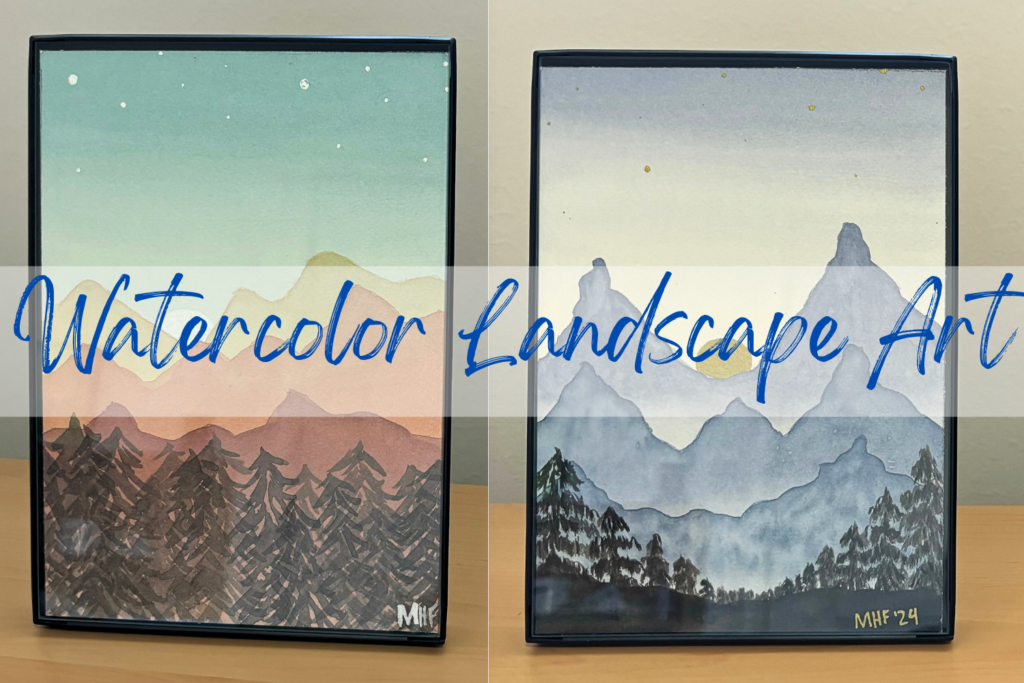
Amazingly Easy Watercolor Landscape Art
Parrot Sketch using Basic Drawing Shapes


Leave a Reply