Want to know the best animals for pencil shading art for beginners? These are easy animals with step by step directions on how to shade them.
Disclaimer: THIS POST MAY CONTAIN AFFILIATE LINKS, MEANING I GET A COMMISSION IF YOU DECIDE TO MAKE A PURCHASE THROUGH MY LINKS, AT NO COST TO YOU. AS AN AMAZON AFFILIATE I EARN FROM QUALIFYING PURCHASES.
Want to know the tricks behind pencil shading art? These are the steps that I did while creating the pencil shading animals.
You will learn how to do pencil shading art, pencil shading drawing ideas, pencil shading animals, and more!
After reading this post you will be able to replicate these pencil shading art animals.
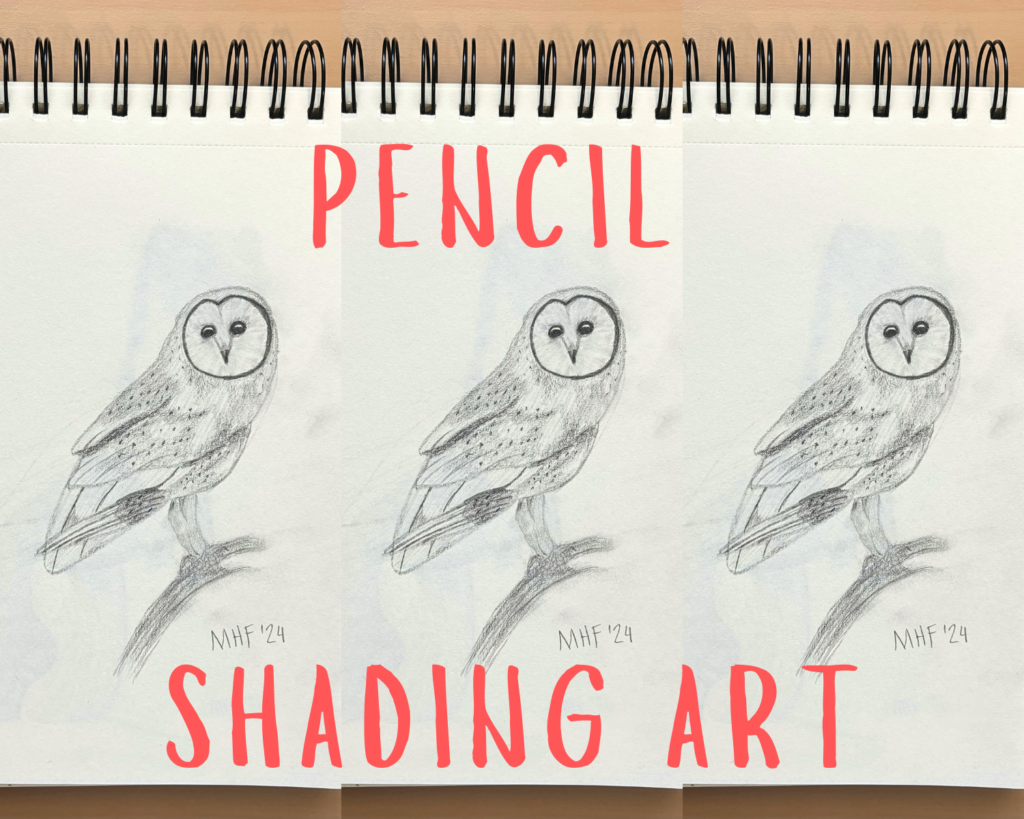
Pencil Shading Art: A Beginner’s Guide
Supplies needed:
- Drawing set (includes sketch pad, charcoal pencils, erasers, pencil sharpener, blending stumps)
- Kneaded Eraser (the drawing set includes a kneaded eraser but it doesn’t work well so I recommend getting this kneaded eraser, you will be a lot happier with it)
Learn how to draw each of these pencil shading art pieces here at Beginners Guide: Easy Cute Animal Drawings.
Owl Pencil Shading Art
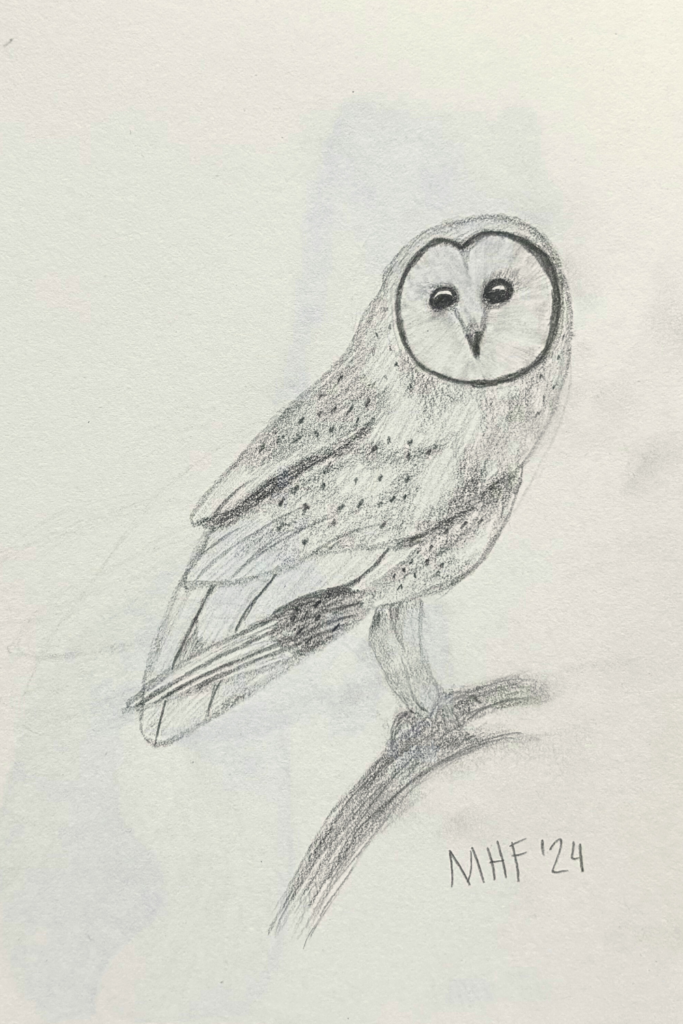
After drawing the owl (follow the instructions here) you are ready for the pencil shading aspect of your sketch. You will want to add the dark tones first.
- Around the face
- The eyeballs (Be sure to leave a part of each eyeball that is pure white paper, this is the reflection and makes it look more realistic)
- The beak point
- Parts of the wings
- Accents in the tree branch
Try to do it as dark as the reference picture above.
The B pencils (8B-B) will apply to the paper darker than the H pencils (H-10H) will. This doesn’t mean you can’t get the H pencils dark, you just have to press harder and apply more lead to the paper than you would with B pencils.
For the darkest tones of this owl, I would suggest using the 4B pencil. It will work better for the eyeballs, beak, and around the face if the pencil is sharpened.
It will look funny because the pencil shading will be splotchy. This is the point that I’m tempted to fill in everywhere on the bird, if you feel this urge you will want to ignore it. You will eventually color in everywhere to blend everything together so it doesn’t look weird. Trust the process when you have these feelings.
After the dark sections are colored in, put in the middle tone areas. The HB or 2H pencil would be good for these areas.
- Around the head
- Places on the wings
- The legs
- The V shape that connects to the beak
- The tree branch
- The talons
Now you need to add the light tones. This step also helps blend in the dark and middle tones so they don’t look choppy.
Take the 5H and lightly color over the entire bird. But you will want the pencil strokes going in the right direction.
For the inside of the face, you will want to turn the paper so the lines all seem to meet in the middle.
With the wings make sure they follow the general shape of the wing.
You can darken sections of the owl that need it and add the spots on the wings and body.
Once you are happy with it sign it!
Check out this post on how to do still life: 17 Great Still Life Drawing Ideas.

Pencil Shading Animals Featuring Sloths

To learn how to draw these cute sloths go to Beginners Guide: Easy Cute Animal Drawings.
Unlike the owl, you won’t start this pencil shading animals with the darkest tone first. Instead, you will start with the middle tone first.
To create the smooth effect of the fur on the baby’s face and the inside of the mom’s arms you will use a blending stump.
Blending stumps are literally just tightly rolled pieces of paper that you use to blend pencils or other mediums. You could make them yourself. I have not done that because the drawing kit I have came with some so I just never needed to.
If this is the first time you have used blending stumps you may want to practice on a separate piece of paper first. The B pencils blend better than the H pencils because you can’t see the original pencil marks.
To get the tones correct, apply the pencil more concentrated to the top of the head and less concentrated around the mouth and chin. This will help you get the light tones and dark tones in while blending.
Take the B pencil and fill in the mom sloth’s body. You don’t need to color in the whole body, just loosely apply the pencil. The more pencil you add the darker her body will be. Then rub the blending stump to smooth out the lead. If you would like it darker add more pencil and blend again.
Do the same to the baby’s head.
Now you will add the details of the fur. Take a sharpened 3B and add short pencil marks to the mom’s arms. The strokes can come off the body to create a furry look. On the back legs make the strokes shorter and more concentrated. You want them much darker to give the illusion of them being behind.
For the head, continue using the 3B pencil and create strokes around the nose and head. Turn the page so you can easily create strokes that go the correct way.
You may want to use a lighter pencil (HB or 2H) for the chin fur as this area of the face should be lighter.
The baby’s head is much simpler. Just add some fur on the top of the head and the snout.
With the eyes, I like to use a really dark pencil (8B). Outline the eyes and then draw a small oval or rounded triangle. Leave that shape white and fill in the rest of the eye with the pencil. Leaving the white area adds a gleam or reflection to the eyes. This not only makes them look real but prevents them from looking creepy or evil.
Use the 8B pencil for the nostrils and mouth. Use a lighter pencil (3B or B) to outline the snouts and color them in.
Now all that is left is the tree branch. Using a darker pencil (5-8B) apply a heavy layer to the bottom of the branch and one side of each splitting branch. Don’t color in the entire branch because you want the top section to be lighter to create a reflection and shadow on the wood.
Use the blending stump and smooth out the pencil on the paper. You can blend the pencil on all of the branches, just make sure that there’s a sliver at the top that is much lighter than the rest.
Take a step back to examine the pencil shading. See if you need to adjust anything and then sign it.
There you have it. Great job on your sloth pencil shading animals!
Pencil Shading of Cygnet
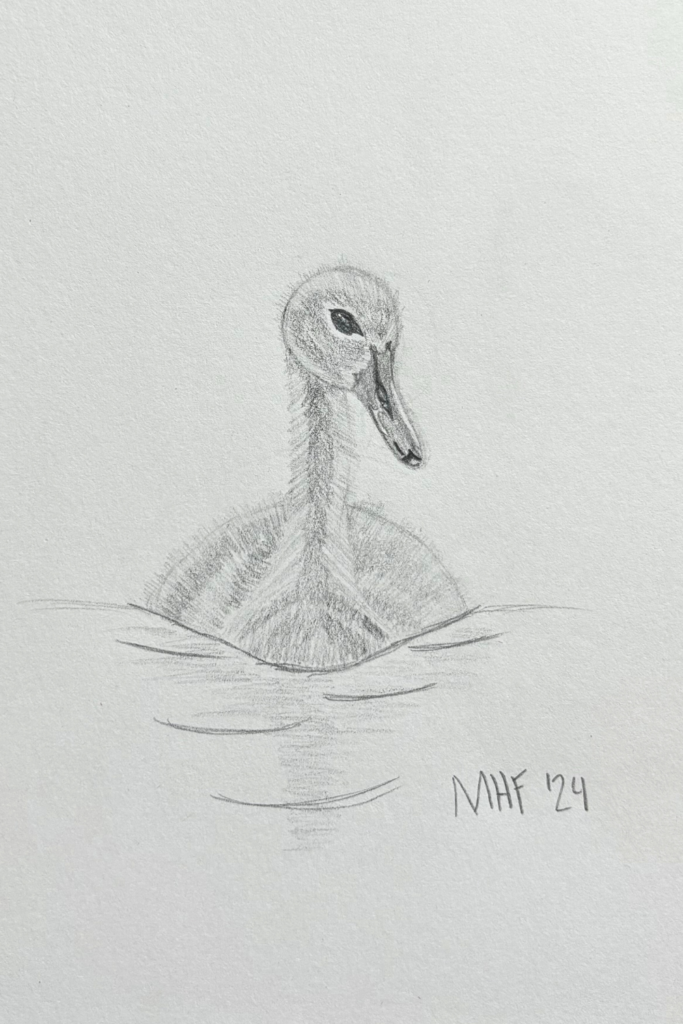
Follow the instructions in Beginners Guide: Easy Cute Animal Drawings to draw this cute cygnet or baby swan.
To create a fluffy look you won’t be using the blending stump for this guide on how to do pencil shading.
Make sure the HB pencil is sharp and start adding in the shadows and darker tones of the baby swan. Pay attention to your pencil strokes. You want them to make sense so it looks realistic. For example, you wouldn’t do horizontal strokes on the body, you want the angled outward. On the neck, start at the base of the head and draw the strokes angled out and downward.
Around the eyes keep a small white area. You won’t add any pencil to it. This will really make the eyes pop. Around the white area, you will color in the dark tone still using the HB pencil. Don’t fill in the entire head though. The area at the back of the head and around the bill are light tones.
Take your 5H pencil and start filling in the light-toned areas. You want to maintain the pencil strokes for the fluffy look so don’t just color in the cygnet. But you will want to overlap the dark-toned areas to blend them in. Follow the same direction as the dark tones.
Do the same thing with the head, but don’t fill in the white area around the eyes.
For the eyes, use a sharpened 8B pencil. Outline the eye and then draw a small circle and a small long oval at the top of the eyeball. Fill in the rest of the eye with the pencil.
The beak is a lot of fun because it has a lot of reflections on it. But like the body, you will add the dark tones first using a sharp 2B. You will need to look at your reference photo a lot to know what shapes to draw with the dark tones.
Use a light pencil (4-5H) and draw the shapes of the white areas. There should be a long slender one at the top of the bill and then a section on the side. After you have the reflection areas drawn color in the rest of the bill.
You want the bill to look smooth and hard so you will color it in differently than the body. Think of it like when you used to color as a kid. That motion is what you will be doing.
After you have finished with pencil shading the baby swan you are ready for the water.
Take the 4H pencil and darken the waterline where it hits the cygnet. Draw some ripples that come out from the body. (If you want to do them better than I did, draw them so each ripple line follows the same line as the swan’s body. Draw about four of them. This will make it look like the cygnet is swimming through the water.)
Still using the 4H pencil, create the reflection of the body. Scribble loosely the body and then the neck directly opposite into the water. You can darken the ripple lines afterward.
Once you are satisfied with how your pencil shading drawing ideas of this baby swan then sign it!
Learn how to sketch trees here: 5 Cool Trees Sketch.

Seal Pup Pencil Shading Drawing Ideas

Learn how to draw this seal pup in this blog post: Beginners Guide: Easy Cute Animal Drawings.
This pup is a great sketch to learn how to do pencil shading with blending stumps.
Like said before the B pencils are the best ones to use for blending stumps. I like to use the B pencils as this is the lightest one. Add the pencil to the seal pup applying more pencil to the right side. Use the blending stump to smooth the pencil shading.
Use various pencils to add the fur. In the lighter areas use a 4H or 5H pencil, the darker areas use 2B-4B pencils. Have some of the pencil strokes go off of the body so it looks fuzzy.
The snout is pretty dark so use a 4-5B pencil to fill that in. But for the darker areas of the snout and eyes use a sharpened 8B pencil. With the tongue being lighter use a 2-3H pencil, but notice that there are still light and dark tones within the tongue.
Great job with this seal pup pencil shading drawing ideas!
How to do Pencil Shading of Ferret

Before you learn how to do pencil shading for this ferret, check out Beginners Guide: Easy Cute Animal Drawings to learn how to draw him.
Like with the other pencil shading art, you will start shading the darkest tones first. This includes the following:
- Tops of the ears
- Eyebrows, eyes, nose, cheeks
- Under the chin/top of the neck
- Under the belly and the crease in the bend
- Top of the arms
You don’t need to use the same pencil for every area, but some pencil recommendations are using HB, B, 4B, and 8B.
I did the eyes differently in this piece and I really like it. I typically use 8B for the actual eyeball. This time I used 8B for the space around the eyeball (eyelids, tear ducts, etc.) and 2H for the actual eyeball, leaving an area completely white for the reflection. I did push pretty hard with the 2H pencil because I wanted it dark. With it having the area immediately around it darker it makes the eyeball stand out more.
With the dark tones on the face and arms you will want to create pencil strokes that look like fur. You do this by going in the same direction as the fur would grow and making the strokes short.
For the shadows on the neck, belly, and bend you don’t need to follow the direction of the fur. This is because shadows don’t create texture on objects. So you can do a horizontal direction when placing these dark tones.
You might be wondering why you aren’t adding the dark areas on the back fur that create the stripes. This is because you will create the stripes by overlapping your pencil strokes. Use the 2H pencil and create the fur on the face, the back, and the arms. Follow the direction that the fur would grow in. You can make vary the thickness of the stripes by overlapping the previous pencil strokes more or less.
For the belly of the ferret, you want it really light. So use the 5H pencil. But you don’t need to cover the entire area with pencil. You want enough pencil strokes to create the illusion of fur, but not so much that it looks dark. Having the white paper peak through will make the belly look lighter.
Even though you have already applied pencil to the shadow areas you will want to create the fur strokes within the shadow. When you are shading the belly just pretend the shadow isn’t there. You may not be able to see the strokes very well but it adds texture and depth to the animal.
After you are done touching up areas and are happy with it you need to add the whiskers. A 3H pencil will work great. You want the strokes thin and long. Add as many whiskers as you want. Just don’t get carried away because it is REALLY difficult to erase them since you would as be erasing everything underneath them as well.
Awesome job on your pencil shading art!
Want some more ideas on what to sketch? Check out 39 Things to Sketch when Bored: Ideas Easy to Hard and then practice your pencil shading skills.

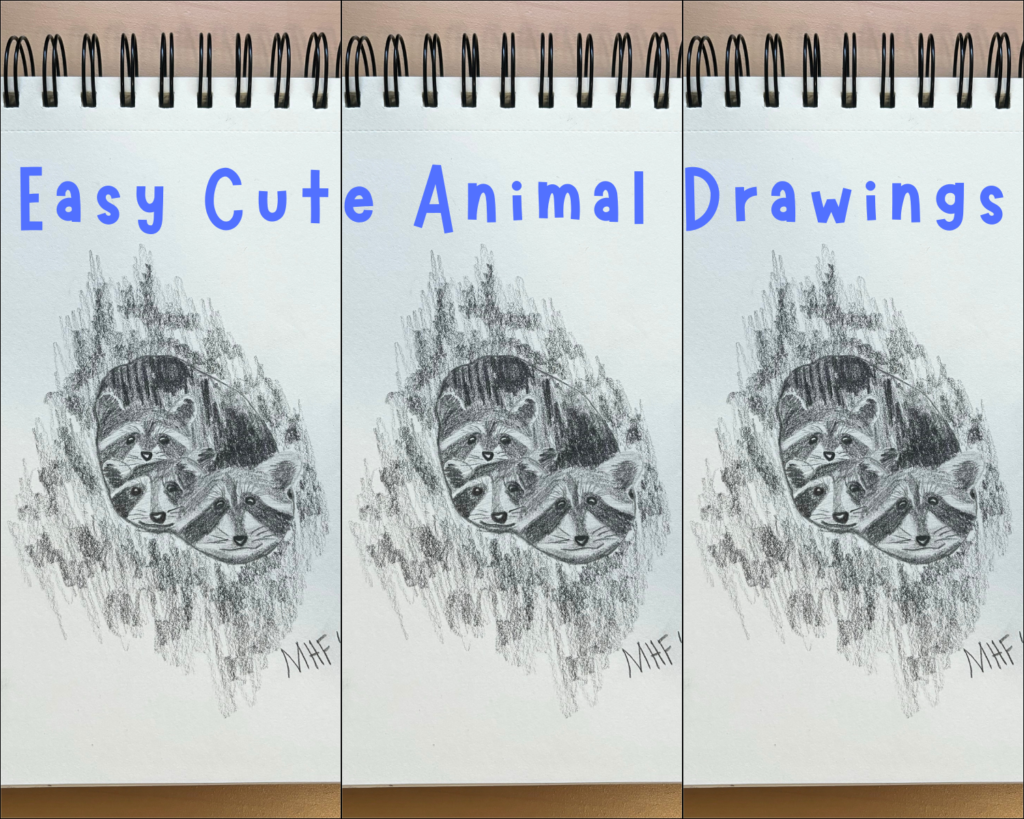
Pencil Shading Techniques for Raccoons

Check out how to draw these cute critters at Beginners Guide: Easy Cute Animal Drawings.
This pencil shading art is pretty dark so you be using mostly B pencils. Which means your hand will get messy and smudge the picture. There are a few ways to avoid this:
- Don’t touch your hand to the paper. This is really hard to do and to remember to do so I suggest the next way.
- Get a clean piece of paper to put your hand on that lays on top of your picture. It takes some time to get used to it because you have to slide it around with your hand and move it out of the way to see the entire picture, but it works really well at preventing smudging.
Pick one raccoon head to shade first and then you will repeat the process for the other two.
Start by shading the eyeballs first. You want them darker than the face mask so use the 8B pencil. Make sure you keep an area that is completely white in the eye.
For the mask area use a lighter B pencil (5-6B). Color in the areas on the face that are dark with that pencil.
The middle of the ears are dark so use the same pencil for that area. Use a lighter pencil (HB-2H) for the rest of the ears.
For the nose and mouth use the 8B pencil. Add a crescent shape or rounded triangle shape on the nose that you leave white for the reflection.
Each raccoon will be a little different so use different shapes for the eyes/nose reflection and make the tones darker on one and lighter on another.
After you are done shading all three raccoons add their whiskers using a sharpened B pencil.
Now you are ready to shade the tree.
Start with the inside of the hole. You want this area to be darker than the bark on the outside. But it is tricky becuase you also need it to be lighter/darker than the raccoons.
Take the 4B pencil and start shading the inside of the hole the same color. You are going to do the opposite of what you have done with all of the other pictures and shade the lightest color first. I like this pencil shading technique when I am creating wood because it doesn’t really matter where the dark tones go as long as they look like wood in the end. I find it easier for me to picture the wood in my head after I have a base color applied.
It is best if you apply the lead with the pencil on its side, not using only the tip.
After there’s a layer of pencil you can start adding the dark textures in the wood. The hole isn’t going to have as much detail as the outside of the tree because it’s dark and further away. However, you still want to create that depth using shadows and reflections.
You can continue using the 4B pencil and just push harder or you can choose a darker pencil like 5-6B.
Even though you don’t want a lot of detail you still want some to make it look like wood so you will follow the wood grain (vertical lines). Now just add in darker areas. Outline the hole as well to make it darker.
The outside bark will follow a similar process, but it won’t be as dark and the pencil strokes will be looser. Continue to apply the pencil on its side from light to dark. You can add knots in the wood to give it character.
Great job on finishing another pencil shading animal art!
This post is all about how to do pencil shading art.
Other posts you might enjoy:


Leave a Reply