Are you wanting to paint oil pastel flowers easy, but don’t know where to start? Follow these tried and true steps to create a beautiful pastel flower.
Disclaimer: THIS POST MAY CONTAIN AFFILIATE LINKS, MEANING I GET A COMMISSION IF YOU DECIDE TO MAKE A PURCHASE THROUGH MY LINKS, AT NO COST TO YOU. AS AN AMAZON AFFILIATE I EARN FROM QUALIFYING PURCHASES.
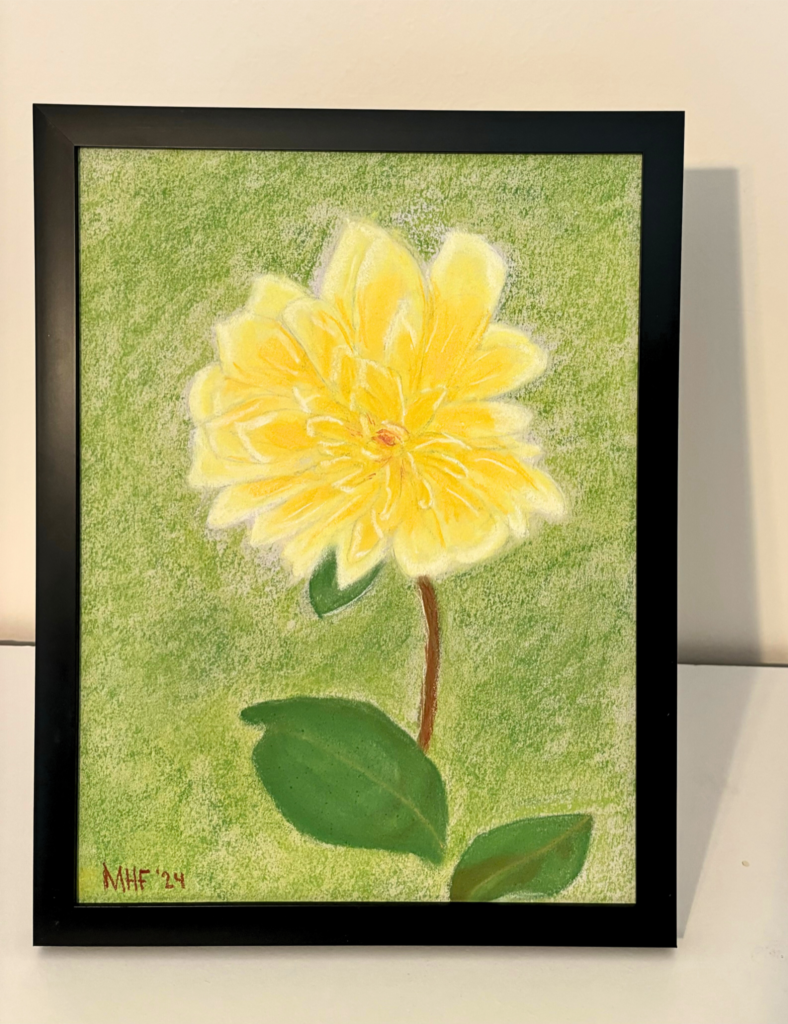
Starting an oil pastel painting is exciting whether it’s your very first pastel or your hundredth one. If you’re anything like me, it can be daunting to start the painting. Here are the 9 steps I used to paint an oil pastel flowers easy in just over 3 hours from setup to framing.
You are going to learn how to create oil pastel flowers easy, oil pastel flowers step by step, oil pastel techniques for beginners, and more.
After learning the steps and techniques used, you will be able to create a beautiful oil pastel flower yourself!
Supplies needed:
Optional: tape, a tablecloth, a paper cutter, and a frame.
Oil Pastel Flowers Step by Step
i. Setup
Luckily the setup for this oil pastel project is easy. You really only need paper, a pencil and eraser, and the oil pastels.
If you take the paper out of the sketchbook it will be best if you tape it down to the table you are working on.
Oil pastels can get messy from the flakes that come off the page so putting down a tablecloth or old blanket can help with the cleanup. I have been using the same plastic disposable tablecloth for years and it works great.
You will also want an apron or have on clothes you don’t care to get dirty. You will be using your fingers for the oil pastel techniques and if you have the habit of wiping your hands on your pants (that’s me) an apron will save you the hassle of worrying about your clothes.
Not a fan of the messiness of oil pastels but love how they turn out. Try oil pastel painting digitally. Check out how to do a digital oil pastel sunset here:
ii. Sketch
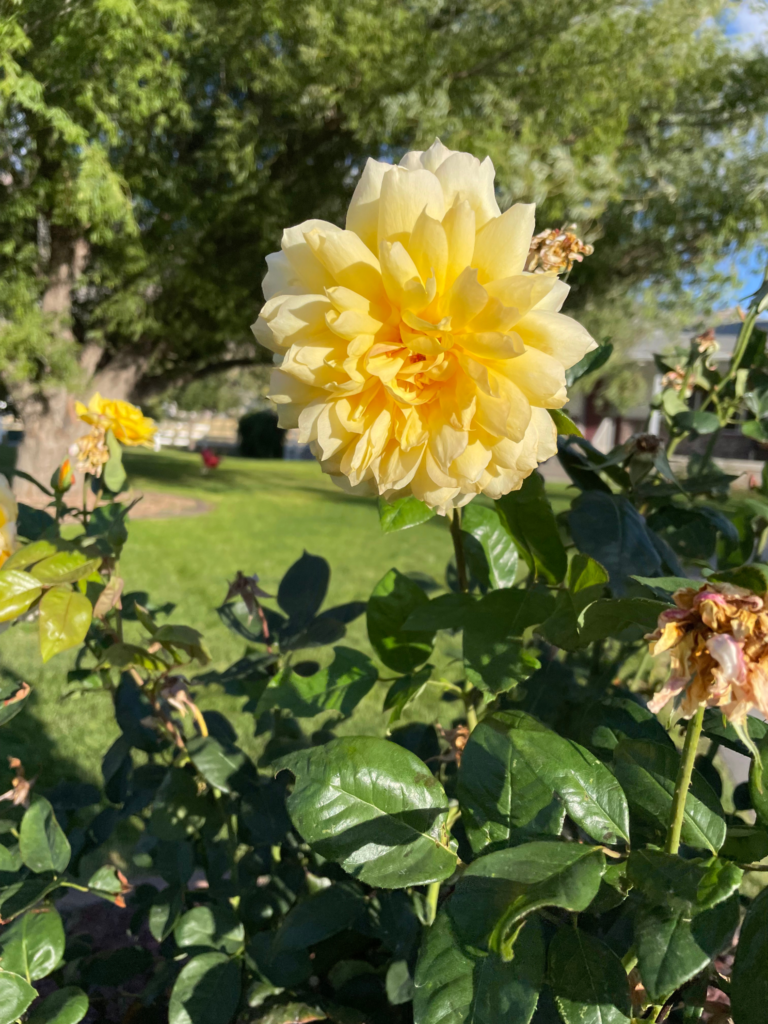
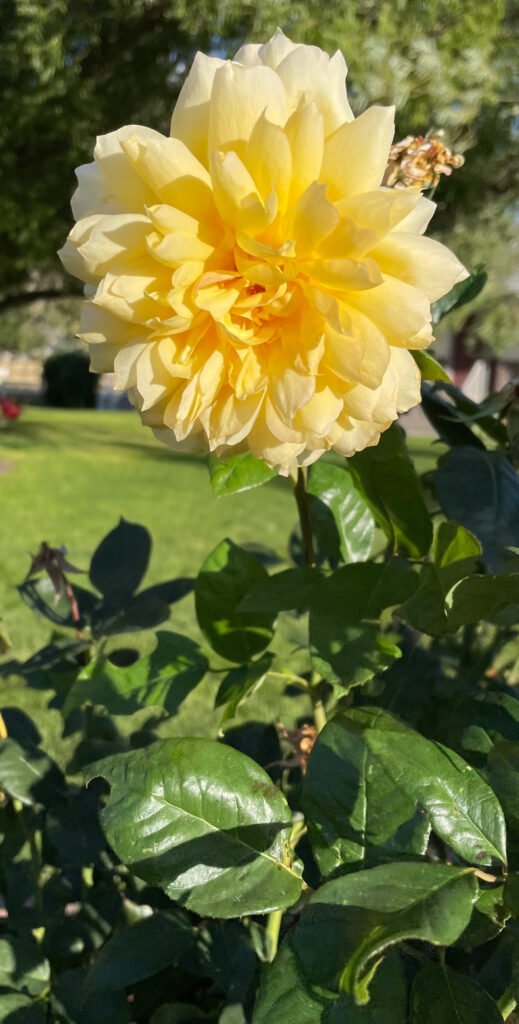
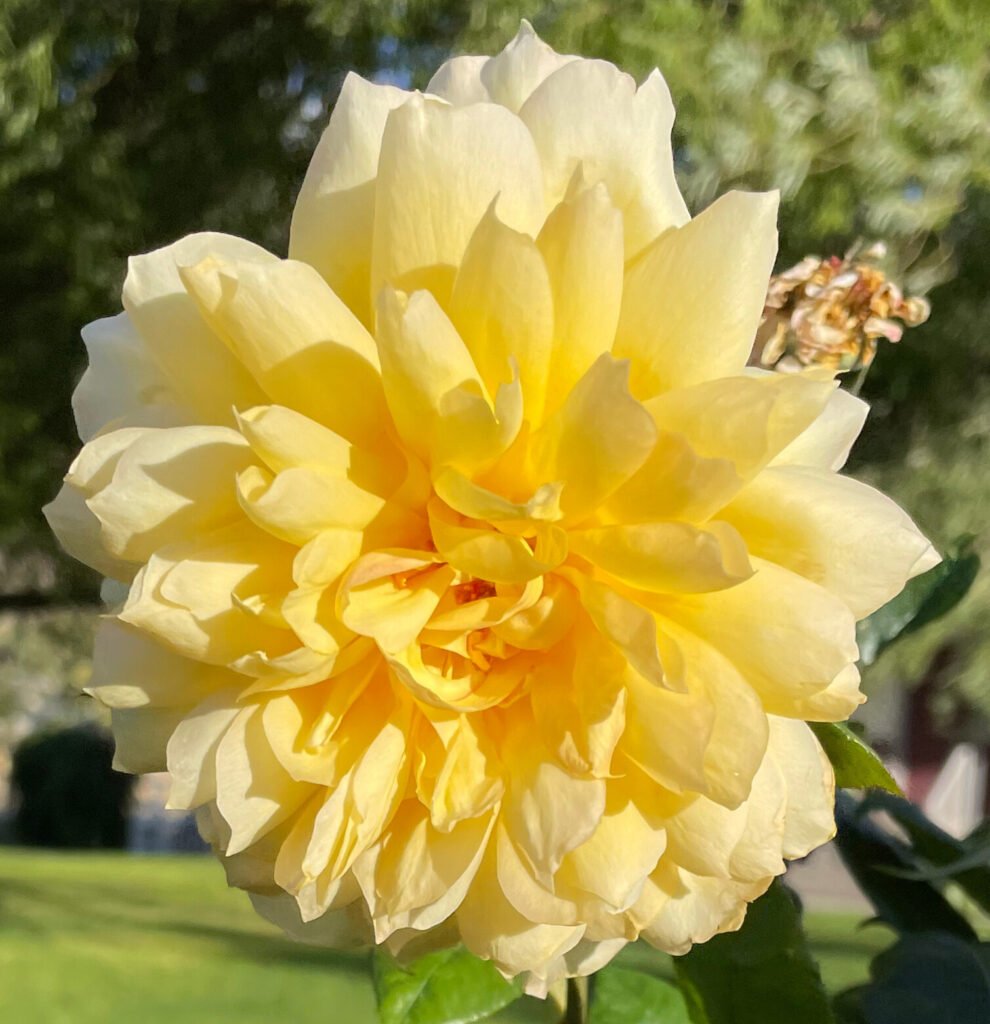
This is the photo that inspired this oil pastel flowers step by step. It was taken last year in one of my mom’s rose gardens. I like how bold the yellow is compared to the green background. If you have a picture of a rose that has a similar composition feel free to use that one with these steps.
When doing a sketch you want to start with loose overall shapes and then work your way to drawing the details.
Here are the pictures of the progression of the sketch.
The circles are the layers of the flower. This will help you when sketching the petals.
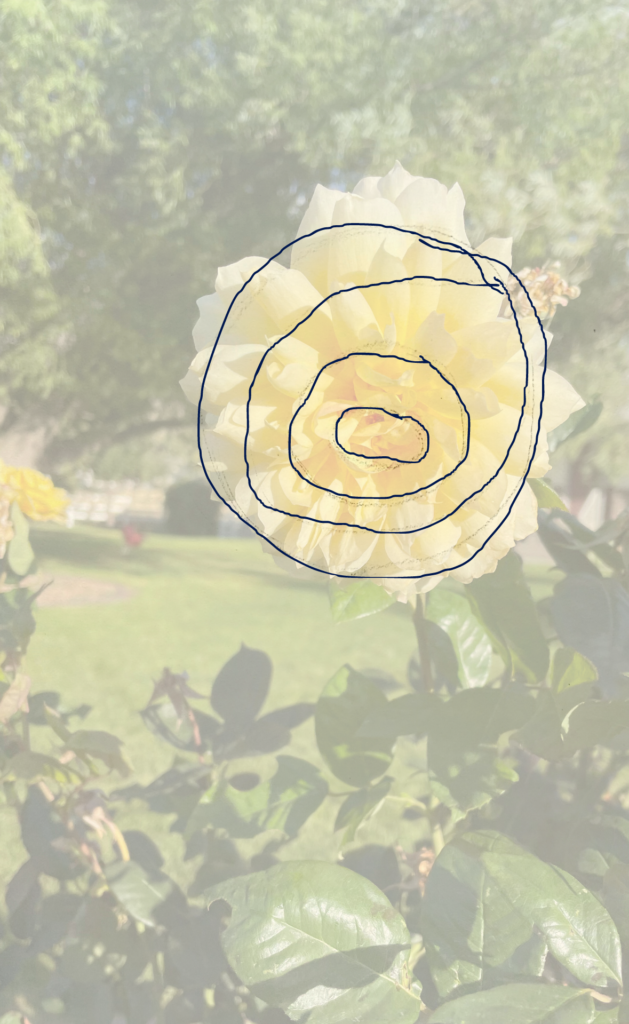
If you’re having a hard time visualizing the layers of the flower, here is an overlay of what I did. It isn’t perfect, but that’s okay. This is just the first draft, an outline for you to follow.
It is going to be very tempting to draw each and every petal perfectly. Instead, let yourself be loosey-goosey with the petals. Draw their overall shape and location but not the details.
Remember this is just a rough draft, it will be covered up entirely with oil pastels.
Why the time to draw the petals if you will paint over them? There are a few reasons for this.
- It gives you practice putting the petals on the page before the final painting.
- You will have a good sense of where they need to go when you start the painting.
- It tells you where the background ends and the flower begins, which is important for step three.
Sketch in the leaf shapes and stem.
When you are finished with the sketch, before you start using the oil pastels, take your kneaded eraser and remove any lines that aren’t needed. These would be the circles you drew at the beginning, any mess-ups, or overlapping lines. Then gently dab all the areas with pencil marks to lighten them. This helps the pencil not show through the oil pastels.
Practice your drawing skills with these 13+ Creative Drawing Ideas Easy.
iii. Background
To start the background choose a light green color. The oil pastel technique you will use to apply the pastel onto the paper is rubbing the side of the stick on the paper. Not only is this the most effective way to apply a lot of paint, but it also creates texture with the paint.
Depending on the type of paper you are using you may have a lot of texture from the paper show through, like my paper. However, the goal is to cover the entire paper with a layer of oil pastel paint.
After applying a good layer of green pastel you will want to blend it with your finger. This is where it starts getting messy.
Move the paint around the page to everywhere you want it to be. It can be tricky to get it in the small spaces between petals or leaves, but if you ‘color inside the lines’ don’t worry. You can easily cover it up when you apply oil pastels to the area of the flower.
To add more dimension to your background, choose a darker green and apply it the same way you did the light green just not as thick. You can do circles or squiggles then use your finger to blend similarly to create those shapes in the background.
Apply more of either color until you are happy with the result.
iv. Leaves and Stem
You will want to use the same oil pastel technique that we did with the background (using the side of the stick to apply the paint) as much as possible. You may need to break your stick into a smaller piece or for the leaf right next to the flower use the corner to apply the paint.
Once you get the base color on the leaves, you will start adding shadows and highlights. If you take a look at the reference photo again (close up) you will see that there is a highlight in the middle of the large leaf and underneath the small leaf.
Use white to make the highlights and a dark green-brown color for the shadows. You want the lines between highlights/shadows and normal leaf crisp so don’t do too much blending if any at all.
I didn’t want the shadow that cuts across the center of the large leaf so I took it out.
You can add more than the 3 leaves I painted but don’t add too many. The focus is on the flower, not the leaves.
To do the stem use the tip of a brown pastel. To smooth out the paint use your pinky finger, as it is the thinnest finger most of us have. That way you don’t mix the stem with the background too much.
You will want to add a darker or lighter color (I chose to use burnt sienna) on top of the base color to add texture and depth. When you do this don’t try to blend both colors to get a smooth effect. Use the corner of the color you chose and make a few lines of varying length down the stem.
From pictures and far away you won’t be able to notice the texture on the stem but it will make it look more life-like.
v. Outside Petals
If you examine the different colors of the flower you will notice that the outside petals are a white-yellow color. To capture the subtle color changes you will add a white pastel first then add a light yellow. You will want more white than yellow. Add yellow in the middle of the petals leaving the tips white.
You can now blend the yellow and white. Don’t worry too much about keeping the definition between petals. You will add that in step four.
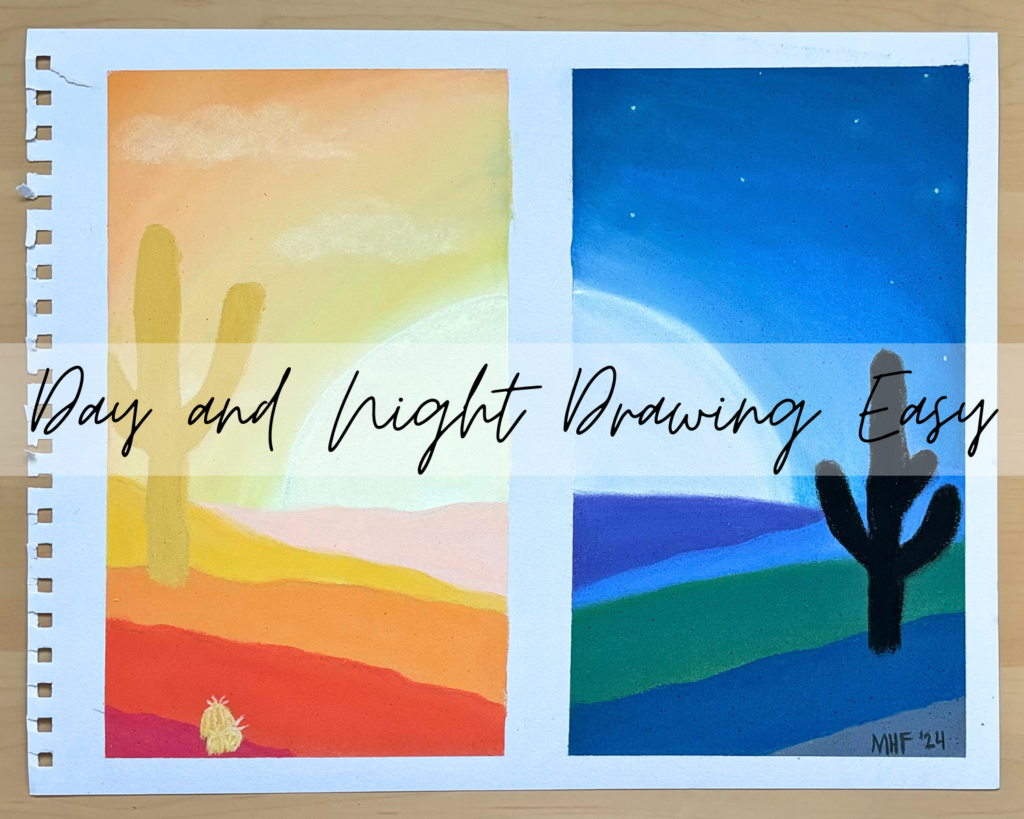
Want to learn more about oil pastels? Check out How to Paint an Oil Pastel Day and Night Drawing Easy.
vi. Middle Petals
The middle petals of the flower are a bright yellow. Use the same bright yellow you used in the previous step but this time you won’t add white.
Keep the outer petals separate from the middle petals by not blending them.
vii. Center Petals
After getting the outer and middle petals painted you will paint the center petals.
These petals are a deeper yellow than the other petals so choose your darkest yellow oil pastel. Apply this color to the center petals of the flower.
I decided I wanted to use some of that dark yellow for other petals. If you decide to do this, keep the dark yellow away from the tips of the petals because they are supposed to be the lightest part.
At this point you can do a little bit of blending but not too much. You want to distinguish between petals and to do this you won’t blend.
viii. Finishing Touches
The last oil pastel technique you will learn is how to add detail to your oil pastel flower.
You will use white to draw the tips of the petals, but you want an oil pastel stick with a sharp corner. You may need to break the stick to get the sharp corner.
You can add more of the bright and dark yellow in areas that need it in the same way to get the flowers’ colors to really pop. But you will want to do each petal individually and don’t have two petals look the same.
If you examine the reference photo you will notice that at the very center of the flower is a red-orange center. Grab a dark red and apply a few dots with the corner of the stick to create the center.
You can even add a few lines of dark red to the innermost petals.
When you are happy with how it looks from up close and far away it is time to sign it!
But signing isn’t the end. With oil pastels, you want to seal the paint. There are a lot of products out there to do this, but I use hairspray. It’s what my professional art teacher uses, it’s cheap, and odds are you have some lying around the house. It’s best if the hairspray doesn’t come out clumpy though. It’s usually the cheap stuff that works the best.
The oil pastel technique for sealing the painting with hairspray is spraying about 6 inches away from the painting. You will want to spray it completely, not too quickly but you want an even spread on the paper. You will do this 3-5 times, letting the hairspray dry between each pass.
This will seal the oil pastel, but it doesn’t completely keep it from rubbing off. If you smudge the painting the paint will move, just not as easily as before you sealed it. The best way to protect it is behind glass.
ix. Reflection
This last step is perhaps the second most important step, behind actually starting the painting of course.
Reflecting on your oil pastel flower and oil pastel techniques will help you actively improve your skills. I used to paint and paint and paint, never thinking about what I could do better. It was still a lot of fun and a good stress reliever for me. But as soon as I started examining how I could improve my skills they grew exponentially. I know that they will for you too.
So invest this time of reflection in yourself and your painting abilities. It will pay off.
i. What is your favorite part of this painting?
Do you like the colors in the background, the definition of the petals, is it how much you have improved in your sketching ability, etc?
ii. What is your least favorite part?
Are the shadows off, is the composition wacky, or do you wish you had a different signature?
iii. What will you do differently with your next oil pastel flower painting?
Take what you liked least about the painting and work on improving that with your next project. Or if you really liked an oil pastel technique you used do it again.
iv. How have you improved since your last piece?
Everyone can use a confidence boost now and then. Use this as an opportunity to be proud of the work you have put into improving your skills.
This post is a step by step approach on how to paint an oil pastel flowers easy.
Do you like the oil pastel flower step by step layout? Check out these other step by step posts by MHF Paints.











Leave a Reply