Are you looking for a step by step to painting oil pastel flowers? These seven easy steps are the tried and true method to creating one!
Disclaimer: THIS POST MAY CONTAIN AFFILIATE LINKS, MEANING I GET A COMMISSION IF YOU DECIDE TO MAKE A PURCHASE THROUGH MY LINKS, AT NO COST TO YOU. AS AN AMAZON AFFILIATE I EARN FROM QUALIFYING PURCHASES.
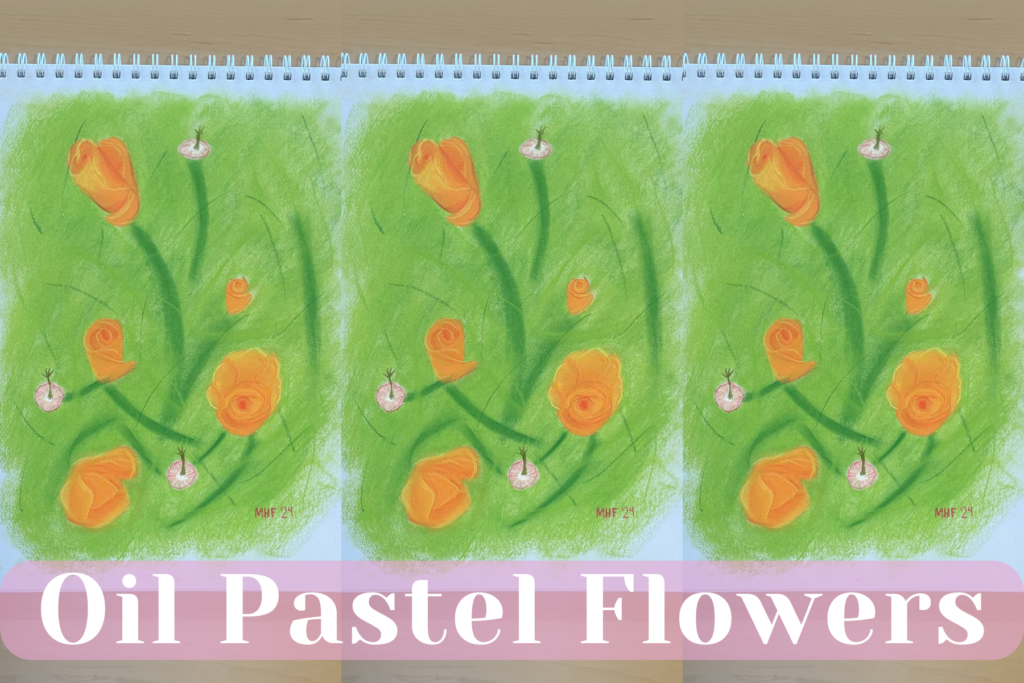
Oil pastels create bold and beautiful masterpieces, but can be intimidating when first starting out. Learn how to create oil pastel flowers artwork in seven easy steps. I followed these steps when creating this oil pastel inspired by a photo I took of wildflowers while on a hike in Oregon. I hope you enjoy painting this as much as I did!
You will learn about oil pastel flowers, oil pastel sets, wildflower sketches, oil pastel background, oil pastel grass, oil pastel techniques, oil pastel sealer, and more!
This post is all about what an artist needs to know when painting oil pastel flowers.
Oil Pastel Flowers in 7 Easy Steps
Supplies needed:
i. Wildflower Sketches
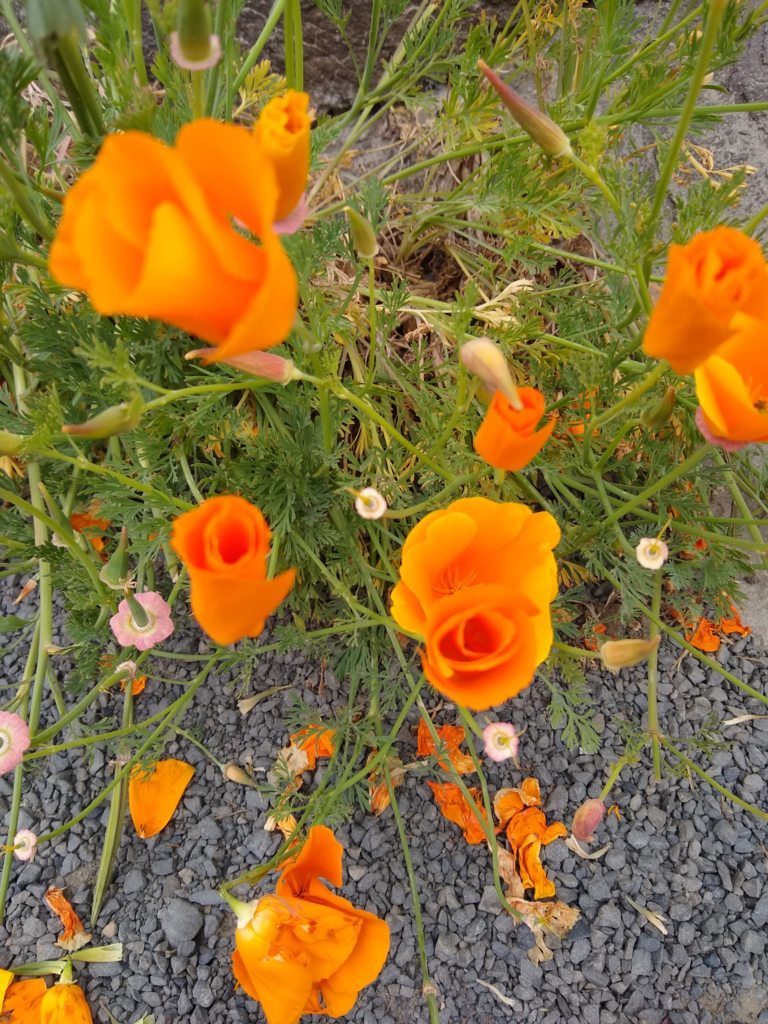
I chose this photo to be the reference for our painting because of the bold orange and yellows that contrast the green grass. Because I like the contrast of the orange and green I decided to replace the gravel with grass. I chose five of the orange flowers and three pink ones to paint to simplify the painting.
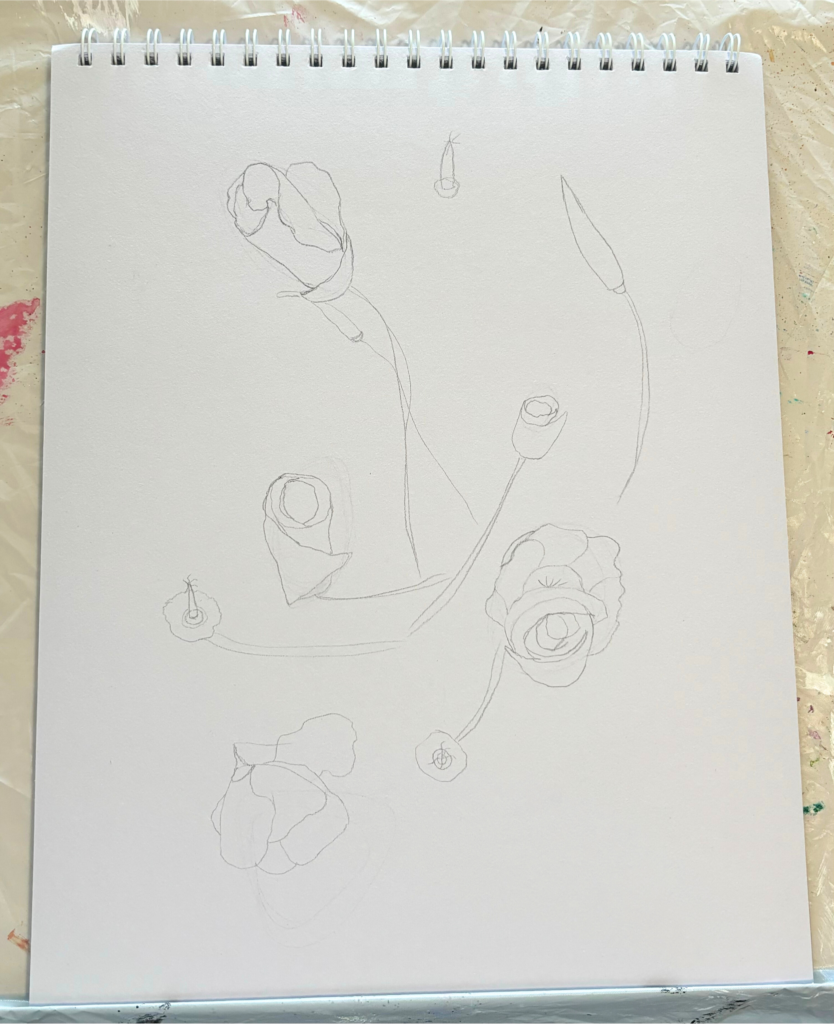
Once you decide which flowers you want in your painting start sketching them. You don’t need to get super detailed in your wildflower sketches because after you apply the oil pastels you won’t be able to see the sketch. However, take this time to practice drawing the flower so you know how to do it when you are using the oil pastels.
The biggest advantage of doing your sketch is you know where the flowers and stems will be on the page. It’s a lot easier to move the flowers around when they’re in pencil than when they’re in pastels.
In my sketch, I added the buds of flowers that hadn’t blossomed yet but ended up taking them out in the next step. You can keep them if you would like.
ii. Oil Pastel Background
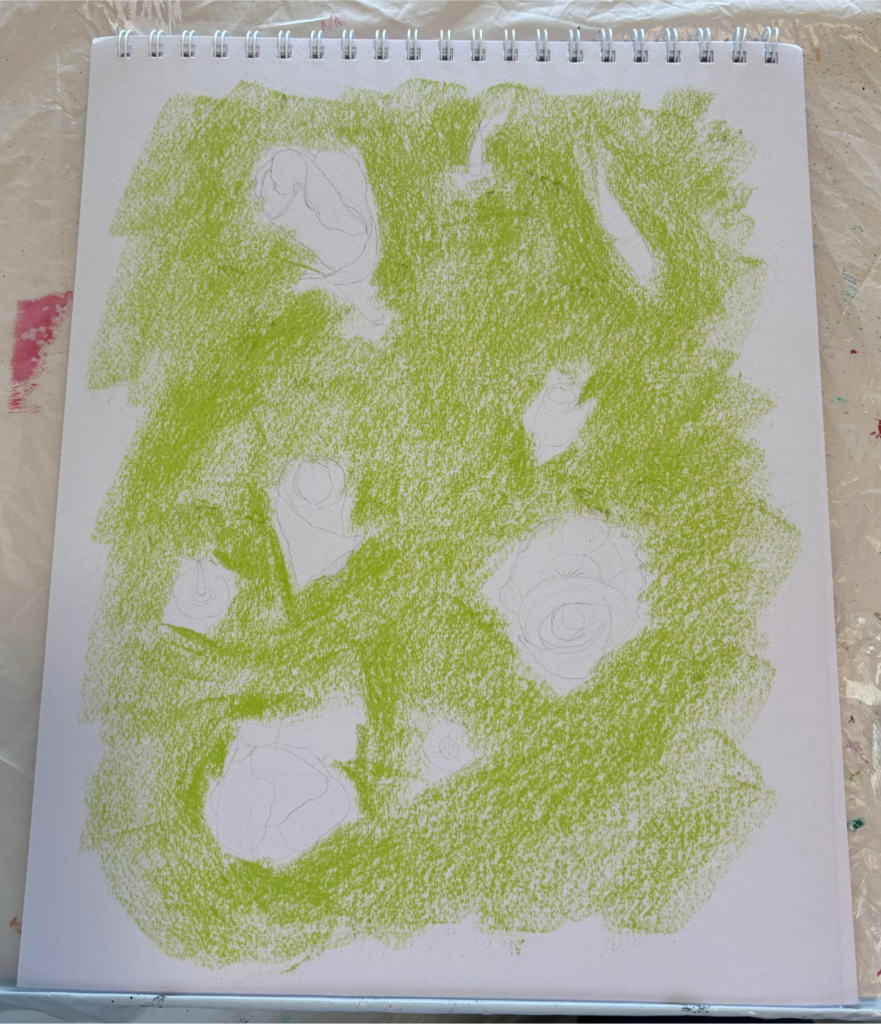
To start painting the oil pastel background you will want to get a good layer of color on the paper. Use a light green color and apply it around the edges of the flowers you sketched. A good oil pastel technique to put the pastel on the paper is rubbing the long edge of the stick along the paper. This will cover more surface area in less time.
Once you have a good amount on the page blend it with your finger. You may need to touch up areas by adding more paint to cover the paper completely.
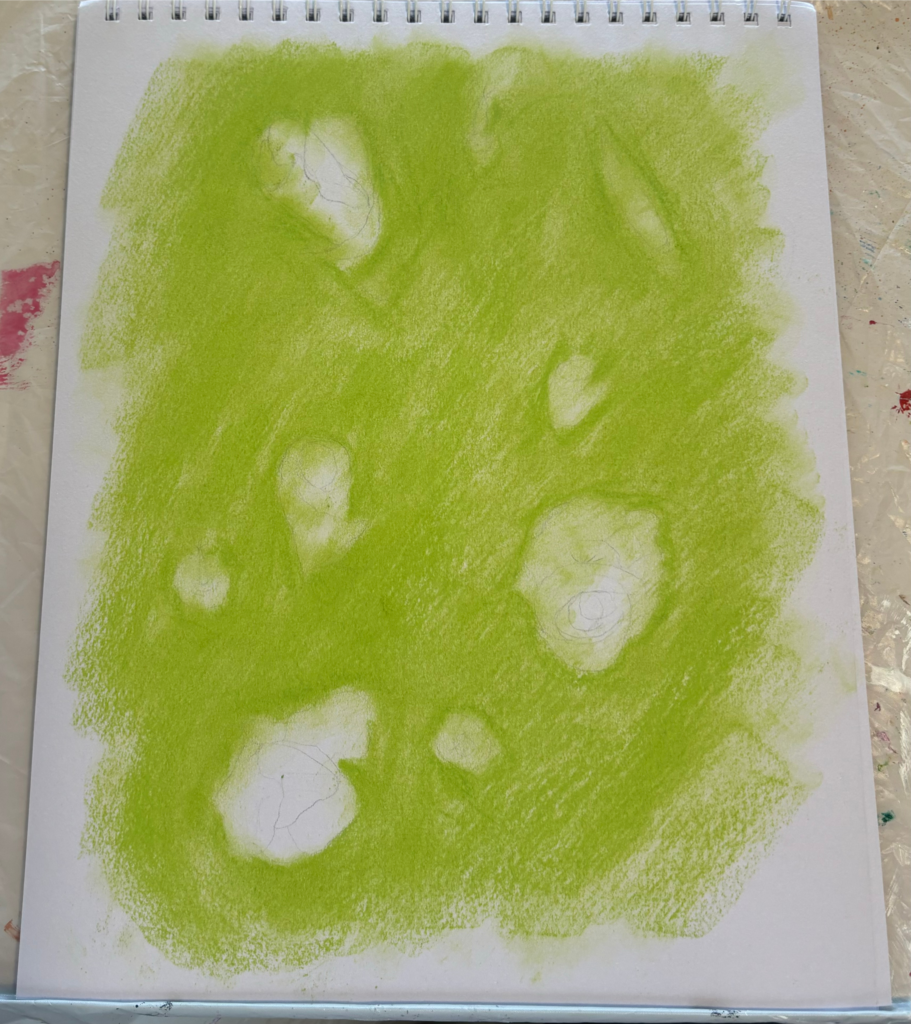
Touch up around the edges of the flowers so you can’t see any of the paper between the background and the flowers. It’s okay if you smear some green into the flowers. You will be able to cover it in step iv. Oil Pastel Flowers.
Do you not like the messiness of oil pastels but love how they look? Try digital oil pastels in this guide to Types of Digital Art:

iii. Oil Pastel Grass

If you would like the oil pastel grass darker than the prior step apply a thin layer of darker green on top of the light green and blend it together. I did this to create a green that I liked better and to add some depth and variety to the background.
Once you are happy with the base color then you can start adding blades of grass and the flower stems.
Add the stems first by using the top square part of the oil pastel stick. Draw a straight line where you want the stem to be. Use your pinky finger to smooth out the paint. You won’t want to blend it too much or won’t look like a stem.
Ensure that each flower has a stem so it isn’t floating in midair.
You will use both shades of green to add blades of grass. Use the corner of the pastel stick and draw lines of various lengths and angles throughout the painting. Don’t blend these lines. You want them thin and crisp to give the illusion of grass.
Have the blades of grass overlap the stems to give it more depth.
iv. Oil Pastel Flowers
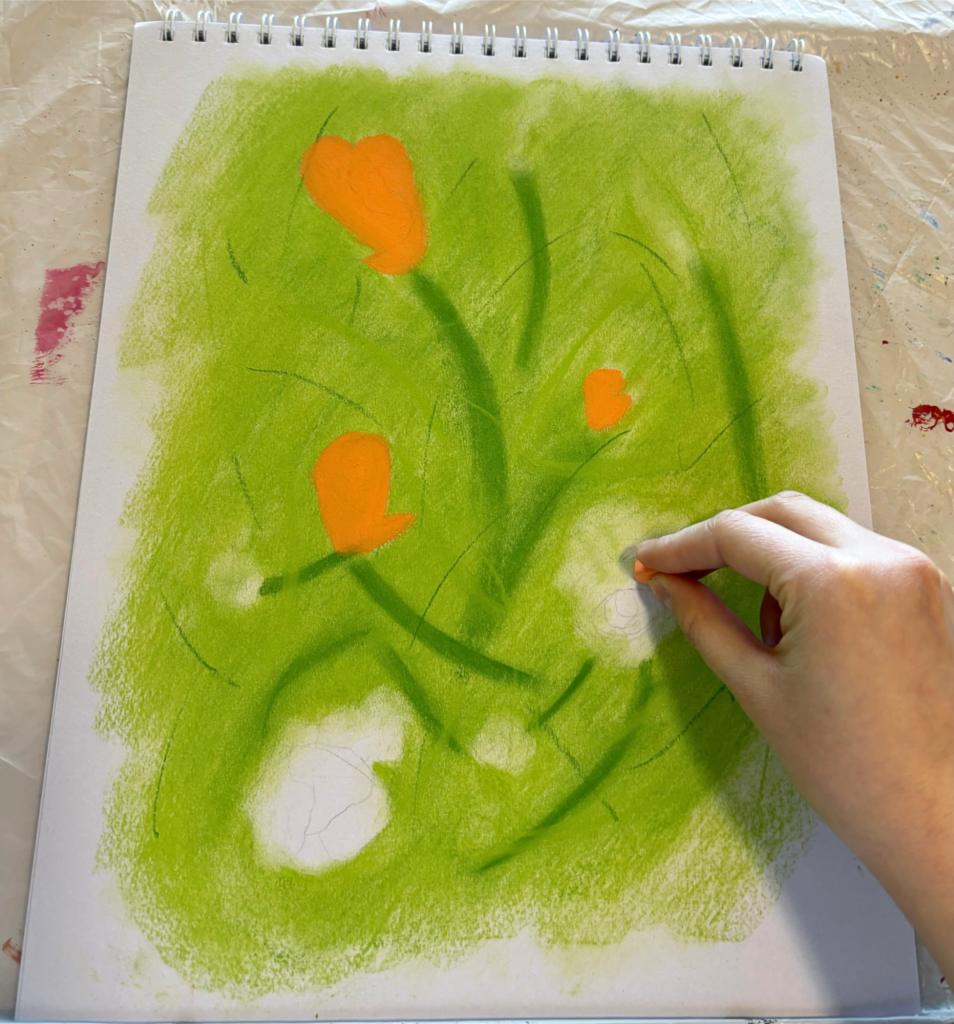
Grab an orange pastel stick and fill in the orange flowers. I find that outlining the flower first and then filling it in is easiest.
Here you will want to be more careful to not mix the orange and green colors.

You can paint the pink flowers now or finish detailing the orange flowers before starting them. The latter is what I chose to do.
Practice your art skills with this Oil Pastel Flowers Easy Painting:
v. Oil Pastel Techniques on Detailing
To create the shadows you will want a red and the highlights a yellow. While looking at the reference photo add yellow and red where it should be on the flowers.
Typically the yellow will be at the tips of the petals and the red will be in the centers.
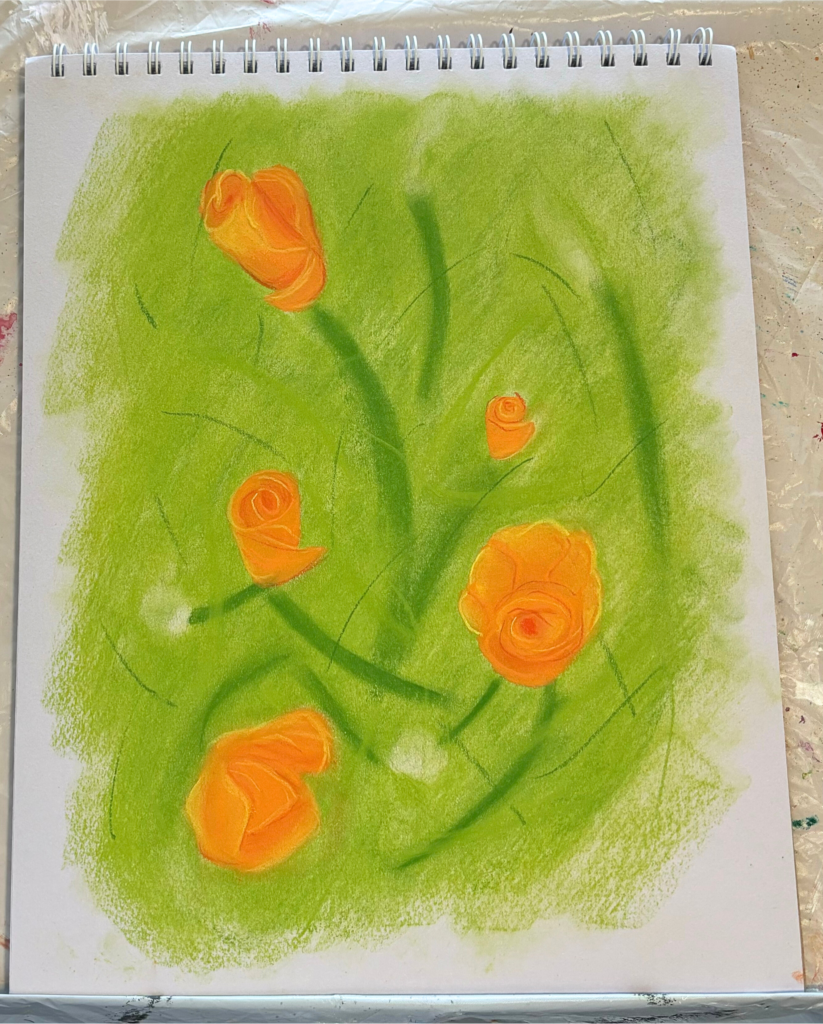
The first coat of red and yellow you will want to blend a little bit. Try to keep the blending to just that petal as much as possible.
After you get a good base color for the petals you will add in the details. These you won’t blend.
Using the corner of the pastel stick outline the tops of the petals with yellow. If they are squiggly that’s okay. Flower petals aren’t perfectly smooth so it will give it a more authentic look.
Take the red using the corner tip and outline the shadow areas. These will be where a petal is wrapping around and it meets another petal or the center of the flower or the underside of a curve. A little goes a long way but play with what looks good. If you don’t like what you did, just blend it and restart.
Do this for every orange flower.
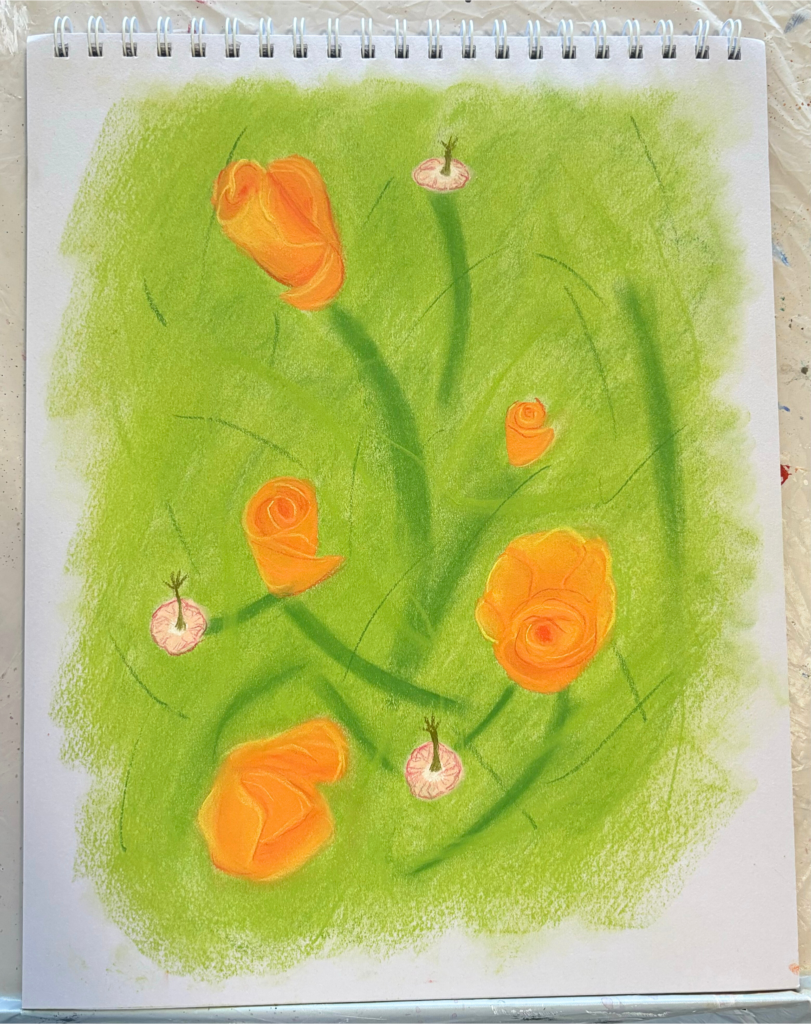
For the little pink flowers use a soft pink as their base color. The middles are white so add a small center of white. When painting something so small I like to use the corner tip of the pastel stick as it gives me more control of where I am applying paint.
With a dark red or dark pink (try out different colors on scratch paper because oil pastels can be deceiving at what color they are when applied to paper) use the corner tip to outline the edges of the flower and the petals. Once again it’s better if it is squiggly rather than smooth lines. If you would like more detail in the petals draw more squiggly lines.
The pink flowers have a strange pistol coming from their centers. Use a green-brown color to create these. In the reference photo, they are very thick but I didn’t like that. So I made the pistols thinner while still giving them the little finger-tentacles at the tops.
vi. Signature
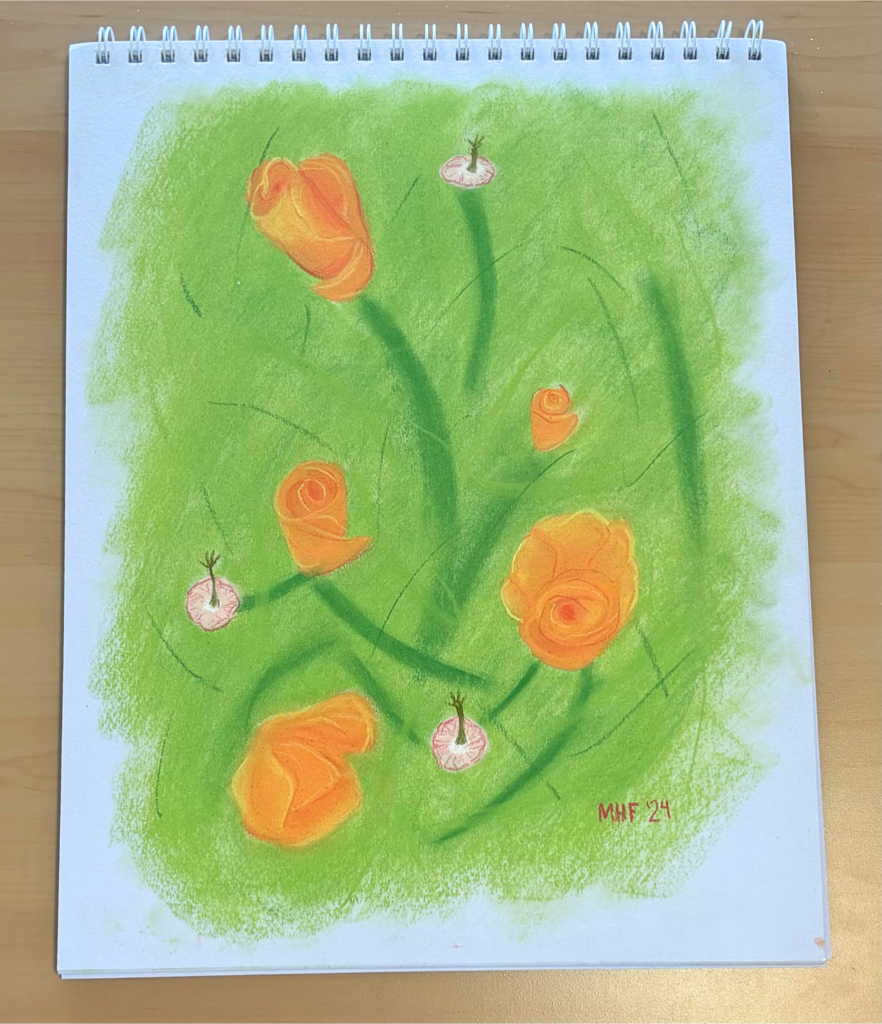
Once you are happy with how the entire painting looks then you are ready to sign it.
This can be a full signature, initials, a symbol representing you, etc. And it can go anywhere on the painting. I like to sign in the lower right-hand corner of my paintings but will move it if it works better elsewhere.
It really doesn’t matter what or where you sign, but it is important that you sign it.
By signing it you acknowledge that it is complete and you take ownership of the painting. Be proud of it! You worked hard on it.
vii. Oil Pastel Sealer
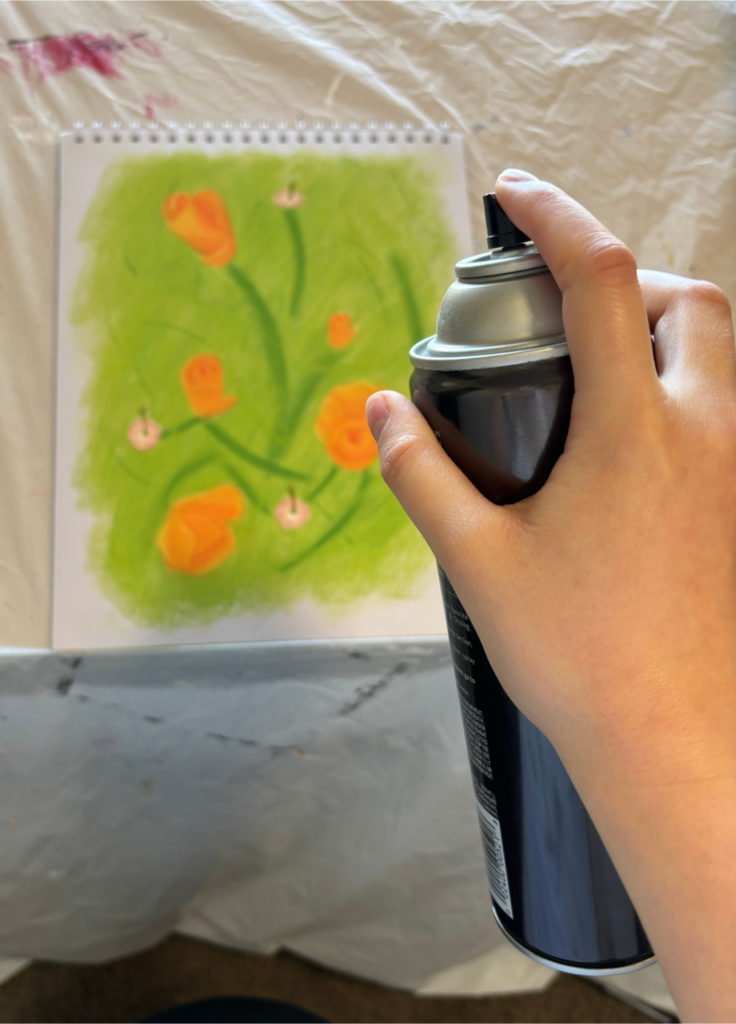
The last step of any oil pastel painting is sealing it. Sealing the paint helps prevent it from smearing and getting ruined. The best and most effective “sealant” is putting it behind glass. But I also seal it even if I am planning on framing the painting because it helps prevent the oil pastel from sticking to the glass.
There are several different products out there to do this. However, a cheap and easy one is hairspray. This is what I use, it’s what my art teacher uses and it works.
It’s best if the hairspray comes out smoothly, not in globs. If you don’t want to go buy a brand new can then clean off the nozzle before spraying.
You will want to spray about 6 inches away from the painting. Cover the entire page and then let it dry. It takes 30-60 seconds to dry.
Repeat the process 3-5 more times.
It’s important to note that if the painting is touched paint can still be smudged and come off, it just doesn’t do it as easily as when it wasn’t sealed. This is why I like to put my oil pastels behind glass after sealing them.

Reflection
Use these questions to reflect on the oil pastel flowers masterpiece that you created to learn from the experience to improve your skills:
i. What is your favorite part of this painting?
Did you enjoy getting messy or are you impressed with the details of the flower petals or did you like the depth of the grass?
ii. What is your least favorite part?
Are you not satisfied with the composition or did you not like getting messy or do you need to work on your signature?
iii. What will you do differently with your next oil pastel painting?
Next time will you spend more time on your sketch or will you cover the entire page with paint or take breaks when you get frustrated?
iv. How have you improved since your last piece?
Has your use of colors improved or are you getting better at seeing shadows/highlights or were you able to finish a painting?
I hope you are proud of the oil pastel flowers painting you have created! Thank you for bringing beauty into this world!
I would love to see how your painting turned out! Share it with me on Instagram (@mhfpaints) or email (mhfpaint@gmail.com).
Did you like this step by step approach to painting? Check out similar posts:


Leave a Reply