Are you on the search for the secret to human figure drawing? Well, hold on tight, my friend, because I’ve got the insider tips that will take you from ‘ehh’ to ‘WOAH’ in no time!
Disclaimer: THIS POST MAY CONTAIN AFFILIATE LINKS, MEANING I GET A COMMISSION IF YOU DECIDE TO MAKE A PURCHASE THROUGH MY LINKS, AT NO COST TO YOU. AS AN AMAZON AFFILIATE I EARN FROM QUALIFYING PURCHASES AT NO EXTRA COST TO YOU.

Let me know if this sounds familiar: While scrolling, your mind is blown away by an amazing drawing of a human figure, and you want to do that, but when you’ve tried before, it was a disaster. Well, I am here to tell you that you CAN learn to blow someone else’s mind with your own human figure drawing. After going through that same experience and overcoming the fear of actually starting again, I have learned things I wish I knew the first time I tried.
After reading and applying these secrets to your artistic practice, you will be well on your way to creating a human figure drawing that you will want to show off.
The 3 Secrets to Human Figure Drawing
Supplies Used
Charcoal Drawing
- Soft Charcoal Stick. If you already have a drawing set kit, there may be one of these included. Or if you would like to use one similar to art classes, you could try a Willow charcoal stick.
- Kneaded Eraser. I really like the Prismacolor kneaded eraser. They are soft, malleable, and effective in erasing.
- Paper. Newsprint works really well, but you could do essentially any paper. If you are using charcoal, it needs to be rougher so that the charcoal can stick to it.
Digital Drawing
- Procreate app. There are many digital art apps out there, but Procreate is amazing and the one that I swear by.
- Apple Device. If you are using Procreate, there are a few different options depending on your device. I like my 13-inch iPad Pro with an Apple Pencil.
Table of Contents
Finding a Figure Drawing Reference
So you’re ready to start drawing a person, but who do you draw? Should you just hop on a bus and start sketching strangers? You could, but you might find yourself alone pretty quickly. Plus, live models are trickier to draw because they move.
As a newbie, the best way to find figure drawing references is through stock photos. Stock photos are nice because you can search for what you want. Typing in “woman standing” or “man sitting” you will find lots of good references. You want models who have tighter-fitting clothing so that you can see the shape of their bodies. They can wear loose clothing, but then you have to guess what their body is doing, which is difficult even with lots of practice.
Canva Pro has stock photos you can use, or you can Google “stock photos of a man standing”.
Note: If you don’t have permission, you still can’t display, use, post, publish, etc. the stock photos. Make sure you follow their rules, policies, and regulations.
The easiest pose is going to be the person standing with their hips in line and arms at their side, looking forward.
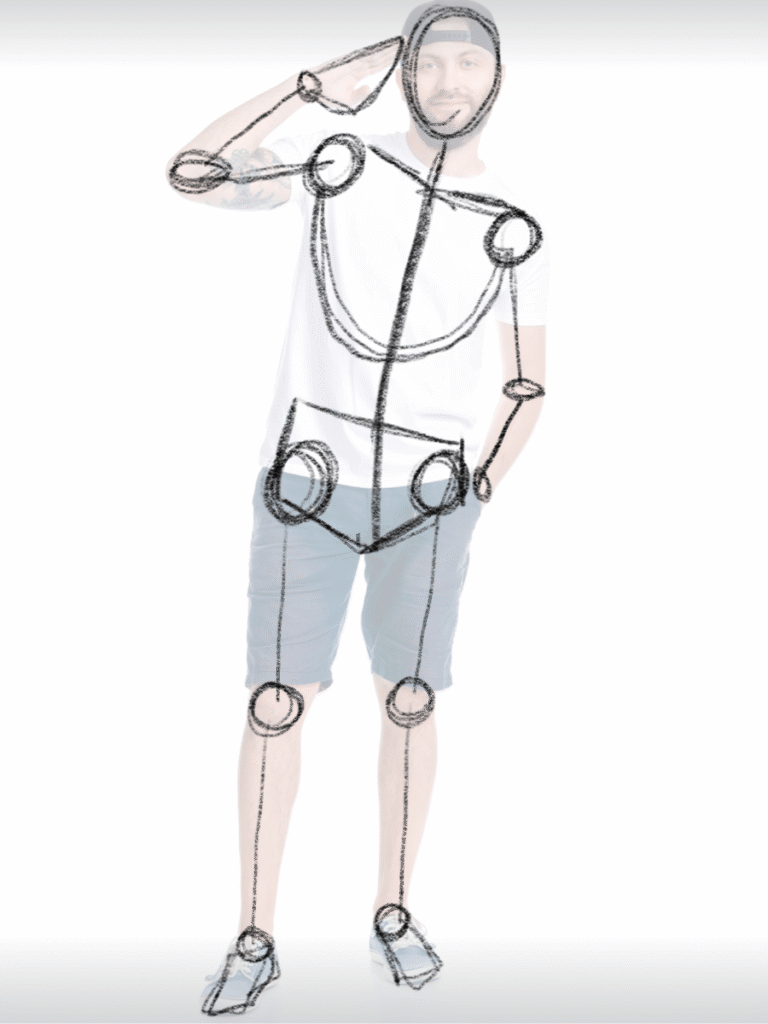
A medium pose is someone sitting down, legs uncrossed, or standing with their hips at an angle and their arms crossed.
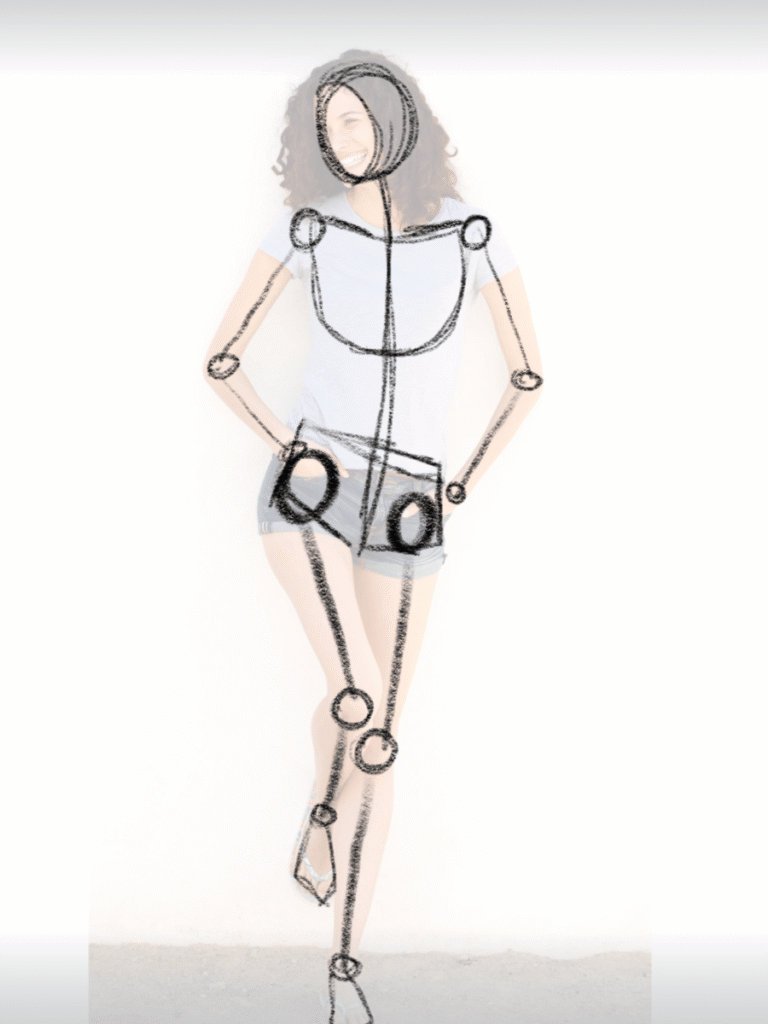
A hard pose would be where the person is sitting criss-crossed or their body is at a weird angle.
Sketching men vs women is different. I find drawing men to be more difficult, but that is not the case for everyone.
Secret 1:Learning the Tricks to Figure Stick Drawing
If you are using Procreate, you can upload the photo (legally) you chose into a new sheet. Then sketch on a new layer and turn the photo layer opacity down to around 50% so you can draw right on top of it. The Carbon Stick at about 1% thickness works really well.
If you are using charcoal and paper, have the picture close by so you can reference it frequently. This way is more difficult because you won’t be drawing on top of the photo. You will need to focus on proportions more.
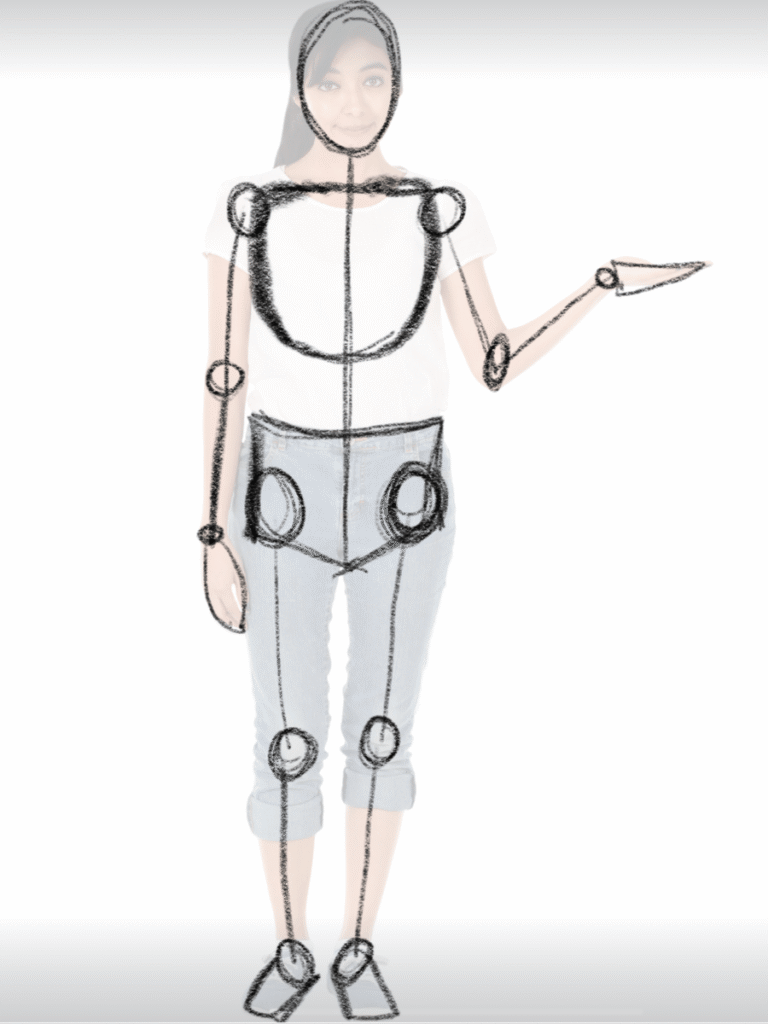
The first thing you will want to do is create a stick figure drawing. You do this by drawing the skeleton, or bones, of the person. If you aren’t familiar with how a skeleton looks, studying one before and during this sketch will be very helpful for you.
All of the joints and head will be drawn as circles. The bones and spine are lines. The hip and rib cage are trapezoidal/rectangular shapes.
Tips for Stick Figure Sketch
- The hip joint will be the largest circle, followed by the shoulders and the knees. The elbow, wrist, and ankles are the smallest circles.
- Draw the joints first and then connect them with the long bones (drawn as straight lines).
- The top of the rib cage will be the collar bones.
- The hip bones mostly follow the underwear line of a person.
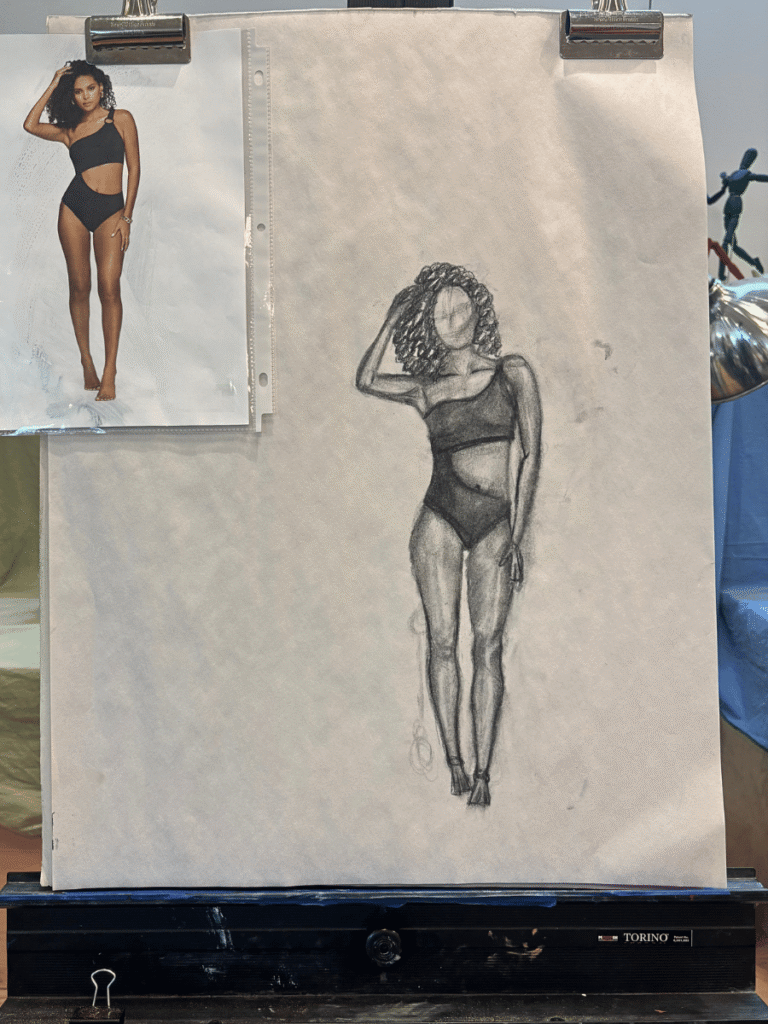
- While sketching, make a note of how one joint relates to another. For example, in this photo, her shoulder joints are aligned with her hip joints. But the right wrist is about halfway between the left shoulder and the elbow joint.
- In this post, we won’t be going over how to sketch hands, feet, or faces so keep those very generic if you draw them.
Now it’s time to practice sketching stick figures.
This guy is slightly harder. Pay attention to his slightly leaning spine and the angles of his arm joints.
Here are some other ideas to improve your drawing skills: 17 Great Still Life Drawing Ideas.

Pay close attention to how her joints move. She’s a bit more tricky than the others.
Secret 2: Learning how to Draw Form
After you are happy with your stick figure, it is time to draw the muscles and skin. The secret is that the better you know the muscular system the easier and better you will be at this part. However, even with a basic knowledge of the big muscles is enough for the beginning.
So what are the big muscles?
- Biceps and Triceps are in the upper arms
- Buttocks for the butt
- Quadriceps or thigh muscles are in the front of the upper leg
- Gastrocnemius or calf muscles are in the back of the lower leg
You don’t necessarily need to sketch out every muscle, but it can be helpful, especially if you have a muscley person.
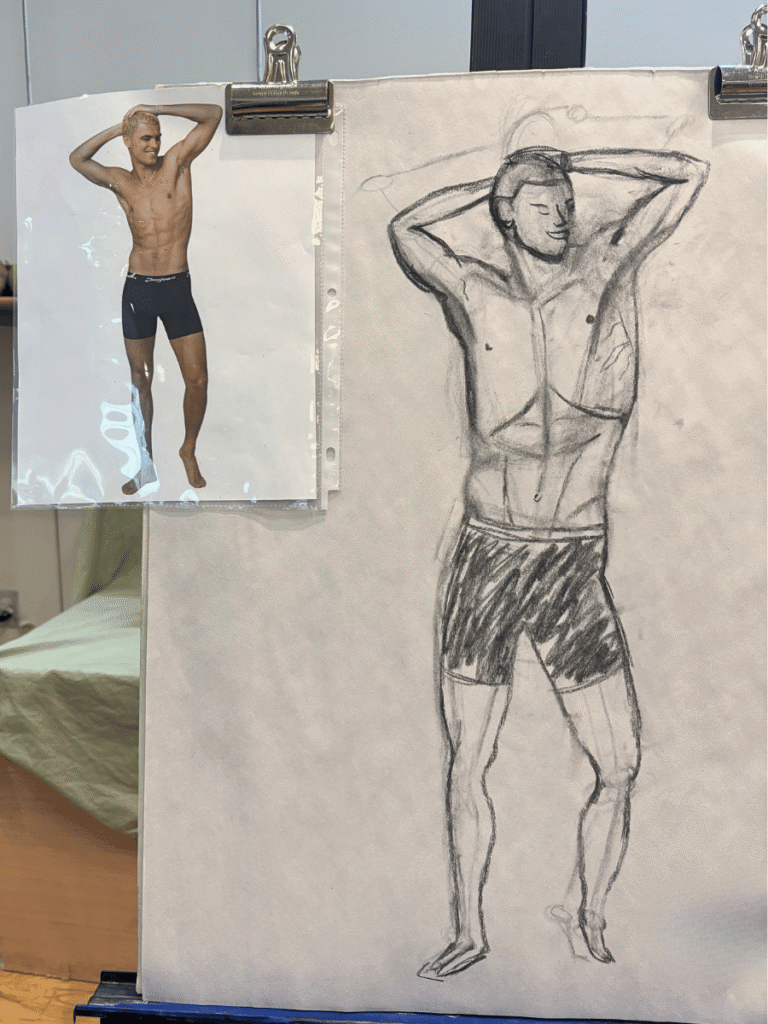
Tips for Drawing Form
- Focus on visualizing and drawing muscles, not skin.
- You can shade a little bit while you go. This helps define the legs and shoulders so it is easier to see what you need to fix.
- If you are doing a charcoal pencil sketch, shading just naturally happens with erasing and accidental smudges.
- Look at your reference photo often, like at least once a minute, and every 10ish minutes, put down your pencil and compare the photo to your drawing.
- What looks off?
- Are the legs too short or too long?
- Is the arm at the wrong angle?
- Is the torso bent strangely?
- Don’t be afraid to change everything in order for everything to look right. This might mean that if the torso is too long, you will need to raise the legs to fix it. It can be frustrating, but in the end, it is totally worth it!
Secret 3: The Most Important Secret
Now that you have your person sketched, it’s time to shade it! Shading requires its very own post, but try it out and have fun with it.
Get a crash course in shading with 5+ Pencil Shading Art: A Beginner’s Guide.
The very last secret is not really a true secret, but a reminder to practice. If you want to get good at human figure drawing, you need to actually draw the human figure. No one can practice for you. No amount of watching videos or reading posts will improve your skills if you never pick up the charcoal and try.
So go pick up that charcoal, or Apple Pencil, and start drawing 🙂
I hope you find these secrets to human figure drawing as helpful as I do! Let me know how yours turned out in the comments.
Check out these other posts that you will love!
13+ Creative Drawing Ideas Easy

5 Types of Digital Art – An Awesome Beginner’s Guide

39 Things to Sketch when Bored: Ideas Easy to Hard

How to do an Art Travel Journal


Leave a Reply