Have you been struggling with pencil drawing? Learn how to do these easy cute animal drawings!
Disclaimer: THIS POST MAY CONTAIN AFFILIATE LINKS, MEANING I GET A COMMISSION IF YOU DECIDE TO MAKE A PURCHASE THROUGH MY LINKS, AT NO COST TO YOU. AS AN AMAZON AFFILIATE I EARN FROM QUALIFYING PURCHASES.
If you are a newbie at sketching you might think that you could never do any easy cute animal drawings no matter how “easy” they claim to be. This was me a few years ago. I would have never considered even trying something like these sketches. But with enough practice and determination, you can do it. Let me show you how!
You will learn how to do easy cute animal drawings, easy animal sketches, easy animals to draw realistic, easy pencil drawings for beginners, easy animal drawings step by step, and more!
You will be a pro at doing it yourself after learning to sketch all of these easy cute animal drawings.
Beginners Guide: Easy Cute Animal Drawings
Supplies needed:
- Drawing set (includes sketch pad, charcoal pencils, erasers, pencil sharpener, blending stumps)
- Kneaded Eraser (the drawing set includes a kneaded eraser but it doesn’t work well so I recommend getting this kneaded eraser, you will be a lot happier with it)
Before you start your sketches understand that drawing is a lot of erasing.
Once when my husband was watching me sketch he said “Why do you draw so many lines if you’re just going to erase them all?”. It is true. I erase probably at least 80% (maybe even 90%) of the lines that I draw. The reason I do this is because the first, second, and even fifth time I draw a line or shape it isn’t how I want it. But I only know that it is off because I see it on the paper.
Don’t get attached to your lines while you are in the process of drawing. It makes it a lot harder to erase them to get it just right. But in the end, it is so worth the extra effort of drawing, erasing, tweaking, and erasing more.
Easy Animal Sketches

This easy animal sketches is of a barn owl. If you want a photo of the actual bird you can click on this Pinterest link.
Start your owl by drawing the big shapes.
- Circle for the head
- Long oval for the body
- Two short skinny ovals for the legs
Once you have the shapes drawn and in the right spot connect the shapes. This owl has a thick neck so make sure the connection is just as thick.
Draw in the shape of the wings.
- The top wings share the same line as the head and neck.
- The back wing curves downward and has a curved point.
- There’s a middle wing that cuts across the back wing.
Don’t worry about the details on the wings. You will draw those in after the overall owl sketch is complete and you are ready to shade.
Note that there is a section of the body right under the head/neck that isn’t part of the wings. This will be the part of your original oval.
Now it is time for you to draw the face.
Within the circle already drawn, draw another circle that has the divot at the top. This circle doesn’t need to be perfectly round. In fact, it shouldn’t be. Animals are all unique and never symmetrical.
Draw two circles for the eyes. A good landmark for them is the divot on the forehead.
For the beak draw a line that comes down from both eyes that connects into a triangle point.
Now that you have the basic sketch stop drawing and look at it. What looks off? What needs to change? I had a heck of a time getting the little section of body in the front to look good.
This is a good time to do more erasing and adjusting. Once you are happy with it you are ready to draw the legs.
You will draw the legs very last because if you didn’t you would have to redraw them every time you moved the body around. And while that is an option, you would get really good at drawing them, it is also frustrating to do. You don’t want to burn yourself out over legs.
Draw the front leg will be thicker than the back leg. This is because you don’t see the entire back leg.
They do bend a little bit. Kind of like an upside-down L at an angle. You can draw it like an L just soften the edges.
The talons are really hard to see after being shaded. They can be awkward looking, but they won’t pull the attention of the viewer so don’t sweat over them too much.
On the front leg, you will draw three talons. On the back leg, there’s only one talon you can see. Look at the Pinterest barn owl pictures and pay attention to the talons. They curve and end at a sharp point. Give it your best shot. If you don’t like it try, give yourself three attempts and then stop.
Stop and examine your bird. Change anything that you need to.
Now you can add whatever you want the owl to be standing on. In this example, it is a tree branch.
Check out 5+ Pencil Shading Art: A Beginner’s Guide to learn how to shade your sketch!
Easy Animals to Draw Realistic

You can see pictures of sloths on Pinterest here.
This baby and her sloth is perhaps the simplest of all six of the easy cute animals drawings in this post. It’s simple because there are only three big shapes:
- Large teardrop for the body
- Big oval at the bottom of the oval for the mom’s head
- Small oval on top of the large oval for the baby’s head
Start your sloth drawing with the mom sloth shapes. (The large teardrop and big oval).
Draw the negative space between the legs with a small teardrop.
That’s all there is to the mom sloth’s body.
For the baby’s head place the small oval at the bottom of the small teardrop. Have the head overlap the mom’s body slightly to make it look like the baby is nestled in.
The faces of both mom and baby are the same shapes just different sizes.
Starting with the mom’s face place two circles for the eyes and then an oval above them. For the details I found it was easier to turn the paper upside down so I was drawing the mom’s face right side up.
The nose has two circles for the nostrils. Then the mouth is right under the nose and it kind of looks like a little sailboat without its sails.
Now draw in the baby’s face like you just did with the mom’s.
Nice job! You just finished an easy animals to draw realistically piece of a sloth!
Finish your sloths with the shading here 5+ Pencil Shading Art: A Beginner’s Guide.
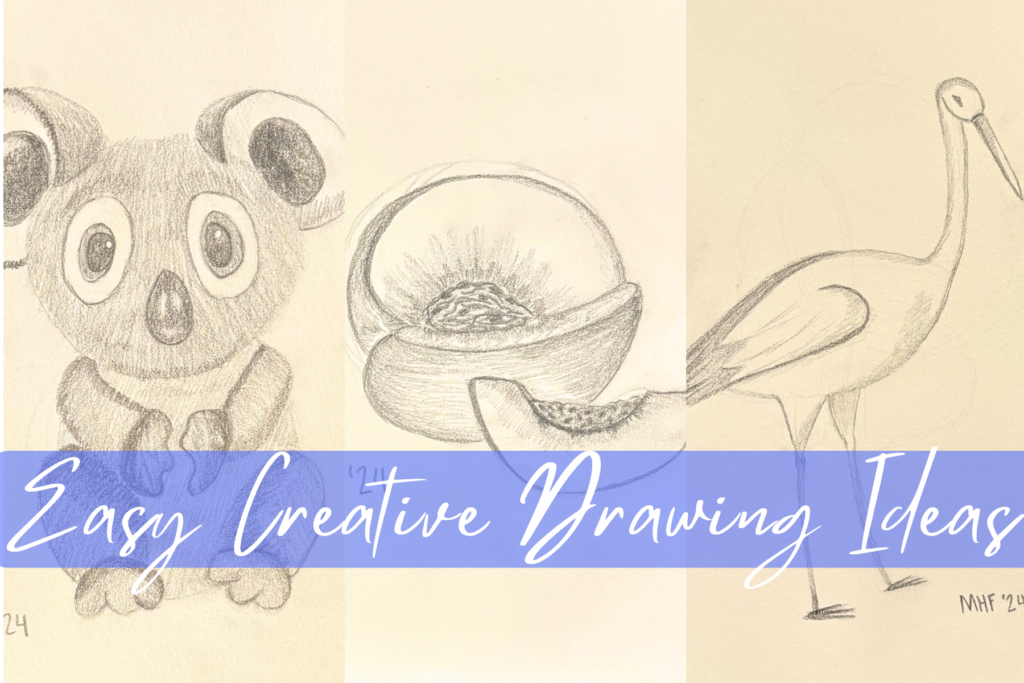
Find more inspiration for easy cute animal drawings for your sketchbook! 13+ Creative Drawing Ideas Easy
Easy Cute Animal Drawings

This baby swan makes the perfect easy cute animal drawings! Look at different pictures of baby swans here on Pinterest.
Start this drawing with a big half-circle with a smaller half-circle in it, a small circle, and a tube that connects the head (small circle) to the front of the body (smaller half-circle). You will want to smooth out the transition between the neck and head.
The head should pretty much be in the middle of the half-circle. You may need to erase and reposition it. When I first drew it I drew the head too far to the side.
Add the water line at the bottom of the half-circles. You want it to be a rounded V shape to make the bird look 3-dimensional.
There are a few different ways you could draw the beak:
- Draw a long oval/tube shape in the general area where you want the beak. Then shape the edges to connect to the head, erasing lines that you don’t need anymore.
- Starting from the head draw a triangle. Then add in the curves of the beak.
Both ways you are drawing the negative space – the space around the actual object.
The eye is almond-shaped with a circle within it for the actual eyeball. You want to line up the big divot of the beak with the point (inner canthus) of the eye.
Learn how to shade your easy cute animal drawings at 5+ Pencil Shading Art: A Beginner’s Guide.
Easy Pencil Drawings for Beginners
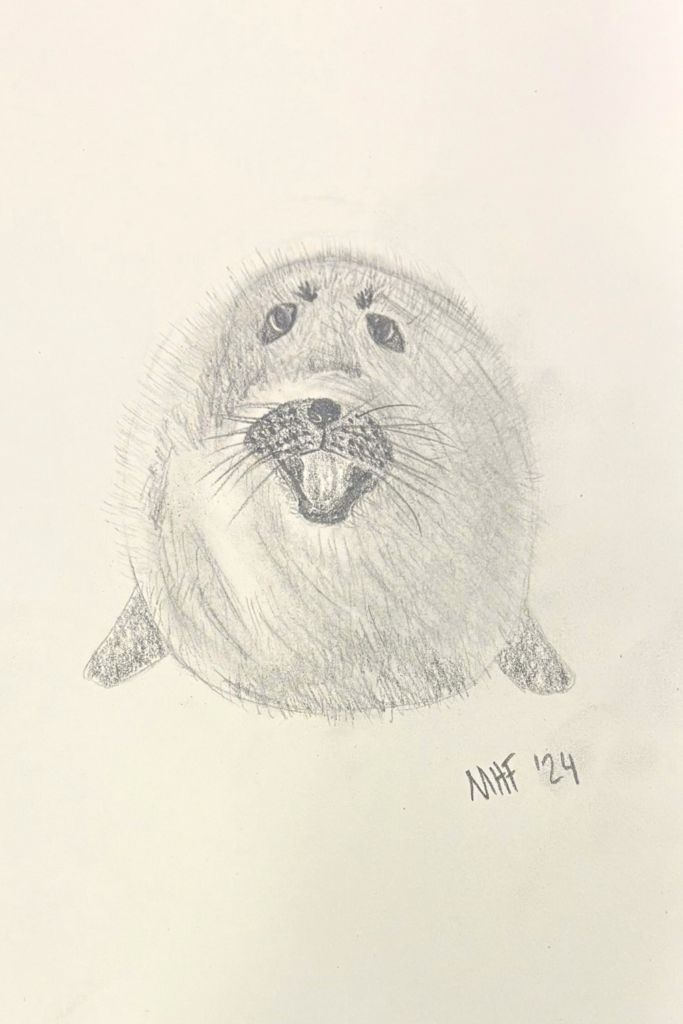
This silly baby Arctic seal is a perfect easy pencil drawings for beginners! Seals are silly creatures so if your drawing comes out a little silly-looking it just adds to their character!
You can see different pictures of Arctic seals on Pinterest here.
You will start this sketch out with a big circle. If you want a chunkier seal make your circle longer than it is tall, do it vice versa if you want a skinnier seal.
Just above the middle of the circle draw another circle that will become the snout and mouth.
At the top of the circle, make two circles to become the whisker parts then connect the circles together or just draw the whisker parts. Add a triangle with curved edges to the middle to become the nose.
Draw a curved triangle connecting the outside edges of the whisker areas. When you get the shape you want draw a line parallel to it just on the inside to create the lips.
For the tongue, the basic shape is a rectangle that goes from the top of its mouth to the bottom. But to make it look like a tongue squiggle the edges of the rectangle.
The eyes are large oblong ovals just to the side of the nose. They are at a pretty steep angle.
You will draw the flippers like U’s that connect to the body.
Great job on your cute baby seal! Be on the lookout for next week’s post on how to shade this silly guy.
For some reason, this was the easy cute animal drawings that I struggled with the most. I wanted to throw in the towel and call it a night but I didn’t! Teaching you how to draw it makes me want to draw it again to see if I could do better. It’s okay if you create something that you don’t like. Every drawing, every sketch, is practice and you can never get better if you don’t practice.
Complete the sketch with pencil shading. Learn how to here: 5+ Pencil Shading Art: A Beginner’s Guide.
Use your sketches to create a watercolor painting! Learn more about watercolor here: 50 Simple Watercolor Painting Ideas.

Animal Drawing Ideas

Ferrets are weird animals, I never would have guessed that they a fun animal drawing ideas but they are! If you need a reminder of what a ferret looks like check out pictures of them on Pinterest here.
You are going to start this drawing with four ovals: a fat egg-shaped oval for the butt, a skinny short oval that is almost parallel with the bottom of the paper, a long skinny oval that reaches for the sky, and a flat football-shaped oval on top of the skinny oval.
Adjust the oval lengths, thickness, and placement until you are happy with the proportions for your ferret. Once you are happy connect the ovals with curved lines. Erase any excess lines.
The front ear you will draw a curved triangle at the corner of its head. The back ear will be more U-shaped.
Place the nose at the tip of the face and draw a line underneath for the mouth.
For the front eye draw a football shape pretty much in the middle of the circle you drew for the head. The back eye is a little circle near the edge of the head.
You are going to want to break up the front legs into basic shapes. It makes it WAY easier to draw.
So start by drawing the front leg with an oval and a circle. The oval will be the arm and the circle will be the paw. Since the arms are dangling downward draw your basic shapes in that direction.
The back leg will be a fat triangle with a circle at the tip.
Smoothly connect the leg ovals to the circles.
People (me included) get caught up in how difficult it is to draw small paws. Let me tell you the secret I have found. Within the parameters of the circle draw the longest finger first. Then draw the finger on either side a little smaller. They just need to be little carrot-shaped shapes. That’s it. Do the same thing on the other paw and erase the lines that aren’t being used.
Don’t get caught up in making each finger look great. Draw them and step back to look at the entire picture. If your eye doesn’t go directly to the paws they are good enough.
Learn how to shade your animal drawing ideas with this 5+ Pencil Shading Art: A Beginner’s Guide.
Learn how to draw trees with pencils here: 5 Cool Trees Sketch

Easy Animal Drawings Step by Step

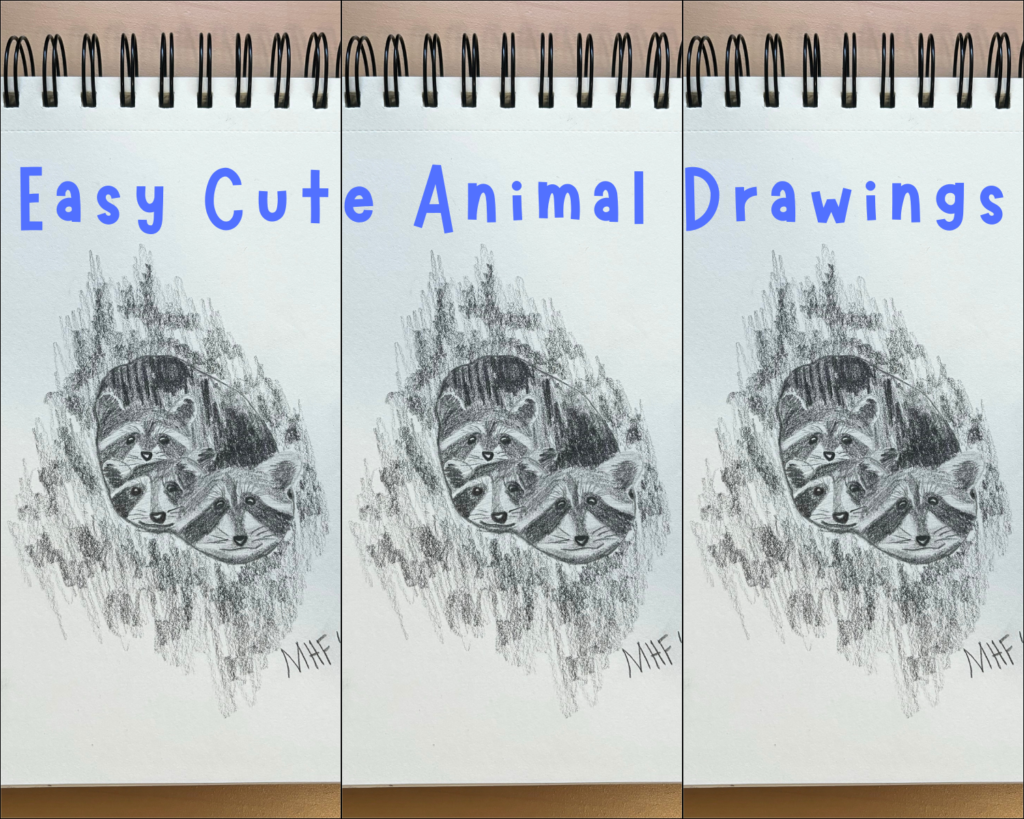
This last easy animal drawings step by step is of a family of raccoons. Jog your memory of what raccoons look like here on Pinterest.
Once again you start your drawing with basic shapes. Draw the hole in the tree then three circles in that hole. The circles will overlap and that’s okay because you’ll just erase the areas that you don’t want. But it is a lot easier to draw circles than the weird circle-ish shapes that the heads actually are.
Move around all the shapes until you are happy with the composition.
Start drawing the details with the lowest head, the one that is in the front. The head isn’t actually a circle, it’s more like a rugby ball. Shape it to your liking.
Then add the ears, both of which are U-shaped.
I found it easier to draw the black sections of the raccoons before adding the eyes and nose. To do this draw tubes on both sides of the face that angle upwards towards the middle of the head. Shape them into the black mask of the critter’s face. Now add the eyes.
Draw the nose before adding the black stripe that connects the nose to the black mask around the eyes. You want the stripe to seamlessly transition between fur to nose. Add a thin line for the mouth.
After you are happy with the eyes and nose you can add the top section of black or you can wait until you shade it in. (Learn how to shade this easy animal drawings step by step in next week’s post).
Repeat the same steps for the other two raccoons. These will be a bit different because you don’t see their entire face. This is when a reference photo and your imagination come in handy. You need to be able to visualize the entire face so you can put the features in the right place.
With the middle head, the right eye is pretty close to the other raccoon’s ear. And you don’t see the connection of the right ear to its head because it is behind the front raccoon’s ear.
The top raccoon’s mouth you won’t draw because it is hidden behind the middle raccoon’s head. Other than that it is similar to the lowest head.
There you go! Great job on this easy cute animal drawings!
Don’t forget to finish your cute raccoons. Learn how to do the shading in this post: 5+ Pencil Shading Art: A Beginner’s Guide.
This post is all about teaching beginning artists how to make easy cute animal drawings.
More posts that you might like:


Leave a Reply