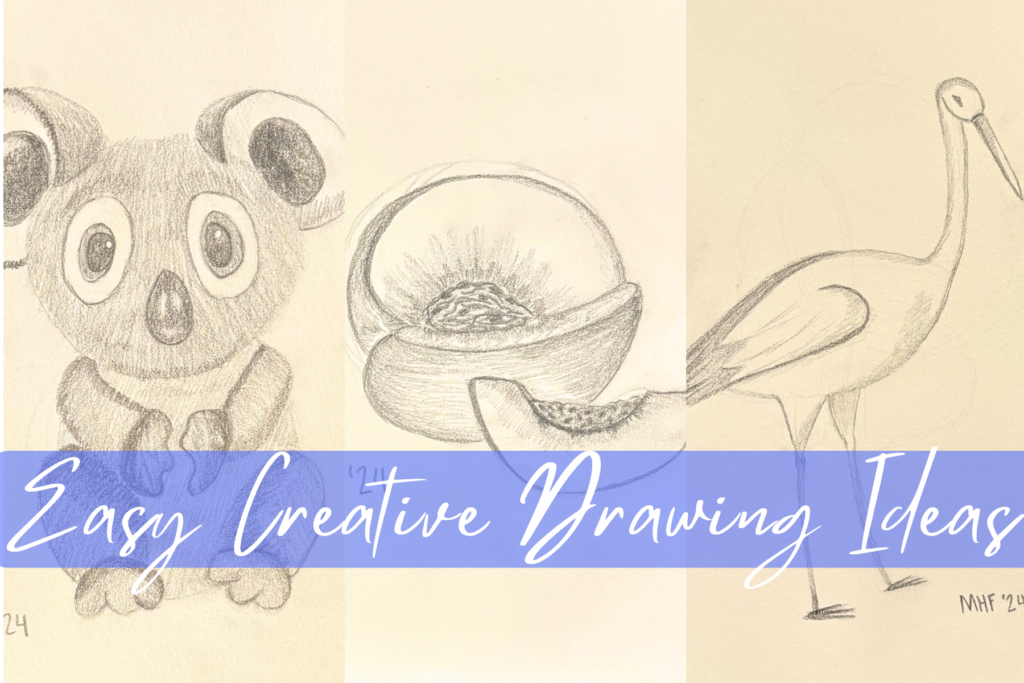
Do you need some easy creative drawing ideas? Here are over 13 ideas that will have you wondering where the time went!
Disclaimer: THIS POST MAY CONTAIN AFFILIATE LINKS, MEANING I GET A COMMISSION IF YOU DECIDE TO MAKE A PURCHASE THROUGH MY LINKS, AT NO COST TO YOU. AS AN AMAZON AFFILIATE I EARN FROM QUALIFYING PURCHASES.
Are you ever just mindlessly watching TV and think that you would like to spend your time better? Try out these easy creative drawing ideas next time you’re rewatching your favorite TV series! My husband loves watching TV and I love to spend time with him but I needed to find time to practice my drawing abilities so I started drawing things in my sketchbook. Now I can enjoy spending time with my husband, watching TV, and improving my art skills all at the same time!
You will get inspiration for easy creative drawing ideas, colored pencil drawing ideas for beginners, cute animal sketches, easy pencil drawings for beginners, bird color pencil drawing, and more!
After reading this you will be able to fill your sketchbook with loads of easy creative drawing ideas.
13+ Easy Creative Drawing Ideas
Supplies needed:
- Drawing set (includes drawing pencils, charcoal pencils, erasers, pencil sharpener)
- Kneaded Eraser (the drawing set includes a kneaded eraser but it doesn’t work well so I recommend getting this kneaded eraser, you will be a lot happier with it)
- Colored Pencils
1. Color Pencil Drawing Ideas for Beginners
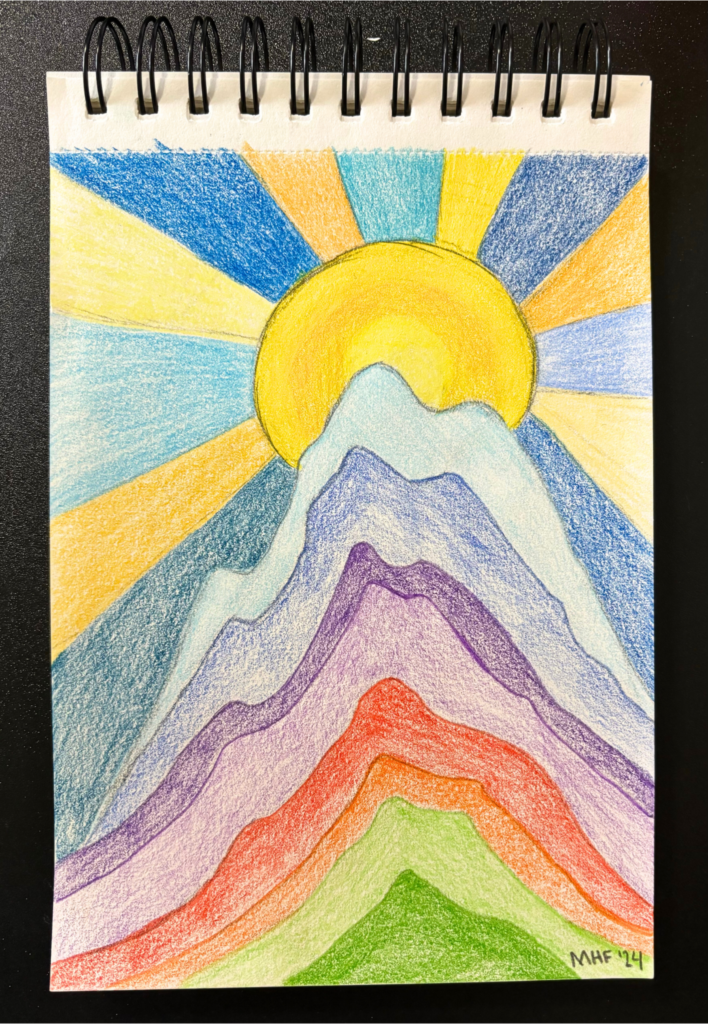
This beautiful drawing is perfect for color pencil drawing ideas for beginners because it is so simple yet looks amazing.
You will start by drawing a large mountain peak. Then draw another peak that has similar peaks and valleys. Vary the space between each peak. Do this until you reach the end of the page.
For the sun create a large circle behind the main mountain peak. Then create rays of sunlight that come out from the sun, and between the rays will be the sky. The sections of sunlight will be smaller than the section of the sky.
You can stop there or add color with colored pencils, crayons, or markers.
If you want a dazzling piece of artwork don’t use the same color twice. If you want a more mellow piece pick two colors with different shades and alternate them for the mountains, sun and rays, and sky.
Once you finish step back and admire what your hands created, you should be proud!
2. Cute Animal Sketches

This cute little critter is bound to brighten your day every time you look at him.
Using the drawing pencils in the drawing set start drawing the hedgehog by creating a large circle. In the top third of the circle draw a smaller circle that will be the head. Now add ears, eyes, nose, and mouth to finish off the head.
Near the bottom, you will add the paws. These can be tricky but they don’t need to be perfect. The focus of the audience will be on the face. The bottom paws will be longer and larger than the top paws, because of this I suggest drawing the bottom ones first. Get five toes in for the bottom paws and five fingers for the top paws.
Once you complete the cute animal sketches, you can add fur, shadows, and other details.
The tops of hedgehogs have spikes that are typically darker in color than the fur of their bellies. Although you mostly seen the belly of this critter you will want to add a crescent-shaped moon to the top and bottom of the body. These crescent moons will be the spikes on the hedgehog’s back. Add the spikes by drawing dark thick lines in those areas.
Make the inner ears lighter than the outside.
Erase the line for the face and replace it with small short lines to create the effect of a furry face. Add some pencil to the nose and around the eyes to give the face depth. Be sure to have a gleam in the eyeballs. To do this you will want a spot of white in the eye. Add a reflection or gleam to the nose as well to make it look more realistic.
If you feel like you want some more texture on the belly add some shadows there as well.
Add some color if you don’t love the black-and-white sketch.
Nice job with that cute critter! I hope you had a fun time making it.
3. Cool Animal Drawings Easy

Snails are kind of gross creatures but they are sure fun to draw! You can make them as simple or as intricate as you want to. Which means they are perfect for drawing beginners and pros.
Start by creating a circle for the shell. You will add the swirl but it won’t be centered in the circle and while it will follow the line at the top of the circle it won’t follow the line at the bottom of the circle. This is because the shell isn’t circular. Draw a curved line from close to the bottom of the swirl to the outside of the circle. This will be the opening of the shell. Erase the rest of the circle not being used.
For the snail’s body draw a long oval then add a squiggly line underneath the oval having the end of the body come to a point. Erase the pencil line between the squiggly line and the oval line. Add antennae to the top of the head and eyes that stick out at the front of the head.
Now you are ready for details. If you want this to be in color use colored pencils instead of charcoal pencils. That way the charcoal won’t show through the colored pencils.
For the shell you can do any design that you want. If you want a simple design stick to the lines perpendicular to the swirl. Then you will want to add a shadow to the top section of the swirls.
For the snail body, you will want a shadow underneath where the shell overlays it. Add dots or lines along its body to give it some texture.
To finish it off add a shadow underneath the snail.
4. Easy Cute Animal Drawings

To draw this cute kitty cat start by making a diamond shape for its face. Add two triangles for the ears and a circle at the bottom corner of the diamond for its neck. Refine the shapes until you like the look of the cat.
Add the eyes, nose, and mouth.
You can use a charcoal pencil to create the details or use colored pencils.
Pick a dark brown that you like and draw lines of various lengths wherever you want dark fur. It’s going to look weird up until the end because you will do this for every color.
Once you get the main colors applied, you can fill in the blank spots with more color. Be sure to make some light lines in areas that are mostly dark and vice versa.
For the eyes add a gleam that is purely white. (I forgot to do this but it looks so much better when there is a gleam in eyeballs).
Nice looking kitty cat!
Want more ideas on what to sketch? Look at these ideas on things to sketch when bored:

5. Sketches of Animals and Birds

Although this ostrich was finished with ink, it started as a pencil sketch.
Draw a circle for the head and a long rectangle or oval for the neck. Then you will want to add the large oval eyes and the beak. Within the eye, ovals draw another partial oval for the iris/pupil of the eye. Draw small triangle shapes in both pupils that will be the white part for the gleams.
For the beak start by drawing a fat oval and another oval smaller but that overlaps the first oval. Using the bottom of the lower oval draw the bow shape of the beak and attach it to the middle of the lower oval. Add a line to separate the top and bottom beaks (or lips). Add the nostrils.
Now that you have the head sketched out you are ready to grab your pen and draw the feathers.
To draw the neck feathers you will draw long thin lines that will start in the middle of the neck. You will want the lines to go downward at an angle. Repeat on the other side of the neck.
To draw the head feathers you will want all of the lines to go out from the beak. It will be easier to draw them if you turn your sketchbook as you are drawing. Don’t cover the eyes with lines/feathers. Instead, have the lines follow the curve of the eyeballs.
For the beak, you will want to outline the pencil lines first. Then add shadows to the top of the upper and lower oval and the upper beak/lip. Color in the nostrils black.
Finish off your ostrich with the eyes. Outline the large oval and the inner oval and the triangle gleams. Then color in the pupil black making sure you leave the gleams untouched.
Great job at creating cute animal sketches!
6. Moon Drawing

This charcoal sketch of the moon is easy and you can use your fingers to do some of the blending. If you love using your fingers for art this easy pencil drawings for beginners is for you!
You will want a softer charcoal pencil to create this moon drawing. I used a 2B med but a 4B or 6B soft would work just as well.
Start by making a large circle. Within that circle make some loose uneven shapes, some larger and others smaller. These will be the craters of the moon. Add as many as you would like.
Use the charcoal pencil and color in the craters you created. Use your finger to smooth out the charcoal.
Outline around the moon and the craters and other areas then, using your finger, move the charcoal around so every part of the moon has some charcoal on it. Add more to areas you would like darker.
This fun and relaxed moon drawing is a great way to get your hands dirty and your mind off of more serious things.
7. Sea Animal Drawings

I have always loved dolphins, not only because they’re smart but also because they know how to have fun. So drawing one in my sketchbook was one of the first things I did.
There are a few different ways to tackle the curve of a dolphin. Either you can draw a circle and then within that circle create the layers of the body or you can draw a banana-shaped oval and refine the dolphin shape from there.
Draw a triangle near the middle of the dolphin’s back to create the dorsal fin. You will want to soften the edges and make them more rounded. You can do the same thing for the two other fins or create a ‘C’ shape for them.
To draw the tail fin create a ‘C’ shape that touches the end point of the dolphin’s body. Then make another ‘C’ shape parallel to the larger ‘C’ higher up for the beginning of the tail. Now all you need to do is attach the two ‘C’s and you are done drawing your sea animal.
Coloring this picture is fun because you can use lots of different colors. I used blues, purples, and grays. But greens, turquoise, yellows, or even pinks would look good as well. You will want the underbelly to be lighter than the top.
Learn how to use colored pencils with watercolor paint here:

8. Pencil Drawings Pictures of Birds

If you want an easy pencil drawings for beginners this little birdie is the one for you!
All you need to do is draw a small oval connected to a large oval. Add a long skinny triangle to the small oval and a small skinny oval for its eye.
For the wing, about midway between the body draw a long slightly curved that comes off of the body. Add two skinny legs with three small lines at the bottom for the feet.
Add some extra lines to accent the wings, body, face, and beak. Now you’re done!
9. Duck Drawing

For this duck, you will want to draw a large oval and a small oval that don’t touch. You will then attach them with a neck or in other words two curved lines. Ducks have shorter necks so don’t make the distance between the two ovals too far or it won’t look right. Add a triangle for the beak.
On the body, draw in the wing. It should come off the body into a point.
This duck is floating on water so where the duck touches the water add a squiggly line that cuts into the bottom of the body. You don’t want to see the bottom of the belly because it would be under the surface of the water. Draw ripples in the water by adding ‘C’ rings that come out from the duck.
If you want a bird color pencil drawing, grab your colored pencils. You can look up pictures of various ducks and choose which one you want to base your duck on. This one was based on a mallard duck which is why it has the green head.
In the water, you want to be sure to add a shadow underneath the duck. This will make it much more realistic looking.
10. Cactus Drawing

This cactus drawing is the perfect easy pencil drawings for beginners. It looks crazy but really after you get the cactus in the rest of it is just lines with your pencil.
You can make the cactus look however you want. If you aren’t comfortable just creating the cactus you can break it into shapes that you connect together. I used ovals, but rectangles would work as well. Once you get the arms where you want them you smooth out the edges and erase the lines you don’t want.
Once you have the cactus sketched out it is time to add the details. I decided to keep the detail lines simple by doing straight vertical lines. You could do diagonal lines or crisscrossing lines or dots.
Then you will add the shadow to the ground. You will want the pencil to be pretty dark to create a big contrast from the rest of the ground.
Draw a horizon line and then add a small sun that lines up with the shadow of the cactus drawing.
Again you can decide which way you want the lines to go, but add lines in for the ground until you reach the horizon line. You will want these pencil marks to be lighter than the shadow marks.
For the sky draw straight lines that come out from the sun. The lines near the horizon line will be nearly indistinguishable but that’s okay. It will add the illusion of the land being flat and going for a long distance.
This one would be a fun picture to add color to. You could approach it similarly as 1. Color Pencil Drawing Ideas for Beginners.
11. Easy Pencil Drawings for Beginners

Here is another one of our cute animal sketches! This koala bear can look intimidating, but in reality, it is just a bunch of basic shapes that you will connect together.
You will start this easy creative drawing ideas sketch by making a large oval touching a large circle on top.
On the head make two large ovals for the ears, two for the eyes, and one for the nose.
Within the ears, you will make a smaller oval that is closer to the head than the outside of the ears.
For the eyes, you will make an oval in the middle then another oval that is off-centered to the middle of the face within that second oval. So in total, each eye is composed of three ovals.
For the body, you will make large ovals for the legs and smaller ones for the arms. At the body of each limb and another oval. You will then refine that circle to make the paws. The face of the koala bear will be the focus so as long as the paws don’t look so wonky that it pulls your attention to them they will be good.
Now you either shade it in with pencil/pen or color it in with colored pencil. Just be sure to add the white gleam in the pupils and the reflection on the nose.
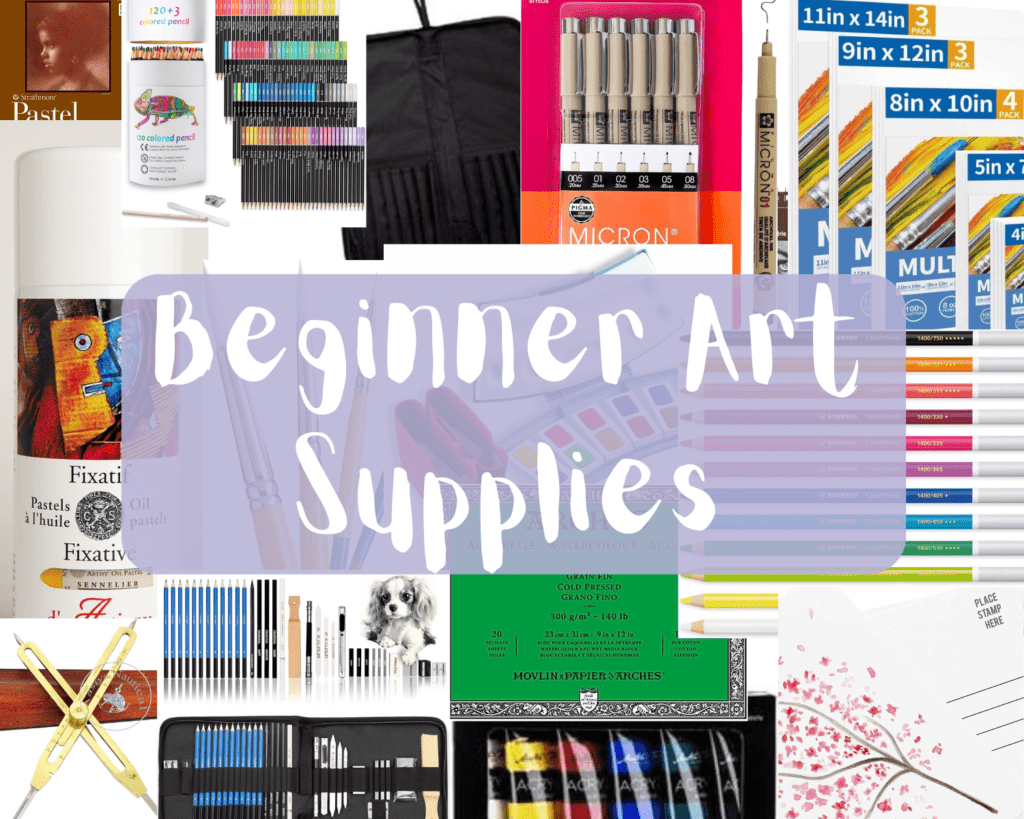
5 Lists of Beginner Art Supplies
12. Bird Color Pencil Drawing
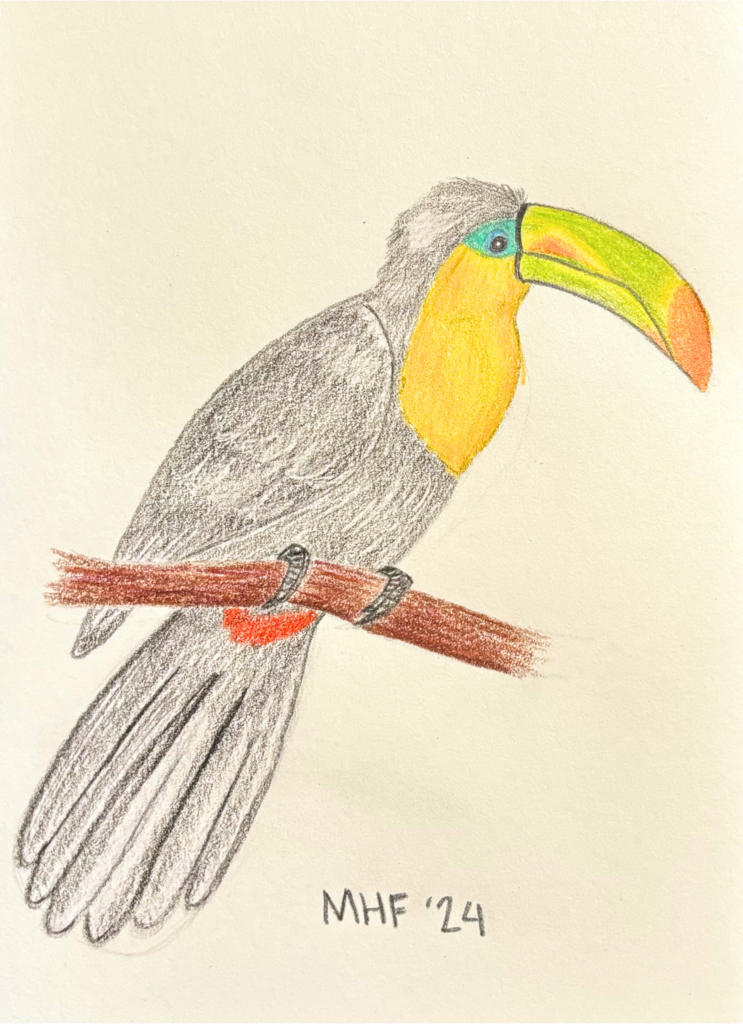
In this bird color pencil drawing, you will want to sketch the parrot differently than previous birds in this post.
You will make your big oval and little circle for the body and head, but you will add two additional ovals for the wing and the tail feathers. Doing it this way will help you connect all of the parts better.
Once you get the sketch of the bird done you will add the beak. The last thing you will add is the branch and talons. You will have to do some erasing because of this but it will help you get the bird’s body right quicker. To get the talons correct you will want to focus on the ‘C’ shape of them and keep them as simple as possible.
Lightly sketch in the areas that have bright colors that way when you add the colored pencils you just have to keep within the lines.
13. Simple Pencil Drawing

For this big birdie, you will want to draw a small circle about an inch above a large oval. Connect them with two curved lines and erase the pencil marks at the base of the head. Now draw a long skinny triangle for the beak. Where the beak meets the head draw a curved edge to make it look more realistic.
To create the wing draw a hook shape around the middle of the body and have it end off of the large oval. Connect the end of the hook to the mid-section of the bird’s back to create a large wing.
To get the legs right you can make two triangles off-centered towards the tail. One triangle will be slightly larger than the other as this will be the leg closest to the viewer. At the point of each triangle draw a small oval to become the knee. Then two lines from the knee come together to the start of the webbed foot. Don’t make the feet more complicated than you need to. Three horizontal lines typically do the trick. If they look goofy try adjusting the direction of the lines until you are happy with it.
Now you can have fun shading and detailing this easy pencil drawings for beginners. Add designs on the wings or to the beak. You could even make it look like a black bird with white wings instead of a white bird with black wings.
14. Fruit Pencil Drawings
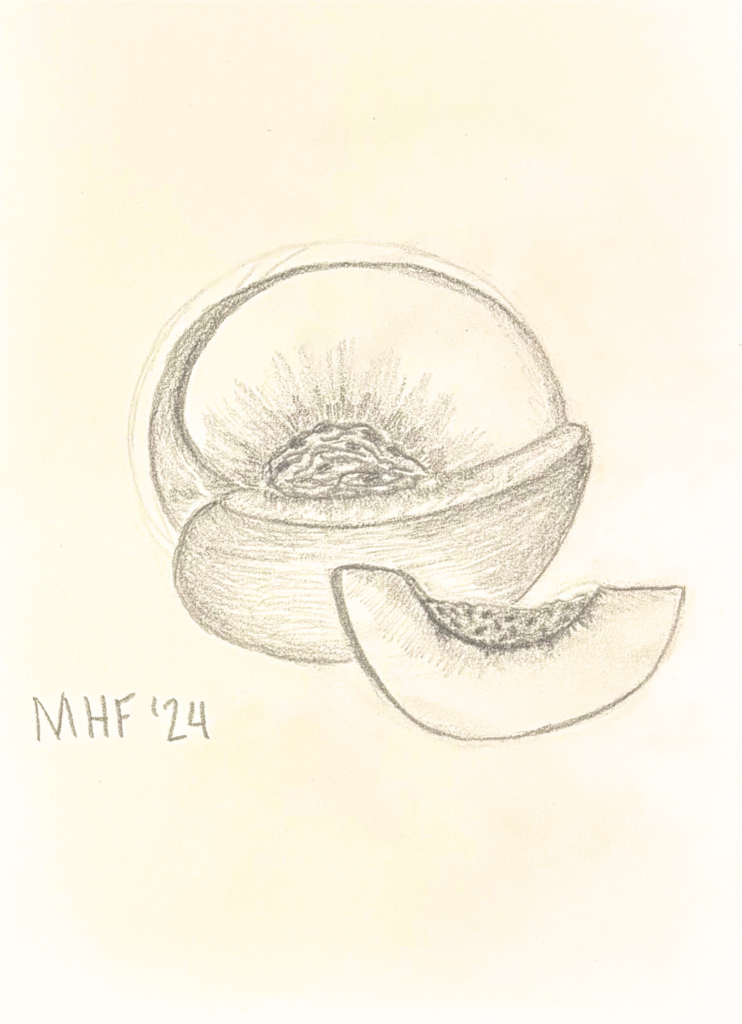
The goal of this easy creative drawing ideas is to draw a peach that looks like a quarter of the fruit has been cut out and to present a slice of that quarter in the sketch.
You will start by drawing a large circle. Then near the center draw an almond shape that will become the peach pit. One end of the almond shape needs to be pointy while the other needs to be flatter. Draw a line that curves slightly outwards (towards the viewer) along the pit’s edge to the end of the circle.
Starting at the flat side of the peach pit draw a ‘C’ shape that connects to the top of the big circle. From the same starting point of the peach pit draw a tight ‘C’ that goes down and connects in another tight ‘C’ to the flat line you drew before along the edge of the peach pit.
In these next steps, you will use the circle as a loose guide but ultimately no peach is perfectly round so you won’t want your peach to be perfectly round.
To make the bottom of the peach, connect both tight ‘C’s. Make the curve near the flat part of the pit more curved than the other side. About halfway in this curve make a line that curves to the top half of the peach. Erase any extra lines.
(Analyzing the slice of peach that I drew I have noticed a few mistakes that I made. 1. the peach slice isn’t as long as the peach itself so it couldn’t have come from that peach. 2. the lengths between the pit indent and the end of the peach aren’t the same as the big peach resulting in the same problem. Overall I made the peach indent too big and didn’t create enough fruit meat.)
With the mistakes that I made in mind do a rough sketch of your peach slice, a half-moon. Then carve out a section for your pit indent.
The shading and detailing are what will make this peach look lifelike. Have the shadows along the edges and the highlights around the middle. With the peach pit add squiggly lines and darker oval shapes to get the look of the pit. Do similar designs in the indent of the pit in the peach slice. Add some shadows to the fruit around the pit because it tends to be a darker color around there.
Now you have just completed easy pencil drawings for beginners that look much more complicated than it is!
15. Elk Drawing Cute Animal Sketches

This cute animal sketches looks more complicated than it is. You will want to start by drawing a large oval (body), a small circle (head), and two medium-sized ovals that overlap the body (top of legs). Then connect all of the lines so that it creates the overall shape of the elk. Add the nuzzle by making a curved triangle.
When you are drawing the hind legs the knees hinge backwards but the front legs hinge forwards. When you draw the front leg make sure that it is hinged in the correct direction or it’ll look wrong.
Draw a long stretched-out ‘S’ shape above the head to create the antlers. Add three extra points. Now thicken the lines. When you have the front antler completed you will draw the back antler by off-setting the points in front on the ones you have already drawn.
Now you are ready to add color. The head, neck, and lower legs are a darker brown than the rest of the body. Overlap the colors when the brown changes shades so that it doesn’t look choppy. Add some grass and weeds to top off your color pencil drawing ideas for beginners.
This post is all about easy creative drawing ideas to help you fill up your sketchbook!
Other posts you might like:


Leave a Reply